Viking TVDR361 Use and Care Manual - Page 23
Replacing Oven Lights, Troubleshooting
 |
View all Viking TVDR361 manuals
Add to My Manuals
Save this manual to your list of manuals |
Page 23 highlights
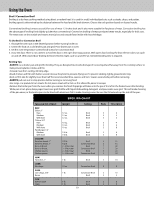
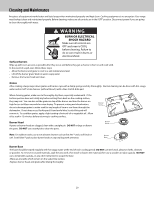
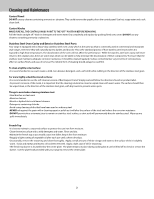
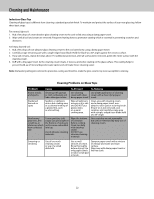
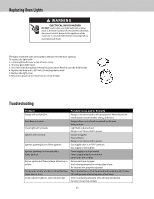
Replacing Oven Lights WARNING ELECTRICAL SHOCK HAZARD DO NOT touch a hot oven light bulb with a damp cloth as the bulb could break. Should the bulb break, disconnect electric power to the appliance at the main fuse or circuit breaker before removing bulb to avoid electrical shock. The lights inside the oven are located in the top near the door opening. To replace the light bulb: 1. Locate light bulb cover in top of oven cavity. 2. Unscrew glass light cover. 3. Use oven miitt during bulb removal to protect your hand in case the bulb breaks. 4. Replace the bulb with a 230 volt, 25-watt appliance bulb. 5. Replace the light cover 6. Reconnect power at the main fuse or circuit breaker. Troubleshooting Problem Range will not function. Broil does not work. Oven light will not work. Igniters will not work. Igniters sparking but no flame ignition. Igniters sparking continuously after flame ignition. Burner ignites but flame is large, distorted, or yellow. Strong odor and/or smoke is noticed first few times oven is used. Oven indicator light on; oven will not heat. Possible Cause and/or Remedy Range is not connected to electrical power: Have electrician check power circuit breaker, wiring, and fuses. Temperature control knob is rotated too far past broil position. Light bulb is burned out. Range is not connected to power. Circuit is tripped. Fuse is blown. Range is not connected to power. Gas supply valve is in "OFF" position. Gas supply is interrupted. Power supply is not grounded. Power supply polarity is reversed. Igniters are wet or dirty. Burner ports are clogged. Unit is being operated on wrong type of gas. Air shutters not properly adjusted. This is normal burn off of insulation and protective oils in oven. This will go away after using oven a few times. Oven is operating properly. Unit will resume heating function once it has cooled. 23
-
 1
1 -
2
-
3
-
4
-
5
-
6
-
7
-
8
-
9
-
10
-
11
-
12
-
13
-
14
-
15
-
16
-
17
-
 18
18 -
 19
19 -
 20
20 -
 21
21 -
 22
22 -
 23
23 -
 24
24 -
 25
25 -
 26
26 -
 27
27 -
 28
28
 |
 |
