Viking VEWD530SS Installation Instructions - Page 7
Installation - Custom Front DFWD
 |
View all Viking VEWD530SS manuals
Add to My Manuals
Save this manual to your list of manuals |
Page 7 highlights
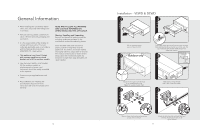
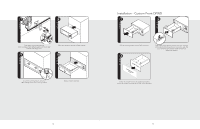
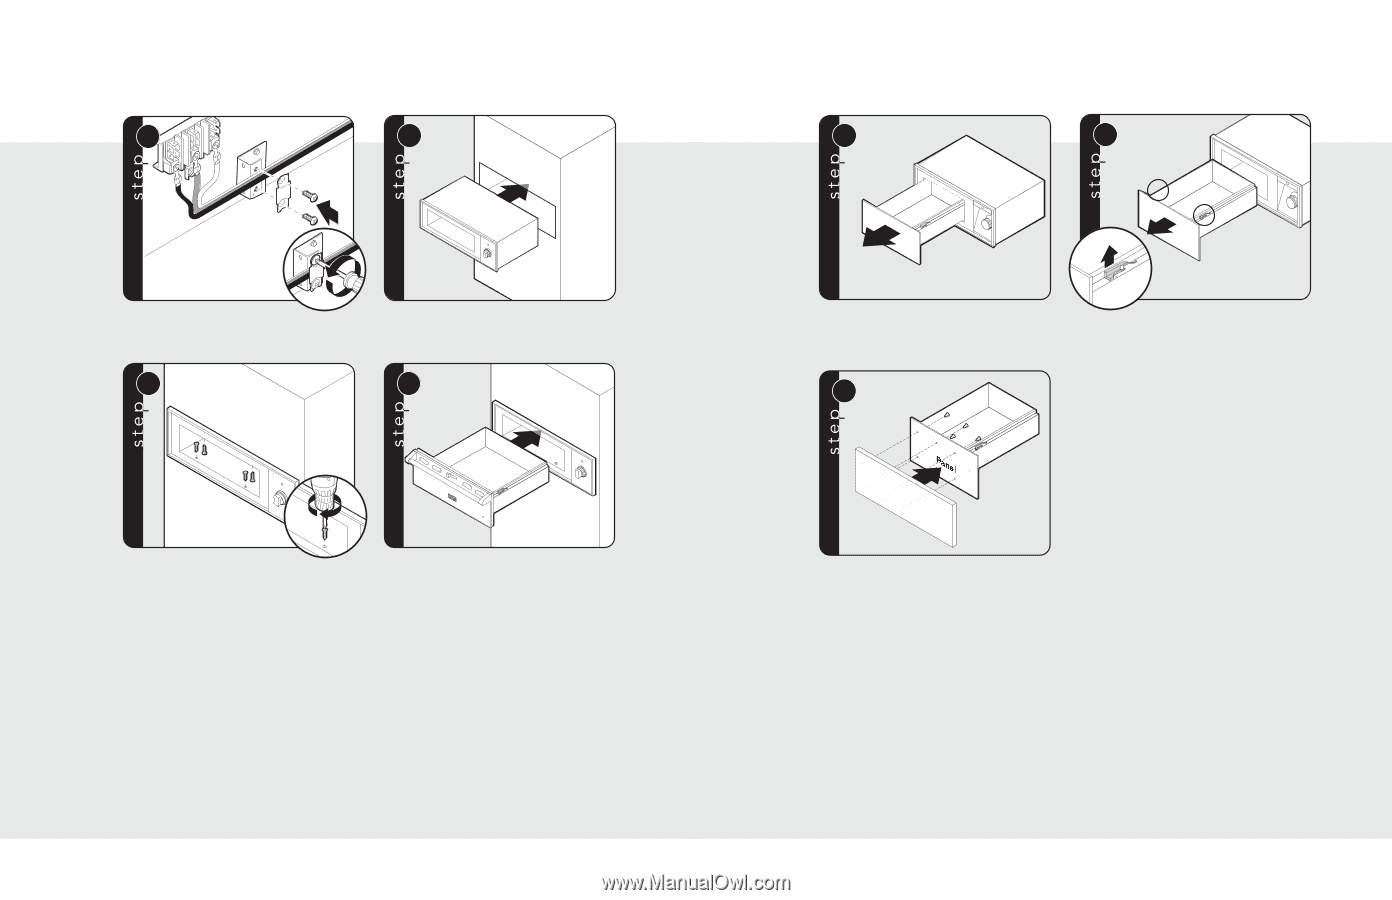
7 8 1 2 Push supply cord toward terminal block to relieve strain, reattach supply cord strain relief bracket over supply cord. 9 Slide cavity assembly into the cabinet opening. 10 x4 Secure the warming drawer using four #8 mounting screws (four screws provided). Replace drawer assembly. Installation - Custom Front DFWD 1 2 2 1 Pull out warming drawer pan until fully extended. 3 Inside Drawer CustPoamneFlront Slide finger along right and left side until you reach the black hand latches (located at the front of the rails). Pull up on both the right and left latches and pull out drawer pan support. Center the custom front on the inside drawer panel. Attach the custom front with the six 5/8" screws provided. 12 13
-
 1
1 -
 2
2 -
 3
3 -
 4
4 -
 5
5 -
 6
6 -
 7
7 -
 8
8
 |
 |
12
1
2
7
Push supply cord toward terminal
block to relieve strain, reattach supply cord strain relief
bracket over supply cord.
8
9
x4
Slide cavity assembly into the cabinet opening.
Secure the warming drawer using four
#8 mounting screws (four screws provided).
10
Replace drawer assembly.
Installation - Custom Front DFWD
13
1
2
1
2
Pull out warming drawer pan until fully extended.
Slide finger along right and left side until you reach the
black hand latches (located at the front of the rails). Pull
up on both the right and left latches and pull out
drawer pan support.
Inside Drawer
Custom Front
Panel
3
id
d
C
to
ne
e
r
Center the custom front on the inside drawer panel.
Attach the custom front with the six 5/8” screws provided.