Viking VUBD140TRSS Use and Care Manual - Page 7
Beverage Dispenser Assembly, Regulator
 |
View all Viking VUBD140TRSS manuals
Add to My Manuals
Save this manual to your list of manuals |
Page 7 highlights
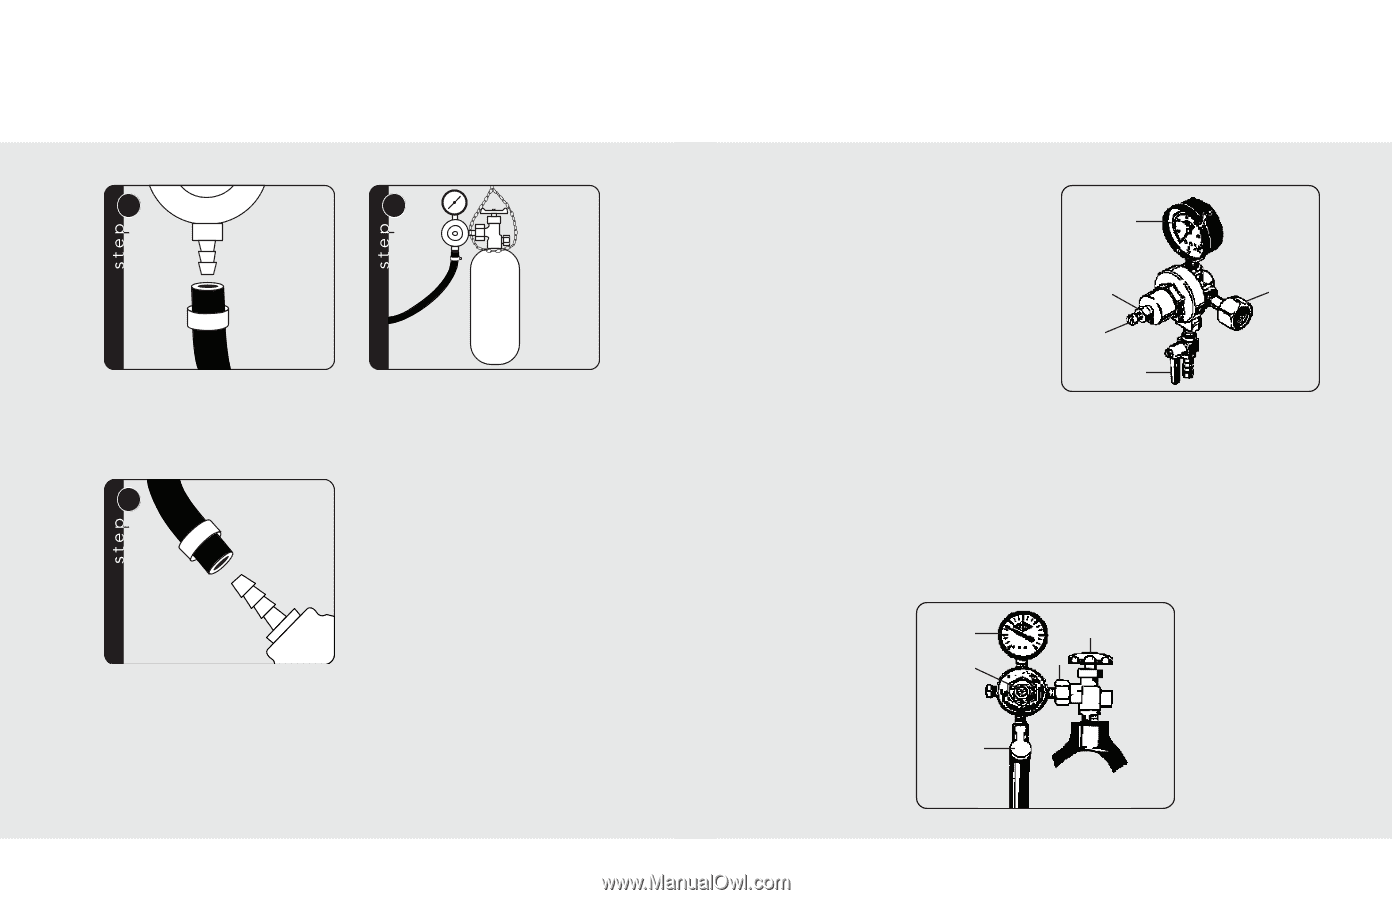
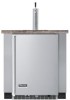
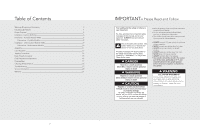
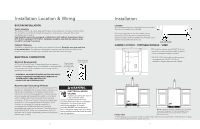
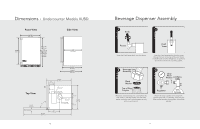
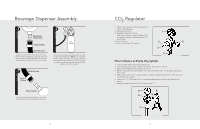
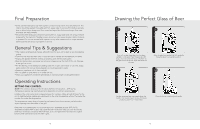
Beverage Dispenser Assembly 5 Regulator Hose Barb Snap Clamp Red Air Line Attach one end of the red air line to the hose barb on the CO2 regulator, using one of the two snap clamps provided. (Use pliers to snap the clamp tight to assure that there is no gas leak.) 6 CO2 Cylinder Place the CO2 cylinder and regulator in the right corner of the refrigerator. NOTE: It is important that the cylinder be kept in an upright position to operate efficiently. Secure the cylinder using the provided chain by looping the chain around the cylinder valve and regulator. 7 Red Air Line Snap Clamp Keg Coupler Fasten the other end of the red air line to the keg coupler using the remaining snap clamp. 12 CO2 Regulator 1. Low pressure gauge (reads the amount of internal keg pressure) 2. Adjustment lock nut 1 3. Regulator adjustment screw (after keg is tapped, screw clockwise until low pressure gauge indicates between 12 and 14 lbs.) 4. Shut-off valve 2 5 5. CO2 nut (use fiber CO2 washer) 3 4 How to Replace an Empty CO2 Cylinder 1. Close cylinder valve by turning clockwise "A". 2. Unscrew adjustment screw (counter-clockwise) "B" as far as it will go. 3. Remove the regulator from empty cylinder "E". 4. Remove dust cap from new cylinder "E". Open and close valve "A" quickly to blow dust from outlet. 5. With cylinder valve "A" in closed position, reattach regulator to cylinder at "E". Be sure to include the CO2 washer. 6. Open valve "A" all the way. (This is important because this cylinder valve seals in two places.) 7. Readjust regulator pressure "B" and open valve "C". D A B E C 13
-
 1
1 -
 2
2 -
 3
3 -
 4
4 -
 5
5 -
 6
6 -
 7
7 -
 8
8 -
 9
9 -
 10
10 -
 11
11 -
 12
12
 |
 |