Viper 9252 Owner Manual - Page 14
Battery Information
 |
View all Viper 9252 manuals
Add to My Manuals
Save this manual to your list of manuals |
Page 14 highlights
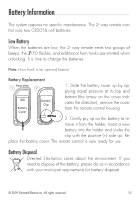
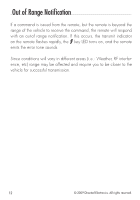
Battery Information The system requires no specific maintenance. The 2- way remote control uses two CR2016 cell batteries. Low Battery When the batteries are low, the 2- way remote emits two groups of beeps, the LED flashes, and additional horn honks are emitted when unlocking. It is time to change the batteries. Note: Horn honk is an optional feature. Battery Replacement Rear View 1 2 1. Slide the battery cover up by applying equal pressure at its top and Battery Cover Battery Clip bottom (the arrow on the cover indicates the direction), remove the cover from the remote control housing. + 2. Gently pry up on the battery to re- move it from the holder. Insert a new battery into the holder and under the clip with the positive (+) side up. Re- place the battery cover. The remote control is now ready for use. Battery Disposal Directed Electronics cares about the environment. If you need to dispose of the battery, please do so in accordance with your municipal requirements for battery disposal. © 2009 Directed Electronics. All rights reserved. 11
-
 1
1 -
2
-
3
-
4
-
5
-
6
-
7
-
8
-
 9
9 -
 10
10 -
 11
11 -
 12
12 -
 13
13 -
 14
14 -
 15
15 -
 16
16 -
 17
17 -
 18
18 -
 19
19 -
20
-
21
-
22
-
23
-
24
-
25
-
26
-
27
-
28
-
29
-
30
-
31
-
32
-
33
-
34
-
35
-
36
-
37
-
38
-
39
-
40
-
41
 |
 |
