Vivitar 5118 v2 Camera Manual - Page 13
Navigating the Menus - camera
 |
View all Vivitar 5118 manuals
Add to My Manuals
Save this manual to your list of manuals |
Page 13 highlights
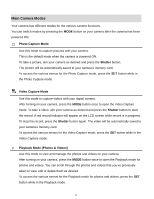
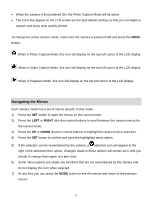
When the camera is first powered ON, the Photo Capture Mode will be active. The icons that appear on the LCD screen are the best default settings so that you can begin to capture and enjoy clear quality photos. To change the active camera mode, make sure the camera is powered ON and press the MODE button. When in Photo Capture Mode, this icon will display on the top-left corner of the LCD display When in Video Capture Mode, this icon will display on the top-left corner of the LCD display When in Playback Mode, this icon will display on the top-left corner of the LCD display Navigating the Menus Each camera mode has a set of menus specific to that mode. 1) Press the SET button to open the menus for the current mode. 2) Press the LEFT or RIGHT direction control buttons to scroll between the various menus for the current mode. 3) Press the UP or DOWN direction control buttons to highlight the desired menu selection. 4) Press the SET button to confirm and save the highlighted menu option. 5) If the selection can be remembered by the camera, a selection icon will appear to the right of the selected menu option. Changes made to these options will remain as is until you decide to change them again at a later time. 6) Some menu options are single-use functions that are not remembered by the camera and do not display this icon when selected. 7) At any time you can press the MODE button to exit the menus and return to the previous screen. 12
-
 1
1 -
2
-
3
-
4
-
5
-
6
-
7
-
 8
8 -
 9
9 -
 10
10 -
 11
11 -
 12
12 -
 13
13 -
 14
14 -
 15
15 -
 16
16 -
 17
17 -
 18
18 -
19
-
20
-
21
-
22
-
23
-
24
-
25
-
26
-
27
-
28
-
29
-
30
-
31
-
32
-
33
-
34
-
35
-
36
-
37
-
38
-
39
-
40
-
41
-
42
-
43
-
44
-
45
-
46
-
47
-
48
-
49
-
50
-
51
-
52
-
53
-
54
-
55
-
56
-
57
-
58
 |
 |
