Vivitar DVR 914HD User Manual - Page 42

Photo Capture Mode Menus
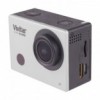
Page 42 highlights

White Balance The White Balance feature allows your camera to adjust the coloring of the captured images depending on the type of light source in the current environment. Properly adjusting the White Balance setting to match your current environment will allow the camera to properly balance the colors in the images that are taken with your camera. Auto (Default) Daylight Cloudy Fluorescent H Tungsten Automatic white balance. White balance selected for daylight surrounding. White balance selected for cloudy surrounding. White balance selected for fluorescent surrounding. White balance selected for tungsten lighting. PHOTO CAPTURE MODE MENUS To open the Photo Capture menu options, press the MENU button while in Photo Capture Mode. The following menus appear: Resolution, Timer, Photo Burst Menu Name and Description Menu Options Resolution The Resolution menu allows you to choose the desired size of the images taken by your camera. Keep in mind that images with a higher resolution will also take up more of your camera's memory. 16M pixel resolution 12M pixel resolution 8M pixel resolution (Default) 5M pixel resolution Timer The Self Timer menu allows you to set a delay between the time that the camera's Shutter button is pressed and the actual capture of the picture. This is an optimal feature if you don't just want to take the picture but would also like to be in the picture yourself. Just set the Self Timer, press the Shutter button on your camera and position yourself in front of the camera as desired. OFF (Default) - no icon 2S 10S Double Menu Option Details 4640 x 3480 4000 x 3000 3264 x 2448 2592 x 1944 OFF - The photo is taken as soon as you press the Shutter button. No icon appears on the screen. 2S - Set a 2-second delay from when you press the Shutter button until the photo is taken. The 2 second Self Timer icon appears on the screen. 41

  • 1
  • 2
  • 3
  • 4
  • 5
  • 6
  • 7
  • 8
  • 9
  • 10
  • 11
  • 12
  • 13
  • 14
  • 15
  • 16
  • 17
  • 18
  • 19
  • 20
  • 21
  • 22
  • 23
  • 24
  • 25
  • 26
  • 27
  • 28
  • 29
  • 30
  • 31
  • 32
  • 33
  • 34
  • 35
  • 36
  • 37
  • 38
  • 39
  • 40
  • 41
  • 42
  • 43
  • 44
  • 45
  • 46
  • 47
  • 48
  • 49
  • 50
  • 51
  • 52
  • 53
  • 54
  • 55
  • 56
  • 57
  • 58
  • 59
  • 60
  • 61
  • 62
  • 63
  • 64
  • 65
  • 66
  • 67
  • 68
  • 69
  • 70
  • 71
  • 72
  • 73
  • 74
  • 75
  • 76
  • 77
  • 78
  • 79

41
White
Balance
The White Balance feature allows your
camera to adjust the coloring of the captured
images depending on the type of light source
in the current environment.
Properly adjusting the White Balance setting
to match your current environment will allow
the camera to properly balance the colors in
the images that are taken with your camera.
Auto
(Default)
Automatic white balance.
Daylight
White balance selected for
daylight surrounding.
Cloudy
White balance selected for
cloudy surrounding.
Fluorescent H
White balance selected for
fluorescent surrounding.
Tungsten
White balance selected for
tungsten lighting.
PHOTO CAPTURE MODE MENUS
To open the Photo Capture menu options, press the
MENU
button while in Photo Capture Mode.
The following menus appear:
Resolution, Timer, Photo Burst
Menu Name
and Description
Menu Options
Menu Option Details
Resolution
The Resolution menu allows you to choose
the desired size of the images taken by your
camera. Keep in mind that images with a
higher resolution will also take up more of
your camera’s memory.
16M
pixel resolution
4640 x 3480
12M
pixel resolution
4000 x 3000
8M
pixel resolution
(Default)
3264 x 2448
5M
pixel resolution
2592 x 1944
Timer
The Self Timer menu allows you to set a
delay between the tim
e that the camera’s
Shutter
button is pressed and the actual
capture of the picture. This is an optimal
feature if you don’t just want to take the
picture but would also like to be in the picture
yourself. Just set the Self Timer, press the
Shutter
button on your camera and position
yourself in front of the camera as desired.
OFF
(Default) - no icon
2S
10S
Double
OFF
The photo is taken
as soon as you press the
Shutter button. No icon
appears on the screen.
2S
- Set a 2-second delay
from when you press the
Shutter button until the
photo is taken. The 2
second Self Timer icon
appears on the screen.