Vivitar T328 User Manual - Page 43
Auto Power off
 |
View all Vivitar T328 manuals
Add to My Manuals
Save this manual to your list of manuals |
Page 43 highlights
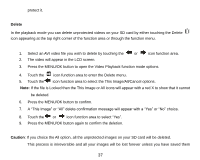
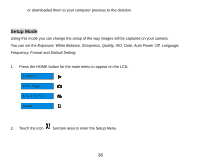
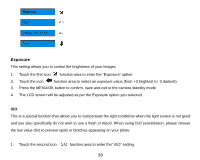
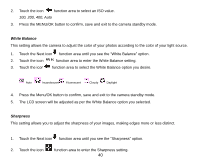
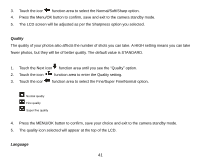
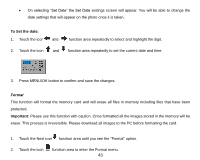
Your digital camera supports only English for this version. Auto Power off By default, if your camera is idle for 60 seconds it will automatically be powered off. Use the Auto Power Off option to change this setting: 1. Touch the Next icon function area until you see the "Auto Power Off" option. 2. Touch the icon function area to enter the Auto Power Off menu. 3. Touch the icon function area to select one of 60S/120S/180S/None. 4. Press the MENU/OK button to confirm, save and exit to the camera standby mode. Date This allows you to set the system time which will be displayed on the photos. 1. Touch the Next icon function area until you see the "Date" option. 2. Touch the icon function area to enter the Date menu. 3. Touch the icon function area to select one of On/Off/Set Date options. 4. Press the MENU/OK button to confirm. On selecting "On" the date will appear on the photo once it is taken. On selecting "Off" no date will appear on the photo. 42
-
 1
1 -
2
-
3
-
4
-
5
-
6
-
7
-
8
-
9
-
10
-
11
-
12
-
13
-
14
-
15
-
16
-
17
-
18
-
19
-
20
-
21
-
22
-
23
-
24
-
25
-
26
-
27
-
28
-
29
-
30
-
31
-
32
-
33
-
34
-
35
-
36
-
37
-
 38
38 -
 39
39 -
 40
40 -
 41
41 -
 42
42 -
 43
43 -
 44
44 -
 45
45 -
 46
46 -
 47
47 -
 48
48 -
49
-
50
-
51
-
52
-
53
-
54
-
55
-
56
-
57
-
58
-
59
-
60
-
61
-
62
 |
 |
