Vtech SBS-MB1 Quick Start Guide - Page 2
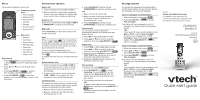
Handset overview, Charger installation, Battery installation and charging, Add and register
 |
View all Vtech SBS-MB1 manuals
Add to My Manuals
Save this manual to your list of manuals |
Page 2 highlights
Charger installation Plug the power adapter into an electrical outlet not controlled by a wall switch. Battery installation and charging 1 2 GP1250 GP1250 3 The CHARGE light turns on. Add and register a handset You can add CM18045/AM18047 handsets to the CM18445/AM18447 console at any time, each new handset must be registered with the console before use. The handsets are assigned with available extension numbers starting from 1 in ascending order (1 to 9). You can register a maximum of nine devices to the console. Register the handset to the console Start registration when the handset shows 1) Press MENU on Console ->Registration ->Register Ext. 2) Press # on this extension to register. 1. On the console, press MENU/SELECT. 2. Press DIR or CID to scroll to Registration, then press MENU/SELECT or /SKIP. 3. Press MENU/SELECT or /SKIP to choose Register ext. The console shows Registering.... 4. On the handset, press #. The handset shows Registering.... 5. You hear a beep sound when the registration process is successful. The handset shows Handset X registered. (X represents the extension number, ranged from 1 to 9). It takes up to 60 seconds to complete the registration process. 6. Press a line key (LINE 1-LINE 4). If you hear a dial tone, the registration was successful. NOTE: If the registration is not successful, the console returns to the previous screen. To reset the handset, remove the handset from the charger. Wait for about two minutes, then try the registration process again. Handset overview Charge light • On when the handset is charging in the charger. Softkeys (2) • Press to select a menu item displayed above the key. LINE 1/LINE 2/LINE 3/LINE 4 • Press to make a call on the desired line. • Press to answer a call. • The indicator is on when the telephone line is in use. • The indicator flashes slowly when the telephone line is on hold. • The indicator flashes quickly when there is an incoming call. DIR • Press to scroll up while in menus. • Press to show directory entries when the telephone is not in use. MENU/SELECT • Press to enter the menu. • While in a menu, press to select an item or save an entry or setting. CID • Press to scroll down while in menus. • Press to show the caller ID history when the telephone is not in use. INT • Press to make an intercom call when in idle. • The indicator is on when the handset is on an intercom call. • The indicator flashes showly when an intercom call is on hold. • The indicator flashes quickly when there is an incoming intercom call. OFF/CANCEL • While using menus, press to return to idle mode. • During a call, press to hang up. -/VOLUME/+ • During a call, press to adjust the listening volume. • Press to adjust the ringer volume when in idle mode. PAGE • Press to begin a one-to-one or one- to-group broadcast. DND (Do not disturb) • In idle mode, press and hold to turn the feature on. Press and hold again to turn off. /SPEAKER • Press to turn on the handset speakerphone. Press again to resume normal handset use. • The indicator is on when the speakerphone is in use. REDIAL/PAUSE • Press to view the last 10 numbers dialed. MUTE/DELETE • During a call, press to mute the microphone. • While predialing, press to delete digits. • While reviewing the directory entry, press to delete an individual entry. • While entering or editing a directory entry, press to erase a digit or character. Press and hold to erase all digits or characters. Specifications are subject to change without notice. © 2017 VTech Communications, Inc. All rights reserved. 06/17. CM18045/AM18047_QSG_V3.0 Document order number: 96-010502-030-100
-
 1
1 -
 2
2
 |
 |
