Weider 220 English Manual - Page 7
Nylon Locknuts yet. - pull up
 |
View all Weider 220 manuals
Add to My Manuals
Save this manual to your list of manuals |
Page 7 highlights
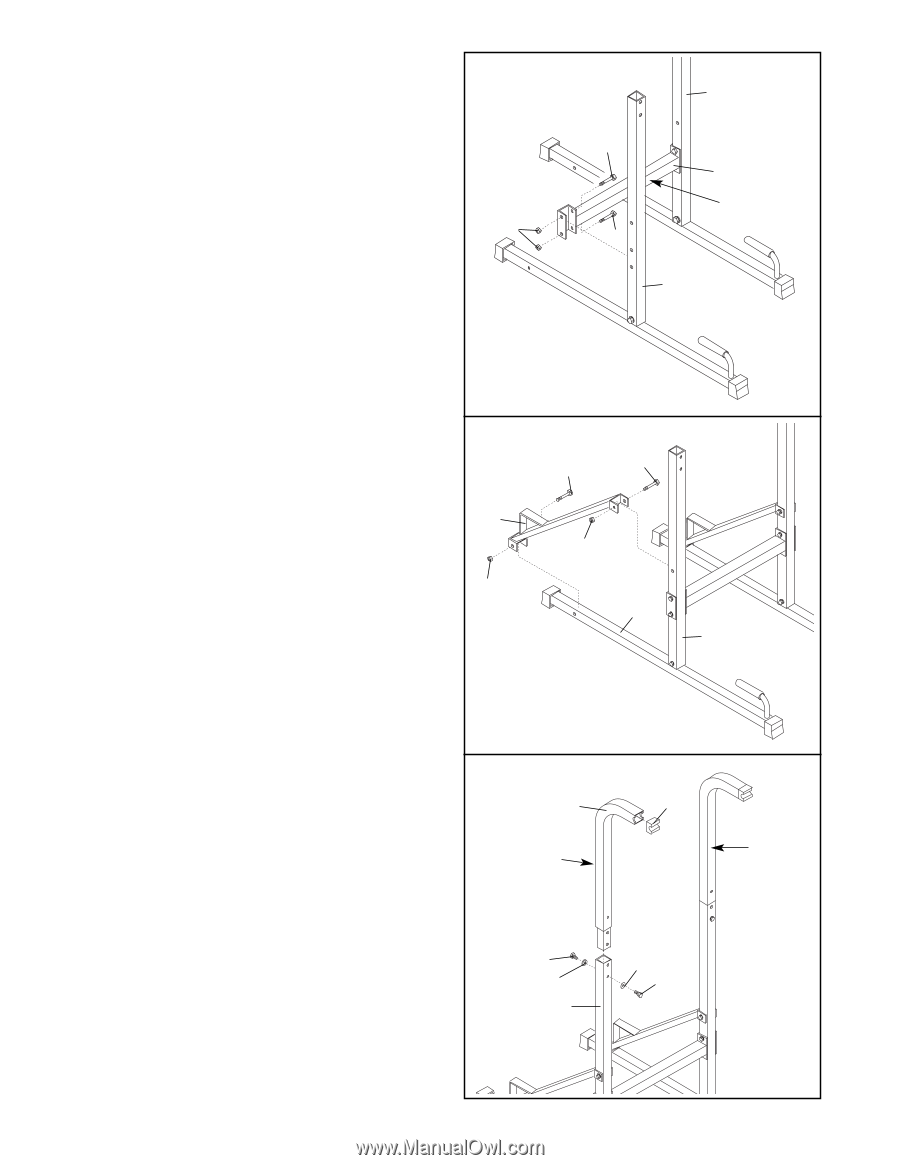
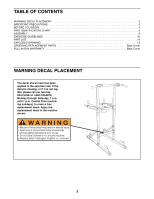
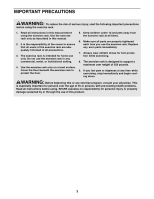
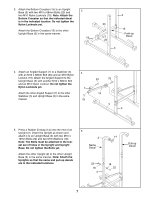
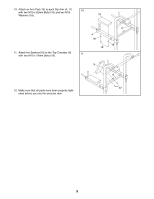
3. Attach the Bottom Crossbar (15) to an Upright Base (3) with two M10 x 68mm Bolts (23) and two M10 Nylon Locknuts (19). Note: Attach the Bottom Crossbar so that the indicated decal is in the indicated location. Do not tighten the Nylon Locknuts yet. Attach the Bottom Crossbar (15) to the other Upright Base (3) in the same manner. 3 19 3 23 15 Push-up Decal 23 3 4. Attach an Angled Support (7) to a Stabilizer (5) 4 with an M10 x 68mm Bolt (23) and an M10 Nylon Locknut (19). Attach the Angled Support to the Upright Base (3) with another M10 x 68mm Bolt and an M10 Nylon Locknut. Do not tighten the Nylon Locknuts yet. 7 Attach the other Angled Support (7) to the other Stabilizer (5) and Upright Base (3) in the same manner. 19 23 23 19 5 3 5. Press a Rubber Endcap (14) onto the end of an Upright (2). Orient the Upright as shown and attach it to an Upright Base (3) with two M10 x 19mm Bolts (22) and two M10 Washers (18). Note: The Bolts must be attached to the lowest set of holes in the Upright and Upright Base. Do not tighten the Bolts yet. Attach the other Upright (2) to the other Upright Base (3) in the same manner. Note: Attach the Uprights so that the name and pull-up decals are in the indicated locations. 5 2 Name Decal 22 18 3 14 18 22 Pull-up Decal 7
-
 1
1 -
 2
2 -
 3
3 -
 4
4 -
 5
5 -
 6
6 -
 7
7 -
 8
8 -
 9
9 -
 10
10 -
 11
11 -
 12
12 -
13
-
14
-
15
-
16
 |
 |