Weslo Cadence 3180 English Manual - Page 8
Accusmart
 |
View all Weslo Cadence 3180 manuals
Add to My Manuals
Save this manual to your list of manuals |
Page 8 highlights
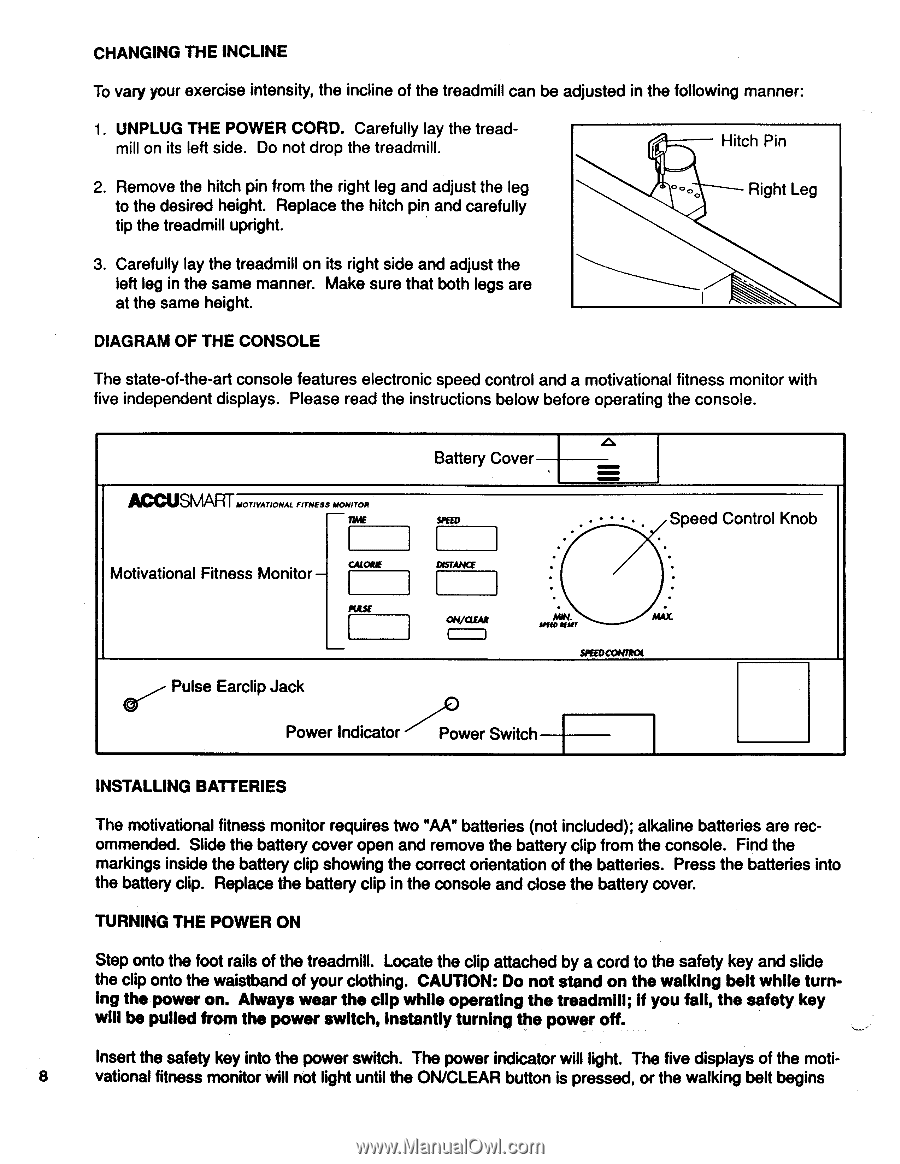
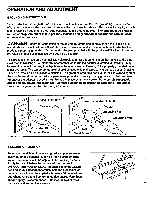
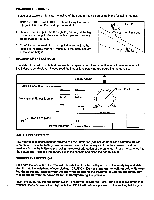
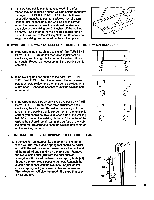
CHANGING THE INCLINE To vary your exercise intensity, the incline of the treadmill can be adjusted in the following manner: 1. UNPLUG THE POWER CORD. Carefully lay the treadmill on its left side. Do not drop the treadmill. Hitch Pin 2. Remove the hitch pin from the right leg and adjust the leg to the desired height. Replace the hitch pin and carefully tip the treadmill upright. Right Leg 3. Carefully lay the treadmill on its right side and adjust the left leg in the same manner. Make sure that both legs are at the same height. DIAGRAM OF THE CONSOLE The state-of-the-art console features electronic speed control and a motivational fitness monitor with five independent displays. Please read the instructions below before operating the console. ACCUSMART MOTIVATIONAL FITNESS MONITOR MAE Battery Cover SPEED Speed Control Knob Motivational Fitness Monitor - CALORIE PULSE Pulse Earclip Jack DISTANCE ON/C1FAR MIN. WM INSET SPEEDCONTROL co Power Indicator Power Switch INSTALLING BATTERIES The motivational fitness monitor requires two "AA" batteries (not included); alkaline batteries are recommended. Slide the battery cover open and remove the battery clip from the console. Find the markings inside the battery clip showing the correct orientation of the batteries. Press the batteries into the battery clip. Replace the battery clip in the console and close the battery cover. TURNING THE POWER ON Step onto the foot rails of the treadmill. Locate the clip attached by a cord to the safety key and slide the clip onto the waistband of your clothing. CAUTION: Do not stand on the walking belt while turning the power on. Always wear the clip while operating the treadmill; if you fall, the safety key will be pulled from the power switch, instantly turning the power off. Insert the safety key into the power switch. The power indicator will light. The five displays of the moti- 8 vational fitness monitor will not light until the ON/CLEAR button is pressed, or the walking belt begins
-
 1
1 -
2
-
 3
3 -
 4
4 -
 5
5 -
 6
6 -
 7
7 -
 8
8 -
 9
9 -
 10
10 -
 11
11 -
 12
12 -
 13
13 -
14
-
15
-
16
 |
 |