Weslo Cadence 4.0 Treadmill Owners Manual - Page 7
Silicone, Application, Circuit, Breaker
 |
View all Weslo Cadence 4.0 Treadmill manuals
Add to My Manuals
Save this manual to your list of manuals |
Page 7 highlights
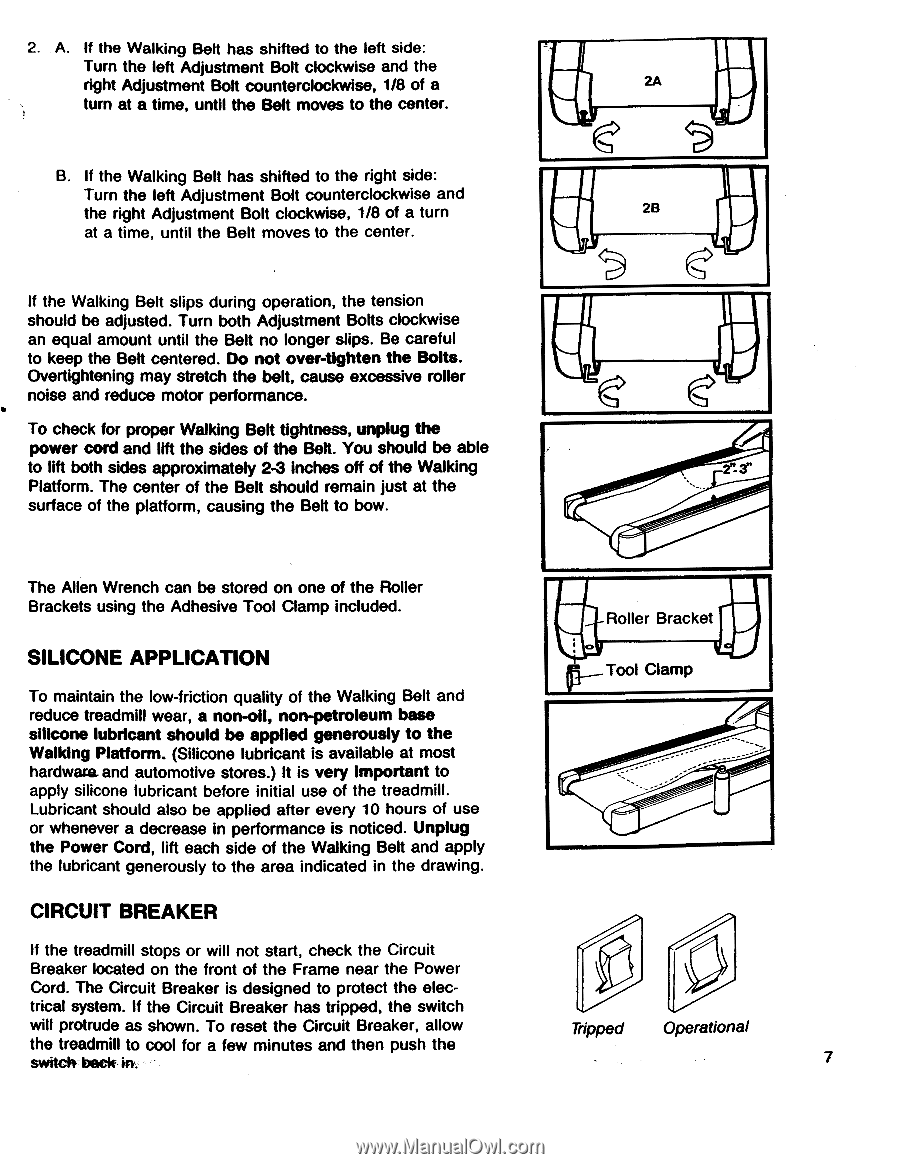
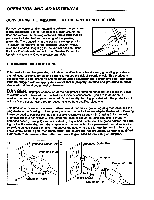
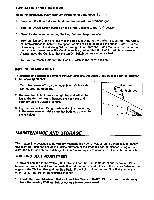
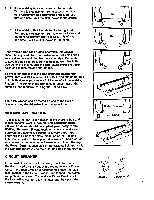
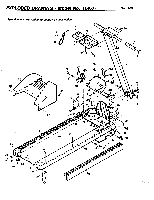
2. A. If the Walking Belt has shifted to the left side: Turn the left Adjustment Bolt clockwise and the right Adjustment Bolt counterclockwise, 1/8 of a turn at a time, until the Belt moves to the center. B. If the Walking Belt has shifted to the right side: Turn the left Adjustment Bolt counterclockwise and the right Adjustment Bolt clockwise, 1/8 of a turn at a time, until the Belt moves to the center. If the Walking Belt slips during operation, the tension should be adjusted. Turn both Adjustment Bolts clockwise an equal amount until the Belt no longer slips. Be careful to keep the Belt centered. Do not over-tighten the Bolts. Overtightening may stretch the belt, cause excessive roller noise and reduce motor performance. To check for proper Walking Belt tightness, unplug the power cord and lift the sides of the Belt. You should be able to lift both sides approximately 2-3 inches off of the Walking Platform. The center of the Belt should remain just at the surface of the platform, causing the Belt to bow. The Allen Wrench can be stored on one of the Roller Brackets using the Adhesive Tool Clamp included. SILICONE APPLICATION To maintain the low-friction quality of the Walking Belt and reduce treadmill wear, a non-oil, non-petroleum base silicone lubricant should be applied generously to the Walking Platform. (Silicone lubricant is available at most hardware and automotive stores.) It is very important to apply silicone lubricant before initial use of the treadmill. Lubricant should also be applied after every 10 hours of use or whenever a decrease in performance is noticed. Unplug the Power Cord, lift each side of the Walking Belt and apply the lubricant generously to the area indicated in the drawing. CIRCUIT BREAKER If the treadmill stops or will not start, check the Circuit Breaker located on the front of the Frame near the Power Cord. The Circuit Breaker is designed to protect the electrical system. If the Circuit Breaker has tripped, the switch will protrude as shown. To reset the Circuit Breaker, allow the treadmill to cool for a few minutes and then push the switch, back- in. 26 2"-3" Roller Bracket rt- Tool Clamp Tripped Operational 7
-
 1
1 -
 2
2 -
 3
3 -
 4
4 -
 5
5 -
 6
6 -
 7
7 -
 8
8 -
 9
9 -
 10
10 -
 11
11 -
 12
12
 |
 |