Weslo Cadence 70 Instruction Manual - Page 9
Operation And Adjustment, Danger
 |
View all Weslo Cadence 70 manuals
Add to My Manuals
Save this manual to your list of manuals |
Page 9 highlights
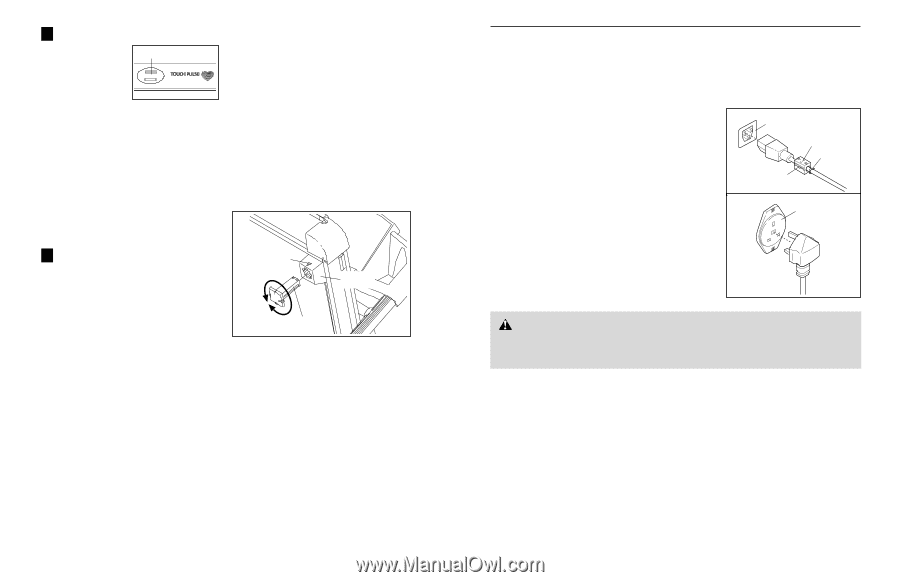
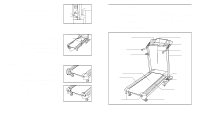
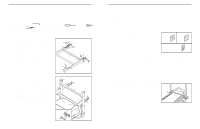
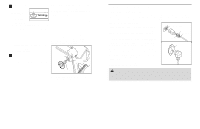
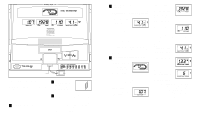
6 Measure your heart rate if desired. To measure your heart rate, stand on Pulse Sensor the foot rails and place your thumb on the pulse sen- sor. Do not press too hard, or the circulation in your thumb will be restricted and your pulse will not be detected. When your pulse is detected, the heart-shaped indicator in the Heart Rate/Speed display will flash each time your heart beats, and your heart rate will be shown. Hold your thumb on the pulse sensor for about 15 seconds for the most accurate reading. If the displayed heart rate appears to be too high or too low, or if your heart rate is not displayed, lift your thumb off the pulse sensor for a few seconds. Then, place your thumb on the pulse sensor as described above. Remember to stand still whilst measuring your heart rate. HOW TO CHANGE THE INCLINE OF THE TREADMILL To vary the intensity of your exercise, the incline of the treadmill can be changed. There are four incline levels. Before changing the incline, remove the key and unplug the power cord. Next, fold the treadmill to the storage position (see HOW TO FOLD THE TREADMILL FOR STORAGE on page 13). To change the incline, first pull one of the incline legs out of its housing as shown below. Rotate the incline leg to a different position and then fully reinsert it. An arrow on the housing will point to one of four numbers on the bottom of the incline leg. Position 1 is the lowest incline level, and position 4 is the highest. Adjust the other incline leg in the same way. CAUTION: Before using the treadmill, make sure that both incline legs are in the same position. 7 When you are finished exercising, remove the key. Arrow Step onto the foot rails, press the Stop button, and remove the key from the console. Keep the key in a secure place. Housing When you are finished using the treadmill, move the on/off switch to the off position. Incline Leg After you have adjusted the incline legs, lower the treadmill (see HOW TO LOWER THE TREADMILL FOR USE on page 14). OPERATION AND ADJUSTMENT THE PERFORMANT LUBETM WALKING BELT Your treadmill features a walking belt coated with PERFORMANT LUBETM, a high-performance lubricant. IMPORTANT: Never apply silicone spray or other substances to the walking belt or the walking platform. Such substances will deteriorate the walking belt and cause excessive wear. HOW TO PLUG IN THE POWER CORD 1 This product must be earthed. If it should malfunction or break down, earthing provides a path of least resistance for electric current to reduce the risk of electric shock. This product is equipped with a power cord having an equipment-earthing conductor and a earthing plug. Two power cords are included. Select the one that will fit your outlet. Refer to drawing 1. Plug the indicated end of the power cord into the socket on the treadmill. Next, lift the tab on the 2 ferrite box and clamp the ferrite box around the power cord. Fasten the included plastic tie just behind the ferrite box and cut off the excess plastic tie. The plastic tie will prevent the fer- rite box from sliding along the power cord. Refer to drawing 2. Plug the power cord into an appropriate outlet that is properly installed and earthed in accordance with all local codes and or- dinances. Important: The treadmill is not compatible with GFCI- equipped outlets. Socket on treadmill Ferrite Box Plastic Tie Tab Outlet Important: If the power cord is damaged, it must be replaced with a manufacturer-recommended power cord. DANGER: Improper connection of the equipment-earthing conductor can result in an in- creased risk of electric shock. Check with a qualified electrician or serviceman if you are in doubt as to whether the product is properly earthed. Do not modify the plug provided with the product-if it will not fit the outlet, have a proper outlet installed by a qualified electrician. 12 9
-
 1
1 -
2
-
3
-
 4
4 -
 5
5 -
 6
6 -
 7
7 -
 8
8 -
 9
9 -
 10
10 -
 11
11 -
 12
12
 |
 |