Weslo Pursuit 3.8 Bike English Manual - Page 6
Note: The Seat Washers R, the Spring Washers S,
 |
View all Weslo Pursuit 3.8 Bike manuals
Add to My Manuals
Save this manual to your list of manuals |
Page 6 highlights
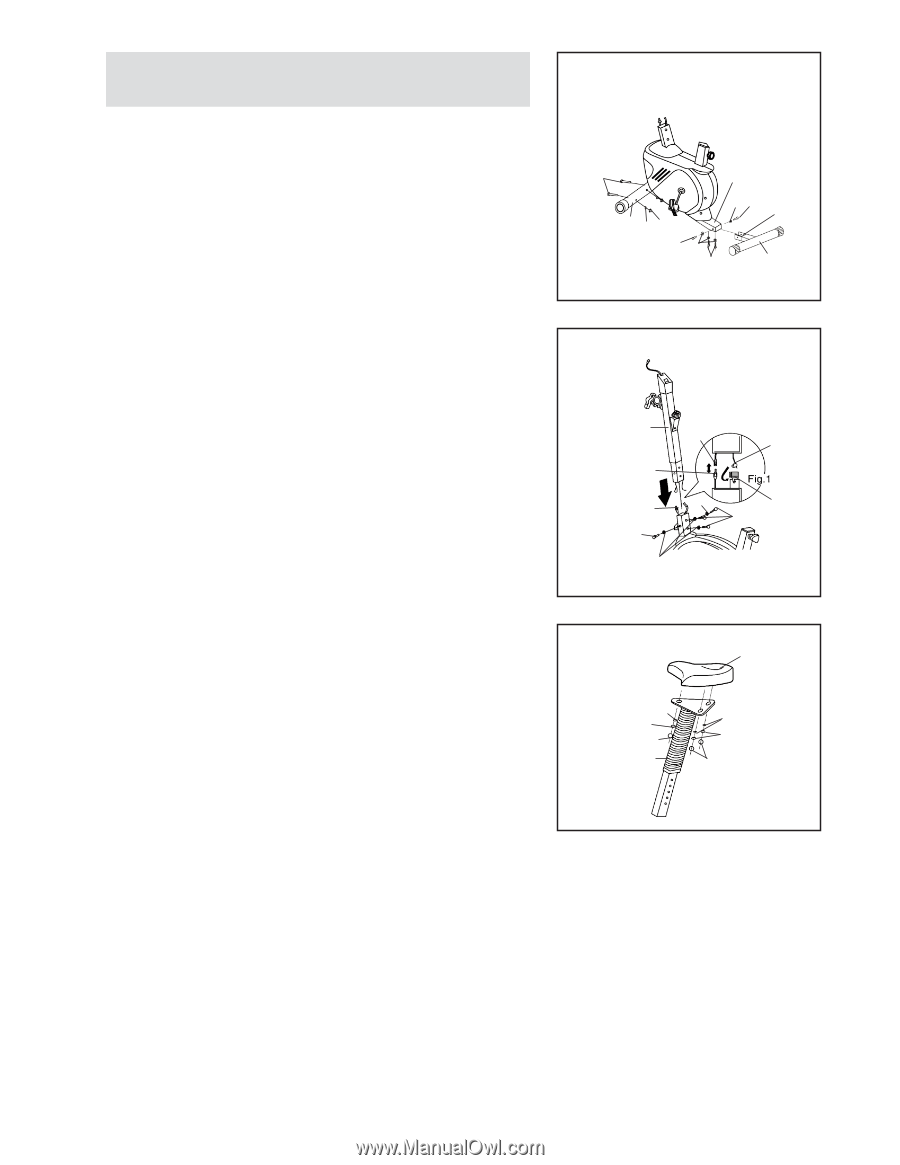
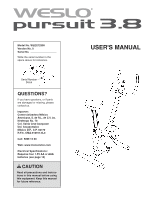
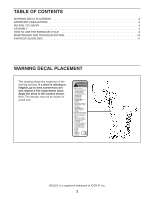
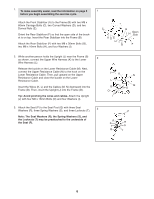
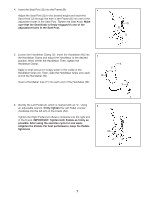
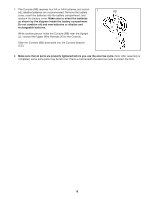
1. To make assembly easier, read the information on page 5 before you begin assembling the exercise cycle. Attach the Front Stabilizer (A) to the Frame (B) with two M8 x 60mm Carriage Bolts (C), two Curved Washers (D), and two Domed Nuts (E). Orient the Rear Stabilizer (F) so that the open side of the bracket is on top. Insert the Rear Stabilizer into the Frame (B). Attach the Rear Stabilizer (F) with two M8 x 30mm Bolts (G), two M8 x 16mm Bolts (H), and four Washers (I). 1 C B I H Open Side A DE HI G F 2. While another person holds the Upright (J) near the Frame (B) as shown, connect the Upper Wire Harness (K) to the Lower 2 Wire Harness (L). Release the buckle on the Lower Resistance Cable (M). Next, connect the Upper Resistance Cable (N) to the hook on the Lower Resistance Cable. Then, pull upward on the Upper Resistance Cable and close the buckle on the Lower Resistance Cable. Insert the Wires (K, L) and the Cables (M, N) downward into the Frame (B). Then, insert the Upright (J) into the Frame (B). Tip: Avoid pinching the wires and cables. Attach the Upright (J) with four M8 x 16mm Bolts (O) and four Washers (I). 3. Attach the Seat (P) to the Seat Post (Q) with three Seat Washers (R), three Spring Washers (S), and three Locknuts (T). 3 Note: The Seat Washers (R), the Spring Washers (S), and the Locknuts (T) may be preattached to the underside of the Seat (P). J K N L B I M O O I P R S R T S Q T 6
-
 1
1 -
 2
2 -
 3
3 -
 4
4 -
 5
5 -
 6
6 -
 7
7 -
 8
8 -
 9
9 -
 10
10 -
 11
11 -
 12
12
 |
 |