Weslo Sport 100 Uk Manual - Page 8
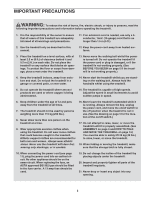
Screws with the 3/4 Screws 77. The Crossbar
 |
View all Weslo Sport 100 manuals
Add to My Manuals
Save this manual to your list of manuals |
Page 8 highlights
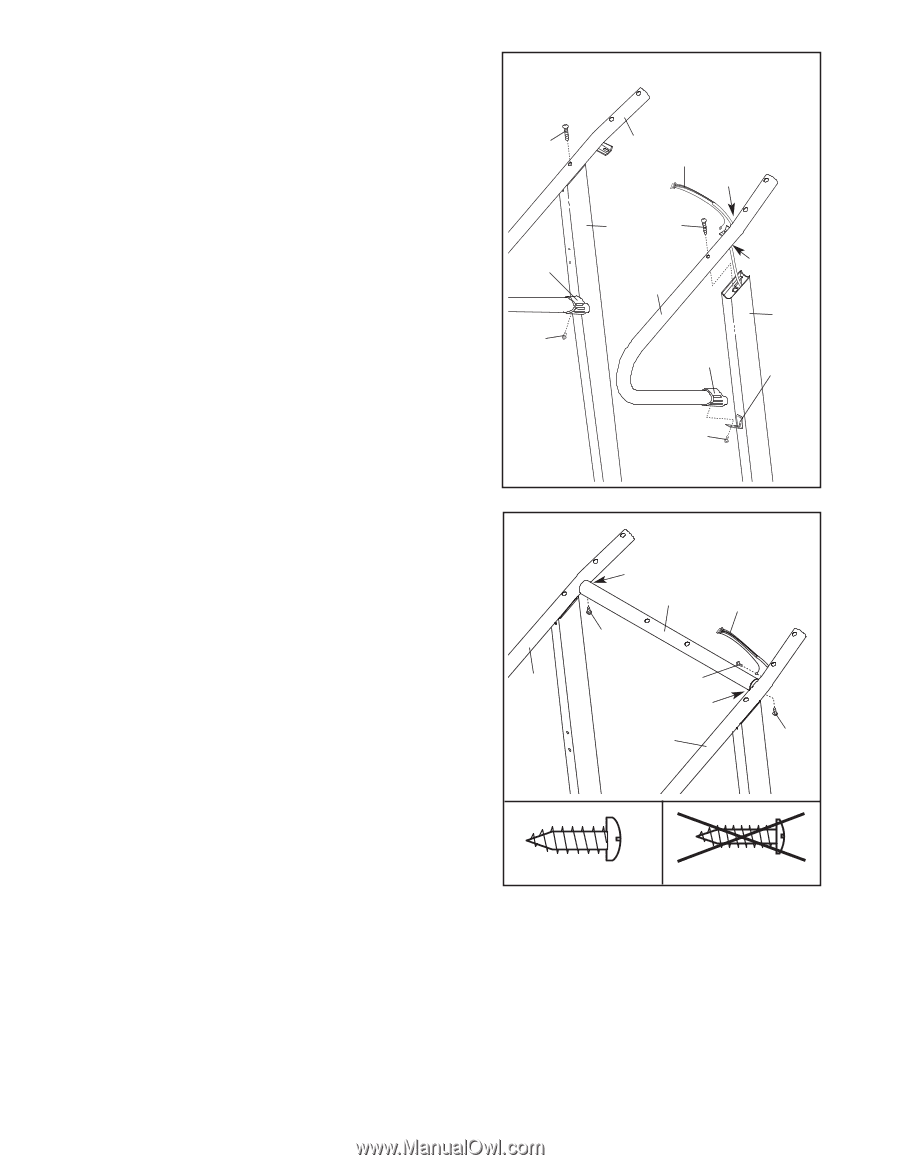
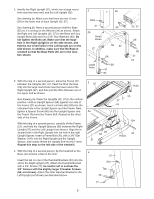
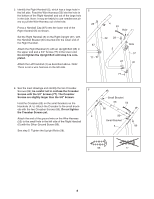
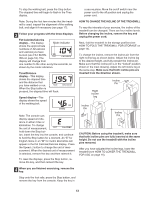
5. Identify the Right Handrail (5), which has a large hole in the left side. Feed the Wire Harness (53) into the hole in the bottom of the Right Handrail and out of the large hole in the side. Note: It may be helpful to use needlenose pliers to pull the Wire Harness out of the hole. Press a Handrail Cap (87) onto the lower end of the Right Handrail (5) as shown. Set the Right Handrail (5) on the Right Upright (37), with the Handrail Bracket (40) inserted into the lower end of the Right Handrail. Attach the Right Handrail (5) with an Upright Bolt (28) in the upper end and a 3/4" Screw (77) in the lower end. Do not tighten the Upright Bolt until step 6 is completed. Attach the Left Handrail (4) as described above. Note: There is not a wire harness on the left side. 5 28 87 77 4 53 Hole 32 28 5 Hole 37 87 40 77 6. See the inset drawings and identify the two Crossbar Screws (86); be careful not to confuse the Crossbar 6 Screws with the 3/4" Screws (77). The Crossbar Screws are slightly larger than the 3/4" Screws. Hold the Crossbar (65) on the small brackets on the Handrails (4, 5). Attach the Crossbar to the small brackets with the two Crossbar Screws (86). Do not tighten the Crossbar Screws yet. 4 Attach the end of the ground wire on the Wire Harness (53) to the small hole in the left side of the Right Handrail (5) with the Silver Ground Screw (89). See step 5. Tighten the Upright Bolts (28). Small Bracket 65 53 86 89 Small Bracket 5 86 86 77 8
-
 1
1 -
2
-
 3
3 -
 4
4 -
 5
5 -
 6
6 -
 7
7 -
 8
8 -
 9
9 -
 10
10 -
 11
11 -
 12
12 -
 13
13 -
14
-
15
-
16
-
17
-
18
-
19
-
20
-
21
-
22
-
23
-
24
 |
 |