Weslo Vector 402 Uk Manual
Weslo Vector 402 Manual
 |
View all Weslo Vector 402 manuals
Add to My Manuals
Save this manual to your list of manuals |
Weslo Vector 402 manual content summary:
- Weslo Vector 402 | Uk Manual - Page 1
, Ltd. Customer Service Department Unit 4 Revie Road Industrial Estate Revie Road Beeston Leeds, LS118JG UK email: [email protected] CAUTION Read all precautions and instructions in this manual before using this equipment. Keep this manual for future reference. USER'S MANUAL Visit our website - Weslo Vector 402 | Uk Manual - Page 2
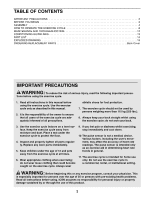
EXERCISE CYCLE 8 MAINTENANCE AND TROUBLESHOOTING 12 CONDITIONING GUIDELINES 13 PART instructions in this manual before using the exercise cycle. Use the exercise cycle only as described in this manual or persons with pre-existing health problems. Read all instructions before using. ICON assumes no - Weslo Vector 402 | Uk Manual - Page 3
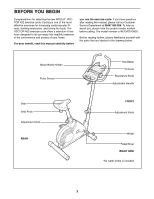
BEFORE YOU BEGIN Congratulations for selecting the new WESLO® VECTOR 402 exercise cycle. Cycling is one of the most effective exercises for increasing cardiovascular fitness, building endurance, and toning the body. The VECTOR 402 exercise cycle offers a selection of features designed to let you - Weslo Vector 402 | Uk Manual - Page 4
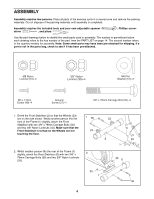
ASSEMBLY Assembly requires two persons. Place all parts of the exercise cycle in a cleared area and remove the packing materials. Do not dispose of the packing materials until assembly is completed. Assembly requires the included tools and your own adjustable spanner driver , and pliers . , - Weslo Vector 402 | Uk Manual - Page 5
3. Slide the two slots in the Handlebar Clamp (42) onto the 3 two indicated tabs on the Upright (13). Lift the bottom of the Handlebar Clamp away from the Upright. Insert the Handlebar (15) between the Handlebar Clamp and the Upright. Centre the Handlebar and rotate it to the desired position. - Weslo Vector 402 | Uk Manual - Page 6
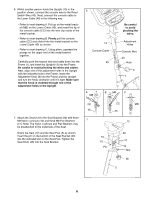
6. Whilst another person holds the Upright (13) in the position shown, connect the console wire to the Reed Switch Wire (43). Next, connect the console cable to the Lower Cable (45) in the following way: • Refer to inset drawing A. Pull up on the metal bracket (MB) on the Lower Cable (45), and - Weslo Vector 402 | Uk Manual - Page 7
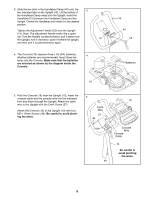
8. Turn the indicated Adjustment Knob (9) counterclock- 8 wise and remove it. Insert the Seat Post (5) into the Frame (1). Align one of the adjustment holes in the Seat Post with the indicated hole in the Frame. Insert the Adjustment Knob into the Frame and the Seat Post, and turn the Knob - Weslo Vector 402 | Uk Manual - Page 8
HOW TO OPERATE THE EXERCISE CYCLE HOW TO ADJUST THE SEAT POST For effective exer- cise, the seat should be at the proper height. As Seat you pedal, there should be a slight Seat Post bend in your knees when the pedals Hole are in the lowest Knob position. To adjust the height of the - Weslo Vector 402 | Uk Manual - Page 9
pace programs. Each program automatically prompts you to increase or decrease your pace as it guides you through an effective workout. 2 Select the manual mode. Each time the console is turned on, the manual This corner should be blank mode will be selected. If a pace program has been select - Weslo Vector 402 | Uk Manual - Page 10
A PACE PROGRAM 1 Turn on the console. See step 1 on page 9. 2 Select one of the four pace programs. Each time the console is turned on, the manual mode will be selected. To select a pace program, press the Program button repeatedly until the number 1, 2, 3, or 4 appears in the upper right corner of - Weslo Vector 402 | Uk Manual - Page 11
Important: The target pace settings for the program are intended only to provide a goal. Your actual pace may be slower than the target pace settings, especially during the first few months of your exercise program. Make sure to exercise at a pace that is comfortable for you. During the program, - Weslo Vector 402 | Uk Manual - Page 12
console display becomes dim, the batteries should be replaced; most console problems are the result of low batteries. To replace the batteries, refer correctly adjusted, reattach the left side shield and the left pedal. PULSE SENSOR TROUBLESHOOTING Refer to step 3 on page 10. 21 54 17 52 Turn the - Weslo Vector 402 | Uk Manual - Page 13
important for persons over the age of 35 or persons with pre-existing health problems. • The pulse sensor is not a medical device. Various factors may affect intensity level can be found by using your heart rate as a guide. The chart below shows recommended heart rates for fat burning, maximum fat - Weslo Vector 402 | Uk Manual - Page 14
Flat Washer 52 6 M4 x 25mm Screw 53 1 Adjustment Handle 54 6 M4 x 19mm Screw 55 1 M6 x 15mm Screw 56 2 Frame Collar # 1 User's Manual # 2 Assembly Wrench Note: "#" indicates a non-illustrated part. Specifications are subject to change without notice. See the back cover of this - Weslo Vector 402 | Uk Manual - Page 15
EXPLODED DRAWING-Model No. WLEVEX19920 R1002B 16 54 27 54 18 49 42 53 13 7 49 8 15 52 12 51 10 51 5 17 52 50 54 51 10 14 52 36 54 54 19 54 25 56 23 11 10 23 10 11 30 30 1 4 2 47 45 33 56 9 4 46 43 22 33 25 26 21 24 38 28 9 37 31 39 28 40 29 34 40 48 33 33 44 - Weslo Vector 402 | Uk Manual - Page 16
Ltd. office, or write: ICON Health & Fitness, Ltd. Customer Service Department Unit 4 Revie Road Industrial Estate Revie Road Beeston Leeds, LS118JG NAME of the product (WESLO® VECTOR 402 exercise cycle) • the KEY NUMBER and DESCRIPTION of the part(s) (see page 14) WESLO is a registered trademark
-
 1
1 -
 2
2 -
 3
3 -
 4
4 -
 5
5 -
 6
6 -
 7
7 -
8
-
9
-
10
-
11
-
12
-
13
-
14
-
15
-
16
 |
 |
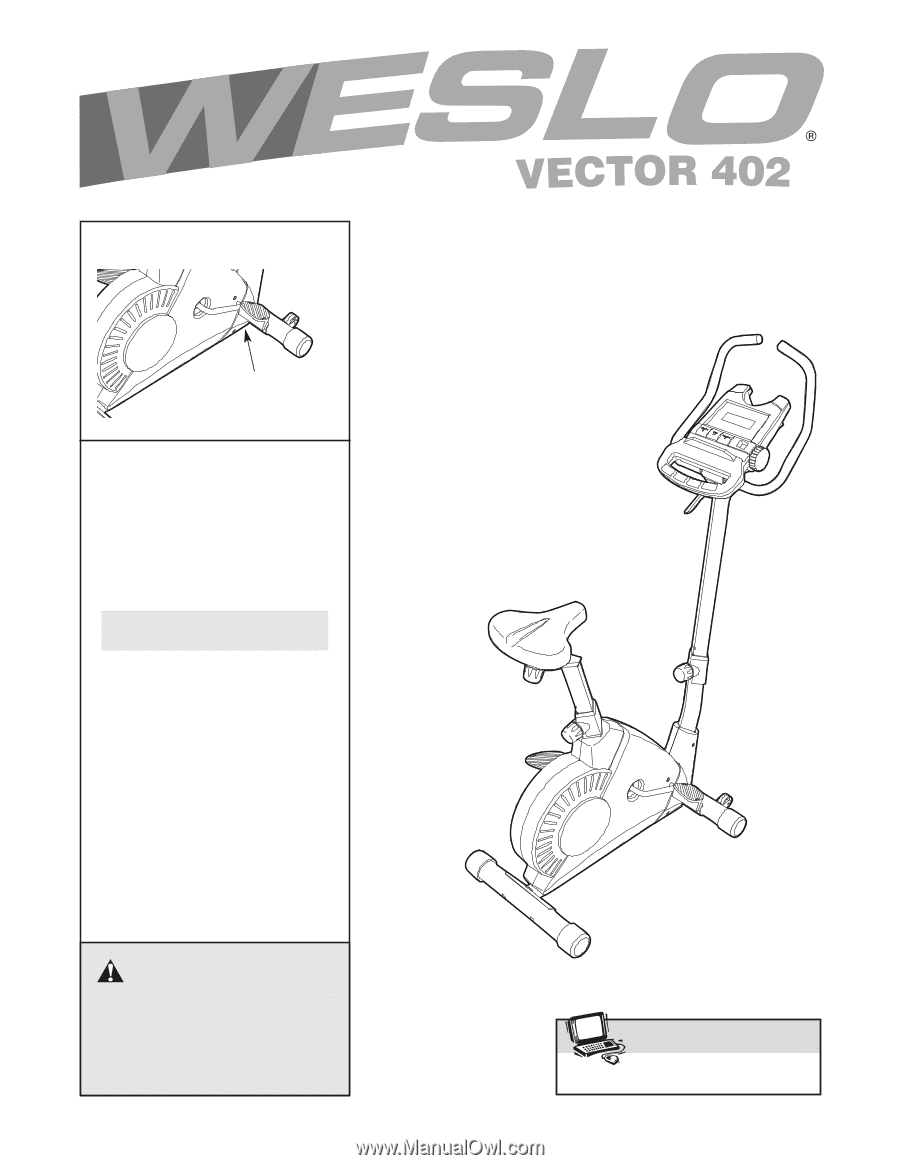
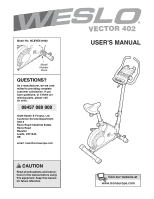
USER'S MANUAL
CAUTION
Read all precautions and instruc-
tions in this manual before using
this equipment. Keep this manual
for future reference.
Model
Number
Decal
Model No. WLEVEX19920
QUESTIONS?
As a manufacturer, we are com-
mitted to providing complete
customer satisfaction. If you
have questions, or if there are
missing parts, please call:
Or write:
ICON Health & Fitness, Ltd.
Customer Service Department
Unit 4
Revie Road Industrial Estate
Revie Road
Beeston
Leeds, LS118JG
UK
email: [email protected]
08457 089 009
www.iconeurope.com
Visit our website at