WestBend 33600 Instruction Manual - Page 5
Helpful Hints
 |
View all WestBend 33600 manuals
Add to My Manuals
Save this manual to your list of manuals |
Page 5 highlights
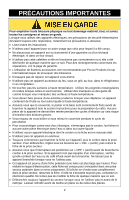
Secure the cover in place and plug the coffeemaker in. If applicable, set the "ON/OFF" switch to "ON." Heat the water until perking stops and the light on the base glows. Remove the cover, lift out the basket and stem with a hot pad, and replace the cover, making sure it is locked in place. Unplug the coffeemaker when less than 3 cups of water remain. The inside of the coffeemaker may darken after heating water, which is normal and does not affect the coffeemaker or the water heated. Other than making coffee or heating water, no other liquid should be heated in the coffeemaker because damage to the heating unit can occur. When the coffeemaker is used to heat water only, it must be cleaned well after each use in addition to special weekly cleaning with white distilled vinegar for removal of mineral deposits. If these deposits are not removed, pitting of the metal can occur and result in damage to the coffeemaker. See "Special Cleaning - Every Two Weeks" in this manual. Improper cleaning of the coffeemaker, especially the heating unit well, will affect the performance, resulting in weak, lukewarm coffee and may even cause the coffeemaker to stop perking. To keep the coffeemaker working properly, it is very important to follow the regular and special cleaning instructions. HELPFUL HINTS • Never make less than the minimum or more than the maximum amount of coffee for your coffee urn. • Do not use soft water, as flooding of the basket may occur. • Use regular electric perk grind coffee or coffee ground for all coffeemakers for best results. Do not use drip or finely ground coffee as flooding of the coffee basket can occur. If grinding your own coffee beans, grind to medium coarseness for best results. Do not grind coffee too finely, powder-like, as this can cause the coffee basket to flood. • Remove coffee basket with grounds as soon as the brewing cycle is completed. This also helps maintain the coffee flavor. Use the coffee maker cover as a carrying tray when disposing of wet grounds. • If dripping occurs between the faucet and the coffeemaker body, tighten the nut inside the coffeemaker. If the dripping occurs from the faucet spout, tighten the faucet bonnet. If the faucet continues to drip or is damaged, contact customer service; see information on warranty page. • Liquid must always cover the inside bottom of the appliance at all times. Falling below the minimum level could cause overheating and damage to internal components and will void the warranty. • A small amount of smoke or odor may occur upon heating due to the release of manufacturing oils - this is normal. • Some minor expansion or contraction sounds may occur during heating and cooling - this is normal. • Do not allow ground coffee to fall into the stem. • If more coffee is immediately desired, partially fill the coffeemaker with cold water to reset the thermostat. Empty the water out of the coffeemaker, then repeat steps 3-9. 5
-
 1
1 -
 2
2 -
 3
3 -
 4
4 -
 5
5 -
 6
6 -
 7
7 -
 8
8 -
 9
9 -
 10
10 -
 11
11 -
12
-
13
-
14
-
15
-
16
-
17
-
18
-
19
-
20
-
21
-
22
-
23
-
24
 |
 |