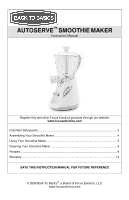
WestBend SR1000 Instruction Manual - Page 5
Using Your Smoothie Maker
 |
View all WestBend SR1000 manuals
Add to My Manuals
Save this manual to your list of manuals |
Page 5 highlights
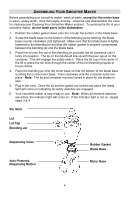
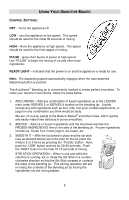
USING YOUR SMOOTHIE MAKER CONTROL BUTTONS: OFF - Turns the appliance off. LOW - runs the appliance at low speed. This speed should be used for the initial 30 seconds of mixing. HIGH - Runs the appliance at high speed. This speed should be used for the final stages of mixing. PULSE - gives short bursts of power at high speed. Use "PULSE" to begin the mixing of ice and other hard ingredients. READY LIGHT - Indicates that the power is on and the appliance is ready for use. Note: The dispensing speed automatically engages when the auto-powered dispensing button is pushed. The AutoServe™ blending jar is conveniently marked to create perfect smoothies. To make your favorite frozen drinks, follow the steps below. 1. ADD LIQUIDS - Add any combination of liquid ingredients up to the LIQUIDS mark under SERVES 2 or SERVES 4 located on the blending jar. Liquids include any soft ingredients such as fruit, milk, fruit juice, herbal supplements, or yogurt in any combination you think would be tasty. We are, of course, partial to the Back to Basics® smoothie mixes, which quickly and easily make three delicious 8-ounce smoothies. 2. ADD ICE - Add ice or frozen ingredients until the total level reaches the FROZEN INGREDIENTS line on the side of the blending jar. Frozen ingredients include ice, frozen fruit, frozen yogurt, ice cream, etc. 3. SMOOTH IT - With the lid locked in place and the stir stick (use as directed below) set in the hole on the lid, pulse the mixture 2 or 3 times by pressing the "PULSE" button. Next, push the "LOW" button and mix for 20-30 seconds. Push the "HIGH" button for the final 10-15 seconds of mixing. STIR STICK OPERATION - When in use and while the machine is running, stir or rotate the Stir Stick in a counterclockwise direction so that the Stir Stick scrapes or contacts the sides of the blending jar. This stirring operation will aid in mixing the contents of the blending jar by forcing the ingredients into the mixing blades. 5
-
 1
1 -
 2
2 -
 3
3 -
 4
4 -
 5
5 -
 6
6 -
 7
7 -
 8
8 -
 9
9 -
 10
10 -
 11
11 -
12
-
13
-
14
-
15
-
16
-
17
-
18
-
19
-
20
-
21
-
22
-
23
-
24
-
25
-
26
-
27
-
28
-
29
-
30
-
31
-
32
-
33
-
34
-
35
-
36
 |
 |
