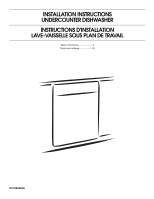
Whirlpool DU810SWPU Installation Instructions - Page 3
Installation Requirements - dishwasher
 |
View all Whirlpool DU810SWPU manuals
Add to My Manuals
Save this manual to your list of manuals |
Page 3 highlights
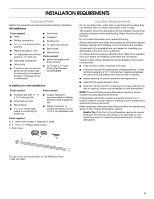
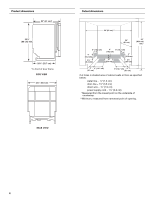
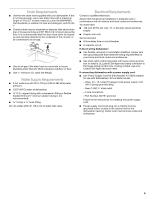
INSTALLATION REQUIREMENTS Tools and Parts Gather the required tools and parts before starting installation. All installations Tools needed: ■ Pliers ■ Phillips screwdriver y ¹⁄₄" nut drivers or hex sockets ■ Measuring tape or ruler ■ 10" adjustable wrench that opens to 1¹⁄₈" (2.9 cm) ■ Flat-blade screwdriver ■ Utility knife ■ 2 twist-on wire connectors which are the proper size to connect your household wiring to 16-gauge wiring in dishwasher ■ Small level ■ Flashlight ■ Shallow pan open-end wrench ■ Bath towell ■ Wood block Parts needed: ■ Shims (if installed with built-up floor) Compr x ³⁄₄" hose fitting. (Part Number W10273460A) In addition, for new installations Tools needed: ■ Cordless drill with y 1¹⁄₂" hole saw bits ■ Small tubing cutter ■ Wire stripper ■ 1¹⁄₂" to 2" screw-type clamp is connecting to waste-tee Parts needed: ■ Copper tubing (³⁄₈" recommended) or flexible stainless steel braided fill line ■ Clamp connector or conduit connector to fit a 2.2 cm) diameter hole Parts supplied A. 2 - drain hose clamps, 1 large and 1 small B. 2 - # 10 x ¹⁄₂" Phillips-head screws C. Drain hose Location Requirements Do not run drain lines, water lines or electrical wiring where they can interfere with or contact dishwasher motor or legs. The location where the dishwasher will be installed must provide clearance between motor and flooring. Motor should not touch the floor. Do not install dishwasher over carpeted flooring. Shelter dishwasher and water lines leading to dishwasher against freezing. Damage from freezing is not covered by the warranty. A side panel kit is available from your dealer for installing your dishwasher at the end of your cabinetry. A moisture barrier accessory (Part Number 4396277) is available from your dealer for installing underneath the countertop. Check location where dishwasher will be installed. The location must provide: ■ easy access to water, electricity and drain. ■ convenient access for loading and unloading dishes. Corner locations require a 2" (5.1 cm) minimum clearance between the side of the dishwasher door and the wall or cabinet. ■ square opening for proper operation and appearance. ■ cabinet front perpendicular to floor. ■ level floor. (If floor at front of opening is not level with floor at rear of opening, shims may be needed to level dishwasher.) NOTE: To avoid shifting during dishwasher operation, shims must be securely attached to the floor. If dishwasher will be left unused for a period of time or in a location where it may be subject to freezing, have it winterized by authorized service personnel. Make sure pipes, wires and drain hose are within the shaded area shown in the "Cutout dimensions" section. Helpful Tip: If the floor in the dishwasher opening is uneven (example: tile flooring only partway into opening), you will need to be exact in measuring dimensions and in leveling dishwasher. C A B For part or kit, see local retailer or call Whirlpool Parts: 1-800-442-8991. 3
-
 1
1 -
 2
2 -
 3
3 -
 4
4 -
 5
5 -
 6
6 -
 7
7 -
 8
8 -
 9
9 -
10
-
11
-
12
-
13
-
14
-
15
-
16
-
17
-
18
-
19
-
20
-
21
-
22
-
23
-
24
-
25
-
26
-
27
-
28
-
29
-
30
-
31
-
32
-
33
-
34
-
35
-
36
 |
 |
