Whirlpool DU810SWPU Installation Instructions - Page 9
Prepare Dishwasher
 |
View all Whirlpool DU810SWPU manuals
Add to My Manuals
Save this manual to your list of manuals |
Page 9 highlights
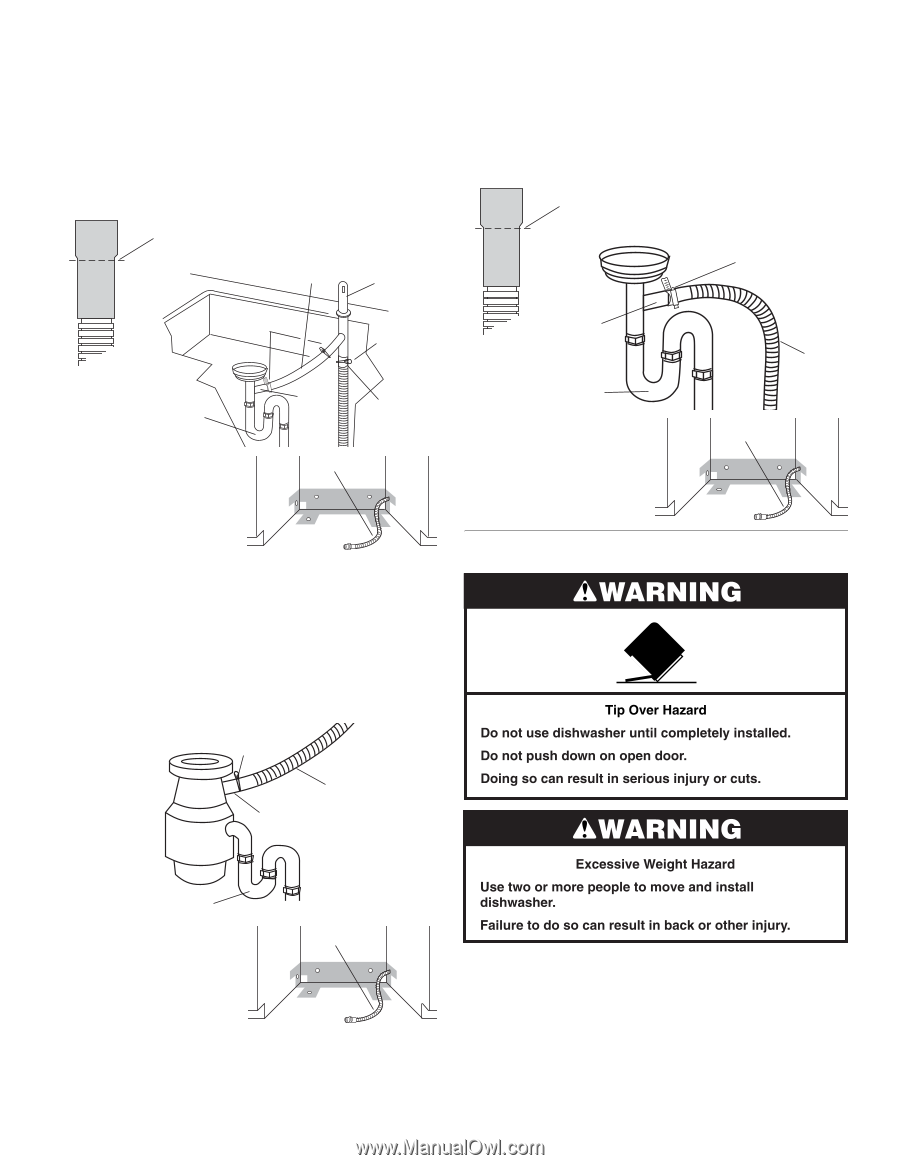
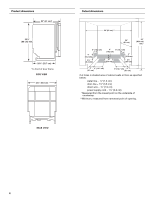
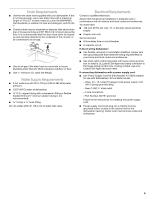
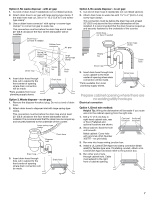
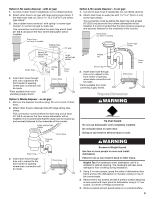
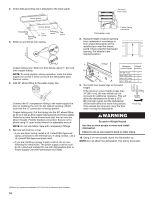
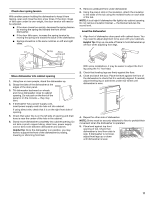
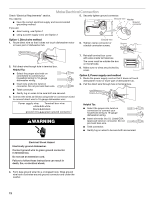
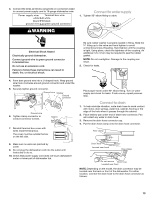
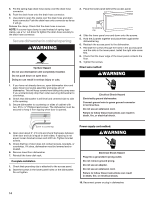
Option 2, No waste disposer - with air gap: 1. Cut end of drain hose if needed (do not cut ribbed section). 2. Attach drain hose to air gap with large spring-type clamp. If the drain hose was cut, use a 1¹⁄₂" to 2" (3.8 to 5 cm) screwtype clamp*. 3. Use a rubber hose connector* with spring- or screw-type clamps* to connect air gap to waste tee. This connection must be before the drain trap and at least 20" (50.8 cm) above the floor where dishwasher will be installed. Drain hose cut here if needed Rubber hose connector Spring- or screw-type clamps Air gap Large spring-type clamp Drain trap Waste tee Drain hose 4. Insert drain hose through hole cut in cabinet to the front center of opening where drain connection will be made. *Parts available from local plumbing supply stores. Drain hose Option 3, Waste disposer - no air gap: 1. Remove the disposer knockout plug. Do not cut end of drain hose. 2. Attach drain hose to disposer inlet with large spring-type clamp. This connection must be before the drain trap and at least 20" (50.8 cm) above the floor where dishwasher will be installed. It is recommended that the drain hose be looped up and securely fastened to the underside of the counter. Large spring-type clamp Option 4, No waste disposer - no air gap: 1. Cut end of drain hose if needed (do not cut ribbed section). 2. Attach drain hose to waste tee with 1¹⁄₂" to 2" (3.8 to 5 cm) screw-type clamp*. This connection must be before the drain trap and at least 20" (50.8 cm) above the floor where dishwasher will be installed. It is recommended that the drain hose be looped up and securely fastened to the underside of the counter. Drain hose cut here if needed Screw-type clamp Waste tee Drain trap 3. Insert drain hose through hole cut in cabinet to the front center of opening where drain connection will be made. *Parts available from local plumbing supply stores. Drain hose Prepare Dishwasher Drain hose Drain hose Disposer inlet Drain trap 3. Insert drain hose through hole cut in cabinet to the front center of opening where drain connection will be made. Drain hose Helpful Tip: Put cardboard under dishwasher until it is installed in cabinet opening. The cardboard will help avoid damage to floor covering during installation. 1. Using 2 or more people, grasp the sides of dishwasher door frame and put the dishwasher on its back, resting on top of the corner posts. 2. Remove the 2 top screws and the 2 bottom screws attaching access panel and lower panel to dishwasher using a ¹⁄₄" hex socket, nut driver or Phillips screwdriver. 3. Remove panels and set panels aside on a covered surface. 9
-
 1
1 -
2
-
3
-
 4
4 -
 5
5 -
 6
6 -
 7
7 -
 8
8 -
 9
9 -
 10
10 -
 11
11 -
 12
12 -
 13
13 -
 14
14 -
15
-
16
-
17
-
18
-
19
-
20
-
21
-
22
-
23
-
24
-
25
-
26
-
27
-
28
-
29
-
30
-
31
-
32
-
33
-
34
-
35
-
36
 |
 |