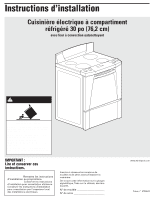
Whirlpool GR556LRKS Installation Instructions - Page 8
For cleaning and maintenance, If range does not operate, If you need assistance or service
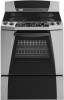 |
View all Whirlpool GR556LRKS manuals
Add to My Manuals
Save this manual to your list of manuals |
Page 8 highlights
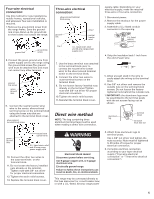
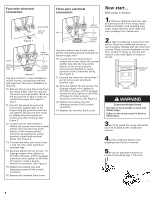
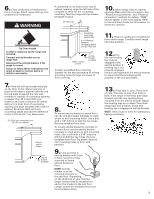
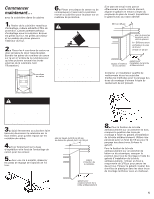
14. Push in and turn each surface unit control OFF LO HI knob to "HI" position. Check the operation of the cooktop elements and indicator lights. MED LO MED HI MED 15. Check the operation of the oven element. Press the "BAKE" pad. "350°F" will appear in the temperature display. Press the "START" pad. "LO" will appear in the display; then "170°F" (when oven reaches 170°F). The bottom element should glow red and the indicator light should be on. The upper element should become hot but not glow red. As the oven temperature rises, the temperature in the display will increase in 5°F increments until the oven reaches the set temperature. Press "CANCEL/OFF" pad. 16. Check the operation of the broil element. Close the oven door. Press the "BROIL" pad. "500°F" will appear in the temperature display. Press the "START" pad. Look through the oven window. The top element should glow red. Press the "CANCEL/OFF" pad. To get the most efficient use from your new electric range, read your Use and Care Guide. Keep Installation Instructions and Use and Care Guide close to the electric range for easy reference. For cleaning and maintenance... If removing the range is necessary for cleaning or maintenance, disconnect the electric supply. If electrical supply is inaccessible, lift the range slightly at the front and pull the range away from the wall. Pull the range out only as far as necessary to disconnect the electrical supply line. Remove the range to complete cleaning or maintenance. Move range back into operating position. Remove drawer. Level the range. Reconnect the electrical supply. Make sure that left rear leveling leg is engaged in the anti-tip bracket. If range does not operate: ✓ Check that the circuit breaker is not tripped or the house fuse blown. ✓ Check that the power supply cord is plugged into the outlet (120 V models). ✓ See Use and Care Guide for troubleshooting list. NOTE: Refer to Use and Care Guide for operating and cleaning instructions. If you need assistance: If you have questions about operating, cleaning or maintaining your range: ✓ Refer to Use and Care Guide. ✓ Call the Customer Interaction Center. Check your Use and Care Guide for a toll-free number to call or call the dealer from whom you purchased this appliance. The dealer is listed in the Yellow Pages of your phone directory under "Appliances - Household - Major - Service and Repair." If you need service: Maintain the quality built into your range by calling an authorized service company. To obtain the name and number of the authorized service company: ✓ Contact the dealer from whom you purchased your range; or ✓ Look in the Yellow Pages of your telephone directory under "Appliances - Household - Major - Service and Repair;" or ✓ Call the Customer Interaction Center. The toll-free number is listed in your Use and Care Guide. When you call, you will need: ✓ The range model number. ✓ The range serial number. Both numbers are listed on the model/serial rating plate located on the oven frame behind the door. Part No. 9758643 ©2004 Whirlpool Corporation Benton Harbor, Michigan 49022 Printed in U.S.A. 01/2004
-
 1
1 -
2
-
 3
3 -
 4
4 -
 5
5 -
 6
6 -
 7
7 -
 8
8 -
 9
9 -
 10
10 -
 11
11 -
 12
12 -
 13
13 -
14
-
15
-
16
 |
 |
