Whirlpool GW397LXUT Installation Instructions - Page 16
Important
 |
UPC - 883049127804
View all Whirlpool GW397LXUT manuals
Add to My Manuals
Save this manual to your list of manuals |
Page 16 highlights
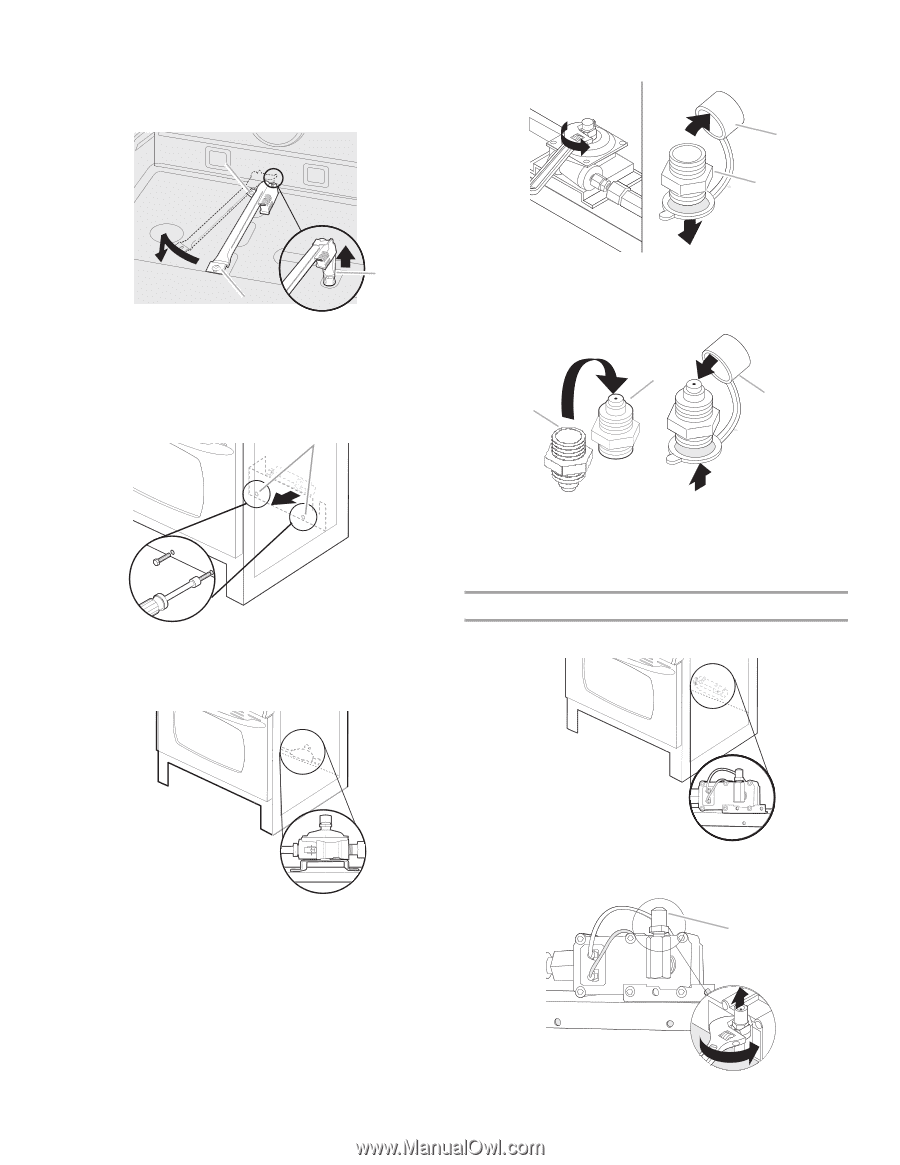
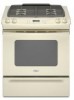
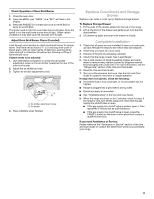
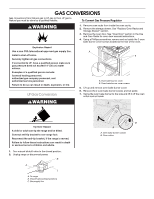
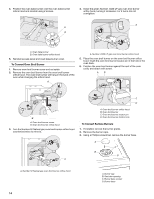
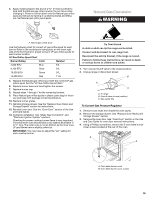
5. Lift up and remove oven bake burner cover. 6. Remove the 2 oven bake burner screws and set aside. 7. Swing the oven bake burner to the side and lift it off the oven orifice and set aside. A 10. Unscrew the regulator cap and remove the plastic cover. A B B A A. Oven bake burner screws B. Oven orifice 8. Locate the access panel at the rear of the storage drawer compartment. Using a ¼" (6 mm) nut driver, unscrew the 2 access panel screws. Remove access panel and set aside along with the 2 screws. A A. Plastic cover B. Regulator cap 11. Flip the regulator cap over and replace the plastic cover. B C A A. Access panel screws 9. Locate gas pressure regulator at the rear of the storage drawer compartment. 2 A. LP gas position B. Natural gas position C. Plastic cover 12. Screw the regulator cap securely back into place. Do not overtighten. To Convert Oven Bake Burner 1. Locate the oven orifice hood from the front of the range. 2 IMPORTANT: Do not remove the gas pressure regulator. 2. Using an adjustable wrench, turn the Number .0512 LP gas oven bake burner orifice hood counterclockwise to remove. .0152 A A. Number .0512 LP gas oven bake burner orifice hood 16
-
 1
1 -
2
-
3
-
4
-
5
-
6
-
7
-
8
-
9
-
10
-
 11
11 -
 12
12 -
 13
13 -
 14
14 -
 15
15 -
 16
16 -
 17
17 -
 18
18 -
 19
19 -
 20
20 -
 21
21 -
22
-
23
-
24
-
25
-
26
-
27
-
28
-
29
-
30
-
31
-
32
-
33
-
34
-
35
-
36
 |
 |