Whirlpool RF378LXPQ Installation Instructions - Page 7
Operating position, Check operation
 |
View all Whirlpool RF378LXPQ manuals
Add to My Manuals
Save this manual to your list of manuals |
Page 7 highlights
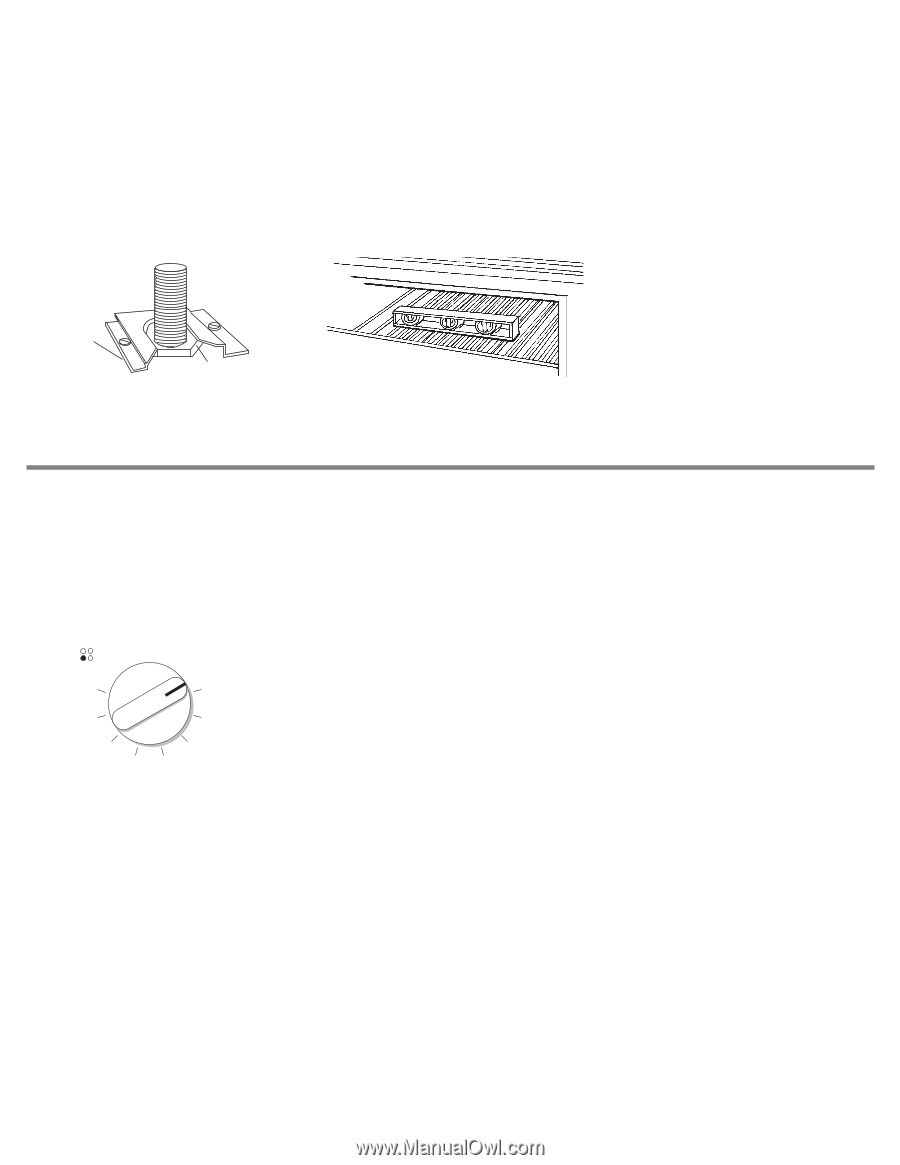
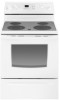
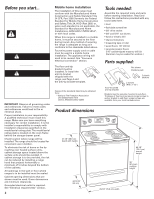
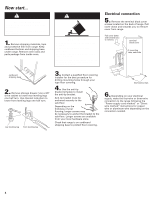
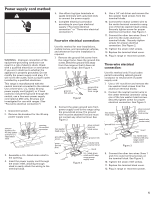
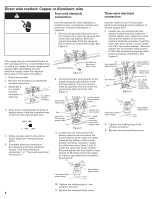
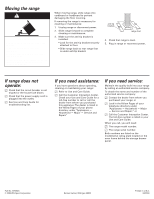
Operating position Before moving range across floor, check that range is still on cardboard shipping base to protect floor covering. 7. Make sure the anti-tip bracket is installed: • Look for the anti-tip bracket securely attached to floor. • Slide range back so rear range foot is under anti-tip bracket. 8. If installing the range in a mobile home, you must secure the range to the floor. Any method of securing the range is adequate as long as it conforms to the standards in the "Mobile home installation"section. 9. Place rack in oven. Place level on rack, first side to side; then front to back. anti-tip bracket range foot If range is not level, pull range forward until rear leveling leg is removed from the anti-tip bracket. Use 3/8" drive ratchet and channel lock pliers to adjust leveling legs up or down until range is level. Push range back into position. Check that rear leveling leg is engaged in anti-tip bracket. NOTE: Oven must be level for satisfactory baking conditions. 10. Replace the storage drawer or lower panel. 11. Reconnect power. Check operation 12. Check the operation of the cooktop elements: Push in and turn each surface unit control knob to "HI" position. Check the operation of the cooktop elements and indicator lights. FRONT OFF LO 2 HI 8 3 7 4 6 5 13. Check the operation of the oven: If your oven has one of the two types of electronic controls shown: 1. Press the "BAKE" pad. • Depending on model, the "BAKE" and "TEMP" indicators will light and "350" will appear in the display or, the "BAKE" indicator will light and "350" will appear in the display. • The "START" indicator will begin flashing after 5 seconds. 2. Press the "START/ENTER" pad. • The "ON" indicator will light. • The "TEMP" indicator will turn off. • The display will show the automatic countdown time needed to preheat the oven to the selected temperature ("350") and begin counting down. • The bottom element should glow red. • The upper element should become hot, but not glow red. 3. Press the "OFF/CANCEL" pad. NOTE: The oven will not go through preheat if the oven temperature is above 170° F; instead, the "TEMP" indicator will light and the selected temperature will appear in the display. 4. Press the "CUSTOM BROIL" pad. • Depending on model, the "BROIL" and "TEMP" indicators will light and "500" will appear in the display or, the "BROIL" indicator will light and "500" will appear in the display. • The "START" indicator will begin flashing after 5 seconds. 5. Press the "START/ENTER" pad. • The "ON" indicator will light. • The upper element will glow red. 6. Press the "OFF/CANCEL" pad. You have just finished installing your new range. To get the most efficient use from your range, read your Use & Care Guide. Keep Installation Instructions and Guide close to range for easy reference. The instructions will make installing the range in another home as easy as the first installation. 7
-
 1
1 -
 2
2 -
 3
3 -
 4
4 -
 5
5 -
 6
6 -
 7
7 -
 8
8
 |
 |