Whirlpool WED49STBW Installation Guide - Page 17
Connect Vent
 |
View all Whirlpool WED49STBW manuals
Add to My Manuals
Save this manual to your list of manuals |
Page 17 highlights
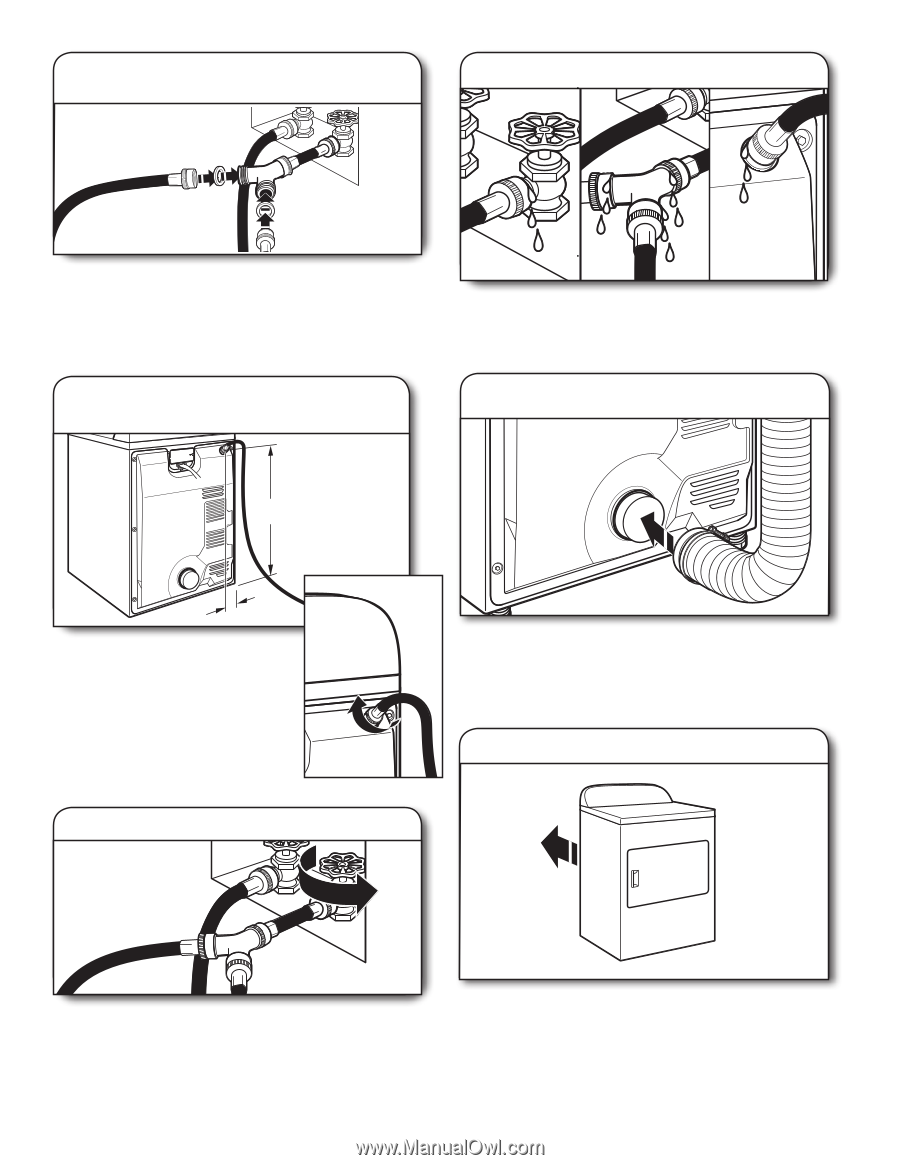
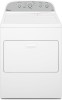
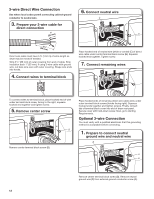
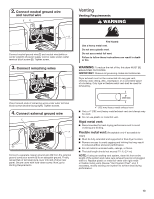
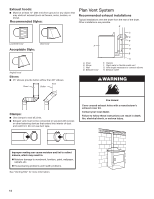
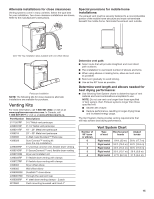
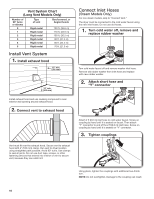
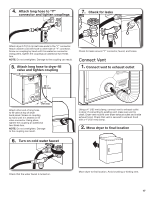
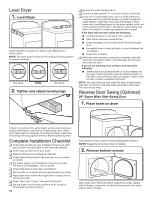
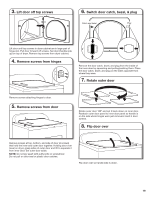
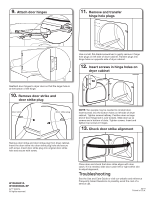
4. Attach long hose to "Y" connector and tighten couplings 7. Check for leaks Attach dryer 5 ft (1.5 m) inlet hose ends to the "Y" connector. Attach washer cold inlet hose to other side of "Y" connector. Screw on coupling by hand until it is seated on connector. Using pliers, tighten the couplings an additional two-thirds turn. NOTE: Do not overtighten. Damage to the coupling can result. 5. Attach long hose to dryer fill valve and tighten coupling Check for leaks around "Y" connector, faucet, and hoses. Connect Vent 1. Connect vent to exhaust outlet 301/4" (768 mm) 4" (101 mm) Attach other end of long hose to fill valve at top of dryer back panel. Screw on coupling by hand until it is seated on fill valve connector. Using pliers, tighten the coupling an additional two-thirds turn. NOTE: Do not overtighten. Damage to the coupling can result. 6. Turn on cold water faucet Using a 4" (102 mm) clamp, connect vent to exhaust outlet in dryer. If connecting to existing vent, make sure vent is clean. Dryer vent must fit over dryer exhaust outlet and inside exhaust hood. Check that vent is secured to exhaust hood with a 4" (102 mm) clamp. 2. Move dryer to final location Check that the water faucet is turned on. Move dryer to final location. Avoid crushing or kinking vent. 17
-
 1
1 -
2
-
3
-
4
-
5
-
6
-
7
-
8
-
9
-
10
-
11
-
 12
12 -
 13
13 -
 14
14 -
 15
15 -
 16
16 -
 17
17 -
 18
18 -
 19
19 -
 20
20
 |
 |