Whirlpool WFG505M0BS Use & Care Guide - Page 7
Electronic Oven Control, Display, Oven Indicator Lights, Start, Off/Cancel, Clock, Tones - lowe s
 |
View all Whirlpool WFG505M0BS manuals
Add to My Manuals
Save this manual to your list of manuals |
Page 7 highlights
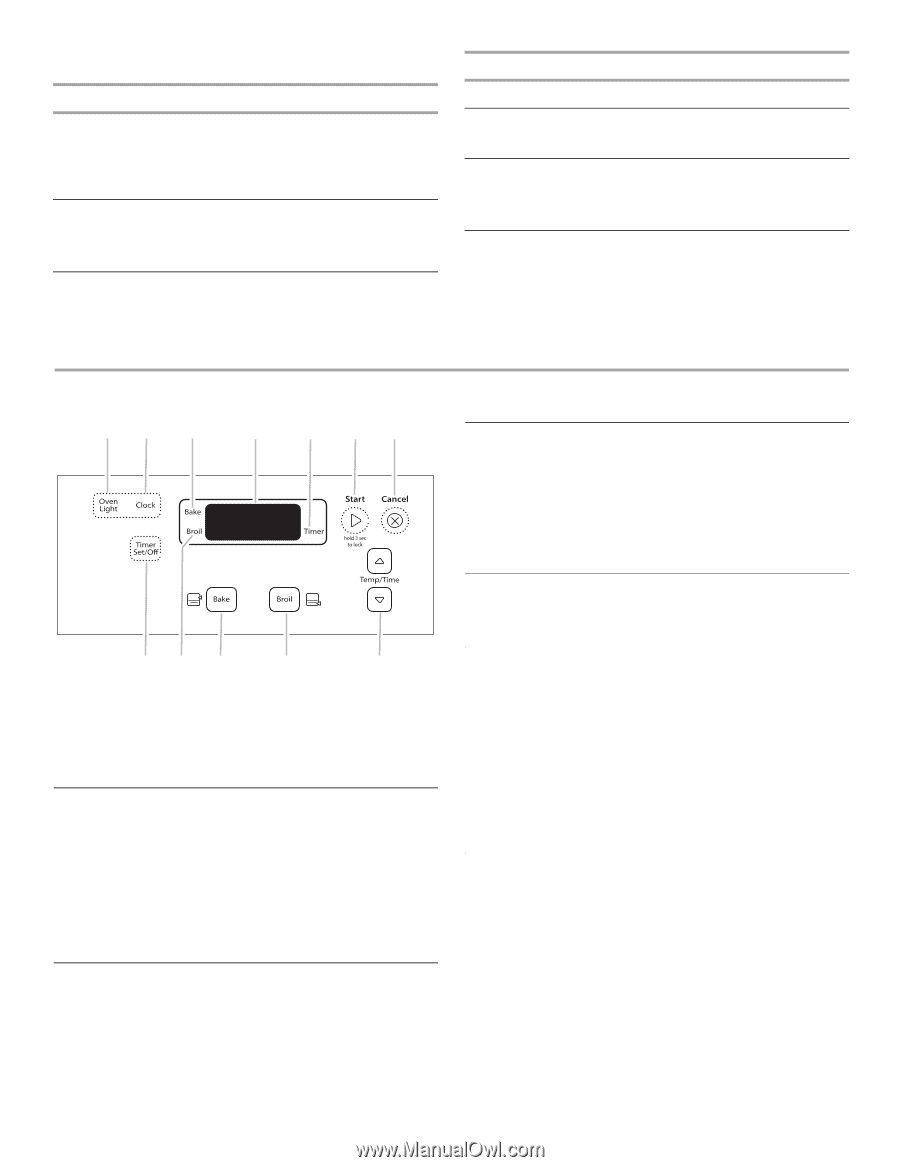
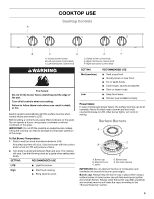
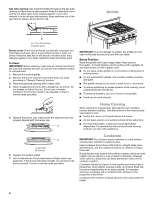
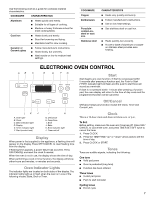
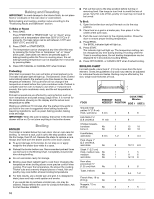
Use the following chart as a guide for cookware material characteristics. COOKWARE CHARACTERISTICS Aluminum ■ Heats quickly and evenly. ■ Suitable for all types of cooking. ■ Medium or heavy thickness is best for most cooking tasks. Cast iron ■ Heats slowly and evenly. ■ Good for browning and frying. ■ Maintains heat for slow cooking. Ceramic or Ceramic glass ■ Follow manufacturer's instructions. ■ Heats slowly, but unevenly. ■ Ideal results on low to medium heat settings. COOKWARE Copper Earthenware Porcelain enamel-onsteel or cast iron Stainless steel CHARACTERISTICS ■ Heats very quickly and evenly. ■ Follow manufacturer's instructions. ■ Use on low heat settings. ■ See stainless steel or cast iron. ■ Heats quickly, but unevenly. ■ A core or base of aluminum or copper on stainless steel provides even heating. ELECTRONIC OVEN CONTROL AB C D E FG Start Start begins any oven function. If Start is not pressed within 5 seconds after pressing a function pad, the Push to Start ("PSH") indicator light will flash and the push to start tone will sound as a reminder. If Start is not pressed within 1 minute after pressing a function pad, the oven display will return to the time of day mode and the programmed function will be canceled. Off/Cancel Off/Cancel stops any function except the Clock, Timer and Control Lock. LK J A. Oven light B. Clock C. Bake indicator light D. Display E. Timer indicator light F. Start (control lock) I H G. Off/cancel H. Temp/time I. Broil J. Bake K. Broil indicator light L. Timer set/off Display When power is first supplied to the appliance, a flashing time will appear on the display. Press OFF/CANCEL to clear flashing time from the display. If flashing time appears, a power failure has occurred. Press OFF/CANCEL and reset the clock if needed. When the oven is not in use, the display shows the time of day. When performing a cook or timer function, the display will show either hours and minutes, or minutes and seconds. Oven Indicator Lights The indicator lights are located on both sides of the display. The indicator lights light up or flash when the oven is in one of the following modes: Bake, Broil or Timer. Clock This is a 12-hour clock and does not show a.m. or p.m. To Set: Before setting, make sure the oven and Timer are off. Press OFF/ CANCEL to cancel the oven, and press TIMER SET/OFF twice to cancel the timer. 1. Press CLOCK. 2. Press the TEMP/TIME "up" or "down" arrow pads to set the time of day. 3. Press CLOCK or START. Tones Tones are audible signals, indicating the following: One tone ■ Valid pad press ■ Oven is preheated (long tone) ■ Function has been entered Three tones ■ Invalid pad press ■ Push to start reminder Cycling tones ■ End of cycle 7
-
 1
1 -
 2
2 -
 3
3 -
 4
4 -
 5
5 -
 6
6 -
 7
7 -
 8
8 -
 9
9 -
 10
10 -
 11
11 -
 12
12 -
13
-
14
-
15
-
16
-
17
-
18
-
19
-
20
-
21
-
22
-
23
-
24
-
25
-
26
-
27
-
28
-
29
-
30
-
31
-
32
 |
 |