Whirlpool WMT50011KS Owners Manual - Page 12
Warning
 |
View all Whirlpool WMT50011KS manuals
Add to My Manuals
Save this manual to your list of manuals |
Page 12 highlights
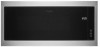
MICROWAVE OVEN CARE Replacing The Cavity Light Cavity Light is located at the top front of the microwave oven, under the cover and is replaceable. Before replacing lamp, make sure lamp is cool. To replace the cavity light refer the following steps: 4. Remove the 4 screws which fasten the trim kit frame to the microwave oven, and set the 4 screws aside. A B 1. Use a Phillips head screwdriver to remove the 4 wood screws C securing the trim kit frame to the cabinet. A. Trim kit frame B. Mounting hole guide C. #7-16x15/16" flat head wood screw (4) D. Cutout ceiling WARNING Excessive Weight Hazard Use two or more people to move and install microwave oven. Failure to do so can result in back or other injury. 2. Using 2 people, slide the microwave oven out of the cabinet. Unplug the microwave oven and place on a stable surface with the microwave door and frame sitting slightly beyond the edge of the surface. BA A. Trim Kit Frame B. #7-18x7/16" round head sheet metal screw (4) C. Screw holes (4) 5. Pull the Trim Kit Frame away from the front of the microwave to release it. Note the 'TOP' and 'up arrow' molded into the frame, the 4 locating pins and the locating slots, set frame aside. B A C A. Trim Kit Frame B. Locating pin (4) C. Locating slot (4) 6. Remove the light cover screw from the top front of the microwave oven. Screw Light cover A. Cabinet B. Microwave Oven 3. Remove the 3 short screws to release the leftside cooling duct, see below pictorial. Set screws and cooling duct aside. 7. Remove the light cover. B A C Top front of the microwave oven A. Leftside Cooling Duct B. Short Screws (3) C. Screw holes (3) 12
-
 1
1 -
2
-
3
-
4
-
5
-
6
-
 7
7 -
 8
8 -
 9
9 -
 10
10 -
 11
11 -
 12
12 -
 13
13 -
 14
14 -
 15
15 -
 16
16 -
 17
17 -
18
-
19
-
20
-
21
-
22
-
23
-
24
-
25
-
26
-
27
-
28
-
29
-
30
-
31
-
32
 |
 |
