Whirlpool WRT108FZD Installation Instructions 1 - Page 1
Whirlpool WRT108FZD Manual
 |
View all Whirlpool WRT108FZD manuals
Add to My Manuals
Save this manual to your list of manuals |
Page 1 highlights
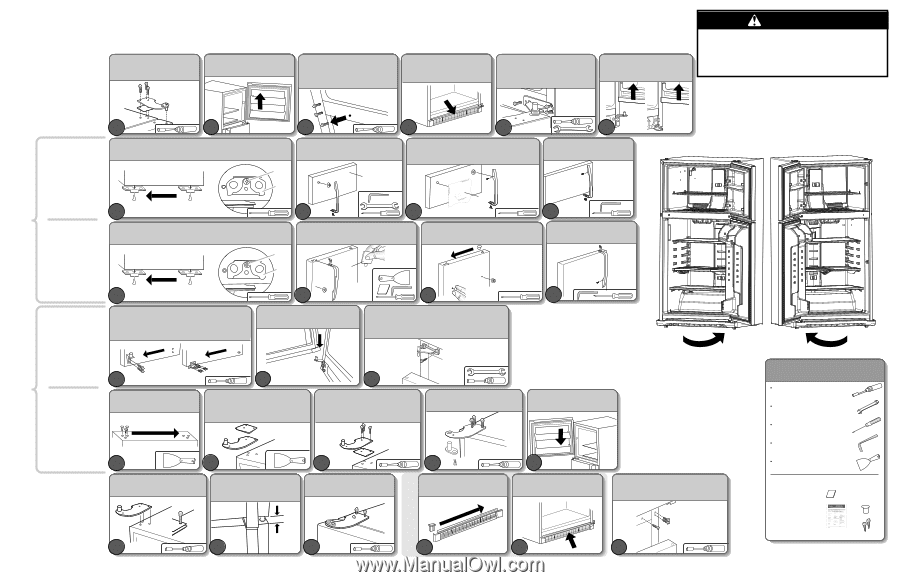
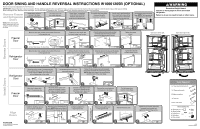
DOOR SWING AND HANDLE REVERSAL INSTRUCTIONS W10661205B (OPTIONAL) Remove food and any adjustable bins from the doors. IMPORTANT: Unplug refrigerator or disconnect power. Provide additional support for the doors while the hinges are being moved. Do not depend on the door magnets to hold the doors in place while you are working. When removing the door, keep the screws and hinges. You will need them to reinstall the door. For more detailed door reversing instructions, see the User Instructions. Remove Freezer and Refrigerator Doors While holding the door, remove 3 hex head screws and the hinge pin. Lift freezer door from the center hinge pin. Center Hinge - Loosen the 2 screws (6 turns) on the lefthand side and remove the screw from the right-hand side. For models with base grilles, firmly pull the grille toward you to remove. Center Hinge - While holding the door, loosen the 2 screws on the right-hand side and remove the screw from the left-hand side. Lift refrigerator door from bottom hinge. NOTE: The hinge style will vary depending on the model. NOTE: After removing the doors, place them on a soft surface to avoid damaging the finish. 1 2 3 4 5 or 6 WARNING Excessive Weight Hazard Use two or more people to move and install refrigerator. Failure to do so can result in back or other injury. Reverse Doors Freezer Door Move the door stop, located on the bottom of the door, to the opposite side. A B Remove the door handle and the Brand badge from the door. BBaradngde 1 A. Door Stop Screw B. Door Stop 2 Place the badge (using the template provided on the last page of the manual), and the handle on the opposite sides of the door. BBaradngde 3 Tighten the handle screws. 4 Open doors left to right. Open doors right to left. Move the door stop, located on the bottom of the door, to the opposite side. Remove the door handle, the screw and the decal or hole plug from the door. Move the decal or hole plug and the handle screw to the opposite sides of the door. Tighten the setscrew and the handle screws. Refrigerator A Door B Install Doors Refrigerator Door Freezer Door 1 A. Door Stop Screw B. Door Stop Move the bottom hinge to the opposite side of the cabinet. Make sure the washer remains on the hinge pin. NOTE: The hinge style will vary depending on the model. 2 Set the Refrigerator door onto the bottom hinge pin. 3 Tighten the two screws (previously loosened), and reinstall and tighten the Center Hinge screw. NOTE: Make sure washers are on both the top and bottom pins of the center hinge. or 1 Move the 3 cabinet hole plugs to the opposite side. 2 Move the plastic spacer from above the top hinge to below the hinge, and place the hinge on opposite side of cabinet. 3 Insert the 3 Top Hinge screws so they are halfway into the Top Hinge, plastic spacer and the top of the cabinet. Remove the screw fastening the hinge pin to the hinge. 4 Set the freezer door onto the Center Hinge. Align Doors W10661205B © 2014 Whirlpool Corporation. All rights reserved. 1 Install the Top Hinge pin, but do not tighten completely. 2 Align the Freezer and Refrigerator doors. NOTE: Make sure to allow a ¾" (19 mm) gap between the doors. 3 Completely tighten the 4 Top Hinge screws. ¾" (19 mm) 1 2 3 Steps 4 & 5 apply only to certain models 4 Move the base grille cover to the opposite side. 5 Reinstall the base grille. Tighten the two screws (previously loosened), and reinstall and tighten the Center Hinge screw. 4 5 6 Tools Required ‡ 5/16" Hex head socket wrench ‡ 5/16" Open-end wrench ‡ Phillips screwdriver ‡ ¼1/8" Hex key ‡ Flat 2" putty knife Reversibility Kit (a) Removal tool (a) (b) Brand badge (c) Instructions (c) (d) Hole plug (e) Two screws (b) Brand Badge (d) (e) 6/14 Printed in Mexico
-
 1
1 -
 2
2
 |
 |