Whirlpool WRT519SZDM Use & Care Guide - Page 9
Door Swing Reversal optional
 |
View all Whirlpool WRT519SZDM manuals
Add to My Manuals
Save this manual to your list of manuals |
Page 9 highlights
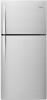
Install Freezer Door 1. Place washer on the upper hinge pin of the center hinge. 2. Place the freezer door on the upper hinge pin of the center hinge. 3. Insert the top hinge pin into the drilled hole in the top of the freezer door. Do not tighten the screws completely 4. Align the doors so that the bottom of the freezer door aligns evenly with the top of the refrigerator door. Tighten all screws. NOTE: The distance between the doors should be approximately ³⁄₄" (19 mm). Style 1-Contour Door Final Steps 1. Plug in the refrigerator or reconnect the power. 2. Reset the controls. See "Using the Controls." 3. Return all removable door parts to doors and food to refrigerator. Door Removal & Replacement Top Hinge Door Swing Reversal (optional) 1-1 1-2 A A A. Cabinet Hinge Hole Plugs B A C A. 5/16" Hex-Head Hinge Screws, Dome Caps and Dome Cap Washers 2 B. Top Hinge C. Hinge Pin Center Hinge A B A. Center Hinge B. 5/16" Hex-Head Hinge Screws Bottom Hinge 6A A B 3 A C A. Shoulder Screw B. Setscrew C. Flat-Head Handle Screw A B C A. Bottom Hinge B. Washer C. 5/16" Hex-Head Hinge Screws A. Flat-Head Handle Screw 5 Reinstallation of Door Stops AB A. Door Hinge Hole Plug 4 Removal of Door Stops A B A. Door Stop B. Door Stop Screw 7 A. Door Stop B. Door Stop Screw A. Door Handle Hole Cap 9
-
 1
1 -
2
-
3
-
 4
4 -
 5
5 -
 6
6 -
 7
7 -
 8
8 -
 9
9 -
 10
10 -
 11
11 -
 12
12 -
 13
13 -
 14
14 -
15
-
16
-
17
-
18
-
19
-
20
-
21
-
22
-
23
-
24
-
25
-
26
-
27
-
28
-
29
-
30
-
31
-
32
-
33
-
34
-
35
-
36
-
37
-
38
-
39
-
40
-
41
-
42
-
43
-
44
-
45
-
46
-
47
-
48
-
49
-
50
-
51
-
52
-
53
-
54
-
55
-
56
-
57
-
58
-
59
-
60
-
61
-
62
-
63
-
64
 |
 |
