Whirlpool WVW53UC6FS Installation Guide - Page 10
Install Vent Covers, Complete Installation
 |
View all Whirlpool WVW53UC6FS manuals
Add to My Manuals
Save this manual to your list of manuals |
Page 10 highlights
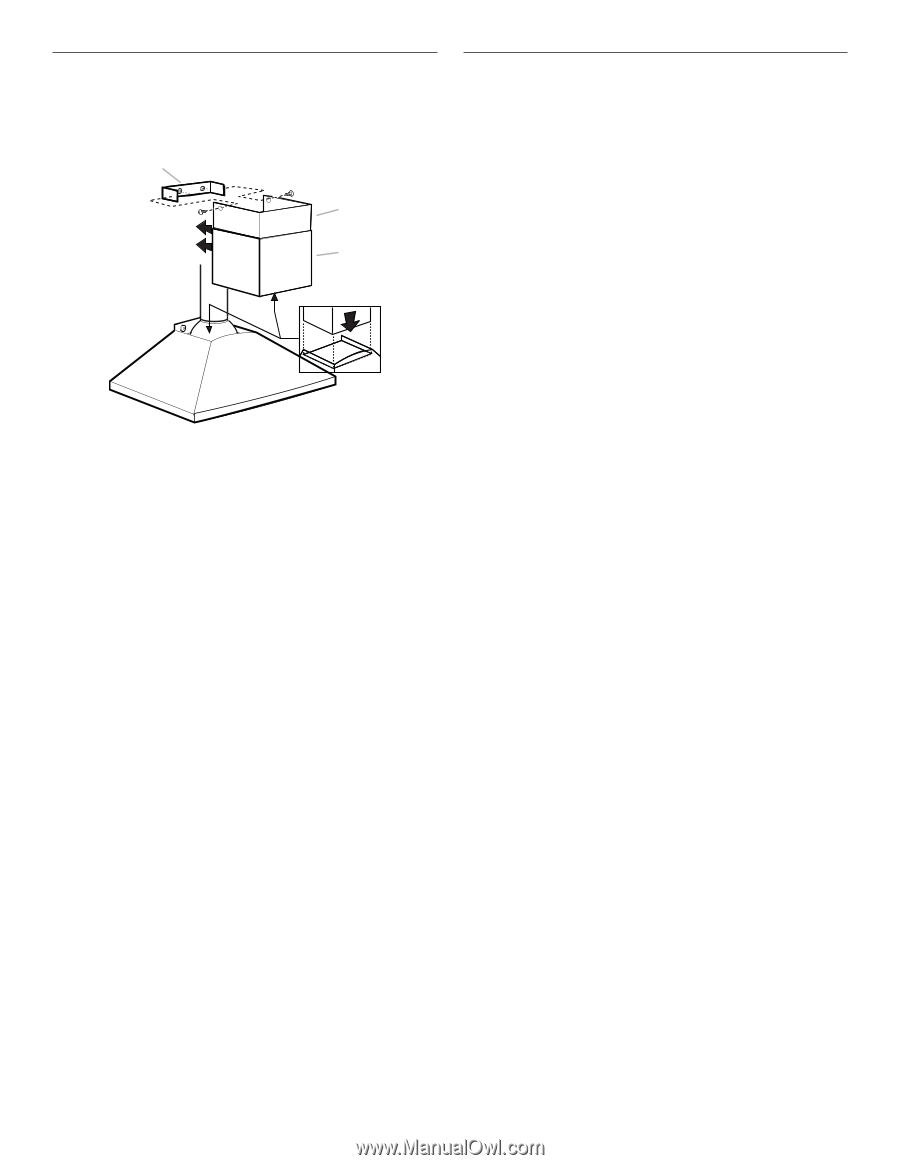
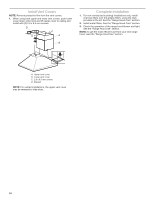
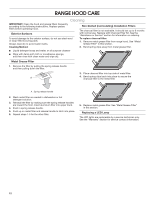
Install Vent Covers NOTE: Remove protective film from the vent covers. 1. When using both upper and lower vent covers, push lower cover down onto hood and lift upper cover to ceiling and install with (2) 2.9 x 6.5 mm screws. D C C A B Complete Installation 1. For non-vented (recirculating) installations only, install charcoal filters over the grease filters, using the clips provided in the kit. See the "Range Hood Care" section. 2. Install metal filters. See the "Range Hood Care" section. 3. Check the operation of the range hood blower and light. See the "Range Hood Use" section. NOTE: To get the most efficient use from your new range hood, read the "Range Hood Use" section. A. Upper vent cover B. Lower vent cover C. 2.9 x 6.5 mm screws D. Bracket NOTE: For vented installations, the upper vent cover may be reversed to hide slots. 10
-
 1
1 -
2
-
3
-
4
-
 5
5 -
 6
6 -
 7
7 -
 8
8 -
 9
9 -
 10
10 -
 11
11 -
 12
12 -
 13
13 -
 14
14 -
 15
15 -
16
-
17
-
18
-
19
-
20
-
21
-
22
-
23
-
24
-
25
-
26
-
27
-
28
-
29
-
30
-
31
-
32
 |
 |