Yamaha CLP-565GP Owner's Manual - Page 107
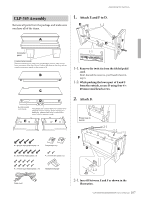
CLP-585 Assembly
 |
View all Yamaha CLP-565GP manuals
Add to My Manuals
Save this manual to your list of manuals |
Page 107 highlights
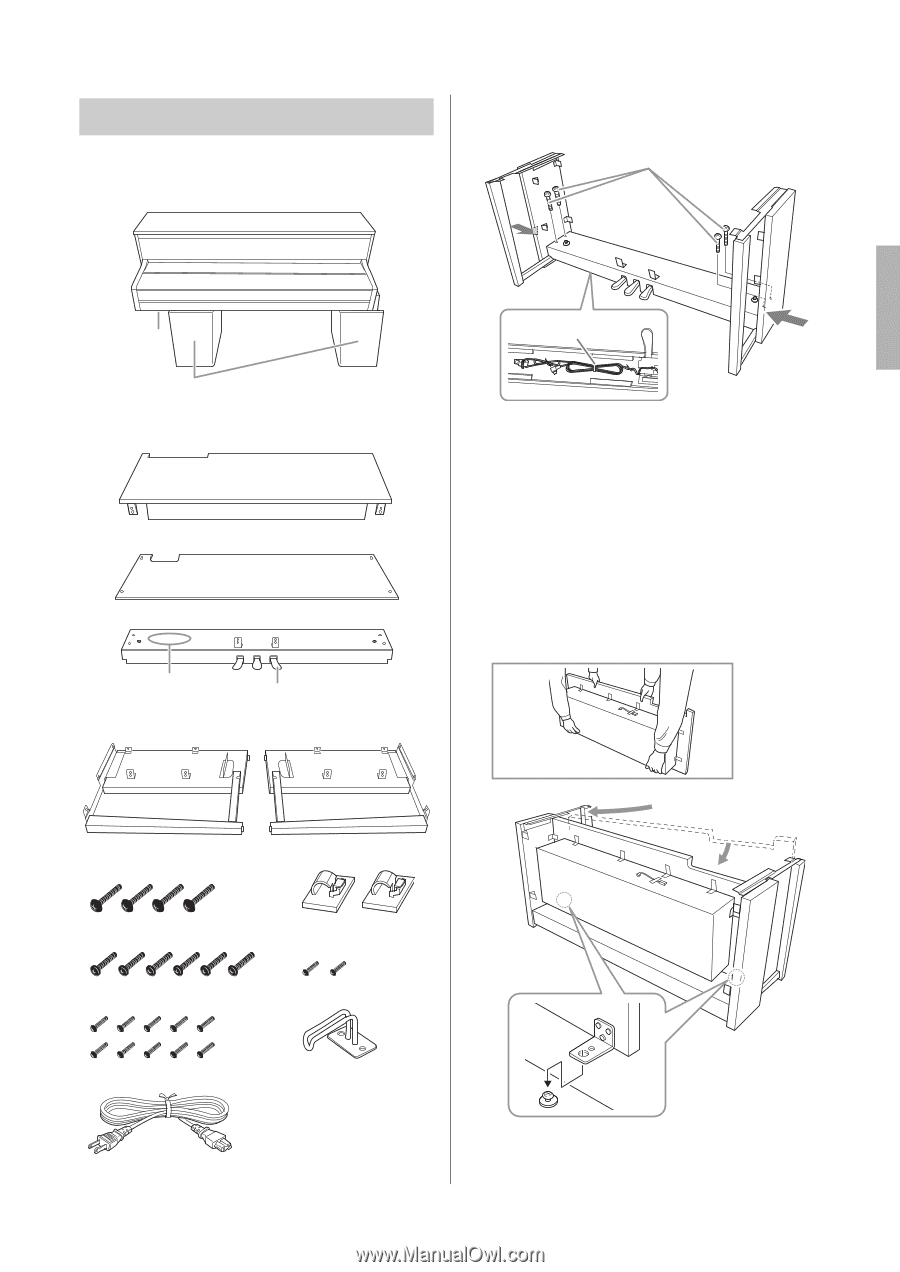
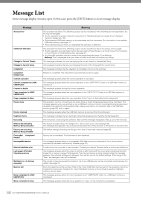
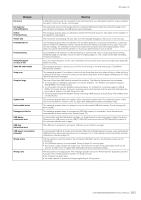
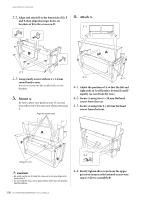
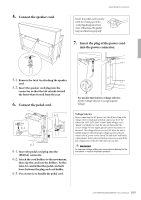
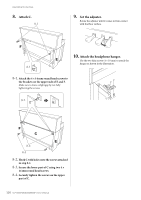
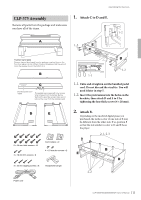
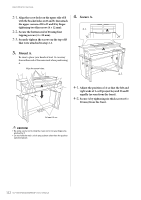
Assembling the Clavinova CLP-585 Assembly Remove all parts from the package and make sure you have all of the items. 1. Attach E and F to D. E 1-2 A Connector panel Foamed styrol pads Remove foamed styrol pads from the package, position them on the floor, then place A on top of them. Position the pads so that they will not hide the connector panel on the bottom of A. B C D Bundled pedal cord inside The pedals are covered with vinyl covers when shipped from the factory. Before starting the assembly, please make sure to remove the cover from the damper pedal. E F 6 × 20 mm round head screws × 4 Cord holders × 2 6 × 20 mm flat head screws × 6 4 × 10 mm thin screws × 2 F D 1-1 1-1. Remove the twist tie from the folded pedal cord. Don't discard the twist tie, you'll need it later in step 6. 1-2. While pushing the lower part of E and F from the outside, secure D using four 6 × 20 mm round head screws. 2. Attach B. Proper way to hold B F D 2-1 B 2-2 E 4 × 14 mm round head screws × 10 Headphone hanger Power cord 2-2 2-1. Insert B between E and F as shown in the illustration. 107 CLP-585/575/545/535/565GP Owner's Manual
-
 1
1 -
2
-
3
-
4
-
5
-
6
-
7
-
8
-
9
-
10
-
11
-
12
-
13
-
14
-
15
-
16
-
17
-
18
-
19
-
20
-
21
-
22
-
23
-
24
-
25
-
26
-
27
-
28
-
29
-
30
-
31
-
32
-
33
-
34
-
35
-
36
-
37
-
38
-
39
-
40
-
41
-
42
-
43
-
44
-
45
-
46
-
47
-
48
-
49
-
50
-
51
-
52
-
53
-
54
-
55
-
56
-
57
-
58
-
59
-
60
-
61
-
62
-
63
-
64
-
65
-
66
-
67
-
68
-
69
-
70
-
71
-
72
-
73
-
74
-
75
-
76
-
77
-
78
-
79
-
80
-
81
-
82
-
83
-
84
-
85
-
86
-
87
-
88
-
89
-
90
-
91
-
92
-
93
-
94
-
95
-
96
-
97
-
98
-
99
-
100
-
101
-
 102
102 -
 103
103 -
 104
104 -
 105
105 -
 106
106 -
 107
107 -
 108
108 -
 109
109 -
 110
110 -
 111
111 -
 112
112 -
113
-
114
-
115
-
116
-
117
-
118
-
119
-
120
-
121
-
122
-
123
-
124
-
125
-
126
 |
 |