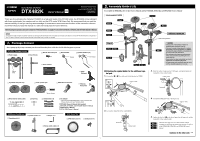
Yamaha DTX482K DTX482K Owners Manual - Page 2
Assembly Guide 2/2, Setting up the drum mod - e drum set
 |
View all Yamaha DTX482K manuals
Add to My Manuals
Save this manual to your list of manuals |
Page 2 highlights
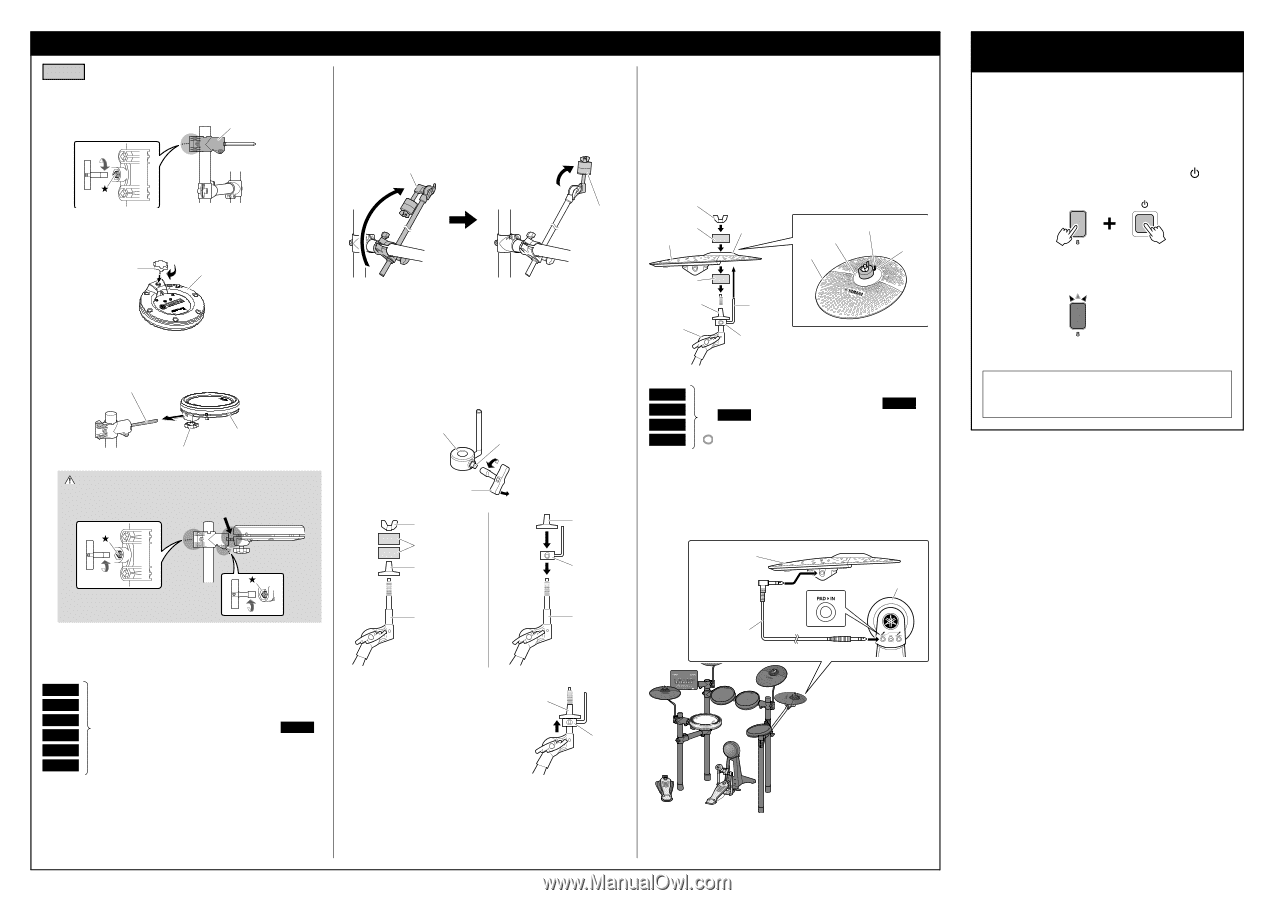
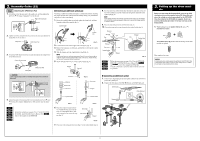
2. Assembly Guide (2/2) Step 4 Attaching the XP80 Snare Pad 1. Attach the rod for the snare pad to the small rack, and then tighten the key bolt () by using a tuning key to secure the rod. Rod for the snare pad 2. Lightly screw the clamp bolt into the socket on the snare pad. (Rotate the clamp bolt five to six times.) Clamp bolt XP80 Snare Pad 3. Attach the XP80 Snare Pad to the rod, and then tighten the clamp bolt to secure the snare pad. Rod for the snare pad Clamp bolt XP80 Snare Pad CAUTION Leave a gap of about a half inch between the base of the rod and the snare pad. 1 2 Attaching an additional cymbal pad Attaching an additional cymbal pad requires a stopper. By properly attaching the stopper prevents the cymbal pad from spinning during your performance and protects cables from damage. 1. Rotate the cymbal holder upward and tighten the clamp bolt, and then bring the cymbal tilter upward (fig. 1). Cymbal holder cymbal tilter (fig. 1) 2. Loosen the key bolt on the stopper with a tuning key (fig. 2). 3. Remove the wing nut, two felt pads, and the bolt cover from the cymbal holder (fig. 3). 4. Slide the stopper onto the cymbal holder's shaft (fig. 4). NOTE If the key bolt was not sufficiently loosened in Step 2, it may not be possible to slide the stopper onto the cymbal holder's shaft. If this occurs, loosen the key bolt as much as possible without removing it. 5. Screw down the bolt cover to secure it into position (fig. 4). Stopper Key bolt Tuning key Wing nut Felt pads Bolt cover (fig. 2) Bolt cover Stopper 8. Pass the end of the cymbal holder shaft through the large hole at the cen- ter of the cymbal pad, and the stopper pin through the small hole in the cymbal pad (fig. 6). NOTE If the stopper pin does not reach the small hole in the cymbal pad, the stopper will not hold the cymbal pad properly. Make sure to secure the stopper position as shown in Step 6. 9. Place the other felt pad on the cymbal holder (fig. 6). 10. Screw the wing nut to secure the pad to the cymbal holder (fig. 6). Wing nut Felt pad Cup Pad Cup Pad Stopper Smaller hole Felt pad Bolt cover Cymbal holder Pin Stopper (fig. 6) Step 11 Step 12 Step 13 Step 14 Follow the instructions on pages 18 to 20 on the DTX402K, DTX432K, and DTX452K Owner's Manual. For Step 12 and Step 14 , refer to the example for DTX452K. Using the cable bands, secure the cables to the kit rack at the positions. Connecting an additional cymbal 1. Connect the L-shaped plug of the stereo phone cable into the [OUTPUT] jack of the cymbal pad. 2. Connect the other plug to the [PAD > IN] jack on the KP65 kick pad. Cymbal pad KP65 Kick pad 4. Adjust the angle of the snare pad by first loosening the key bolt (1 and 2 in the above figure). Tighten the key bolt securely after the adjust- ment. Step 5 Step 6 Step 7 Step 8 Step 9 Step 10 Follow the instructions on pages 15 to 17 on the DTX402K, DTX432K, and DTX452K Owner's Manual. With Step 5 , refer to the example for the DTX452K. Cymbal holder Cymbal holder (fig. 3) 6. Place the stopper to make full con- tact with the bottom surface of the bolt cover and tighten the key bolt with a tuning key to secure the stopper (fig. 5). Bolt cover Full contact (fig. 4) Stopper (fig. 5) 7. Place one of the felt pads removed at Step 3 to the cymbal holder (fig. 6). Stereo phone cable 3. Setting up the drum mod- ule Before you start using the drum module, power it up while simultaneously pressing number button [8]. Doing this optimizes the settings on your drum module for the DTX482K. Once the setup for the DTX482K is complete, there is no need to perform this procedure every time you turn on the drum module. 1. While holding down the number button [8], press [ ] (Standby/On) button. Hold The number button [8] flashes while the settings on the drum module are updated. This completes the setup. NOTICE Initializing the drum module erases the settings for the DTX482K. After initializing the drum module, make the initial settings for the DTX482K by carrying out the procedure shown above. 2
-
 1
1 -
 2
2
 |
 |