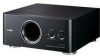
Yamaha FSW050 Owner's Manual - Page 8
Connecting the components and the, subwoofer to the AC power, VOLTAGE SELECTOR, The system connection
 |
UPC - 027108928906
View all Yamaha FSW050 manuals
Add to My Manuals
Save this manual to your list of manuals |
Page 8 highlights
The system connection This unit has a SYSTEM CONNECTOR jack. Use the supplied system control cable when connecting a Yamaha component equipped with a system connector jack. When connected, the power mode (ON, OFF/ SYSTEM) of this unit can be controlled with the power button of the connected Yamaha component. Notes • Set the POWER button of this unit to OFF/ SYSTEM. The power of this unit can be turned on even when the POWER button is set to OFF/SYSTEM. • When the POWER button of this unit is set to ON, the connected component will not control the power mode of this unit, even though they are connected via a system connection. The power mode of this unit will always be ON. • When this unit does not output low frequency signals even if you use the system connection, you need to change the setting of the connected component. For details, refer to the manual of the component. Yamaha Digital Sound Projector (example) SYSTEM CONNECTOR YST-FSW150 rear panel INPUT SYSTEM CONNECTOR SYSTEM CONNECTOR Connecting the components and the subwoofer to the AC power After you complete a subwoofer connection, plug the amplifier, TV and/or other audio/video components, and the subwoofer into an AC outlet of appropriate voltage. YST-FSW150 rear panel INPUT SYSTEM CONNECTOR YST-FSW050 rear panel SYSTEM INPUT CONNECTOR To AC outlet To AC outlet VOLTAGE SELECTOR (For Asia and General models only) The voltage selector switch on the bottom panel of this unit must be set for your local main voltage BEFORE plugging this unit into the AC main supply. Voltages are 110-120/220-240 V AC, 50/60 Hz. VOLTAGE SELECTOR 220V-240V 110V-120V SYSTEM INPUT CONNECTOR YST-FSW050 rear panel 4 En
-
 1
1 -
2
-
 3
3 -
 4
4 -
 5
5 -
 6
6 -
 7
7 -
 8
8 -
 9
9 -
 10
10 -
 11
11 -
 12
12
 |
 |
