Yamaha HD-200 HD-200 Owners Manual - Page 12
Setting Up and Voice Settings, Turning the Power On/Off, Master Volume Control - harmony director
 |
View all Yamaha HD-200 manuals
Add to My Manuals
Save this manual to your list of manuals |
Page 12 highlights
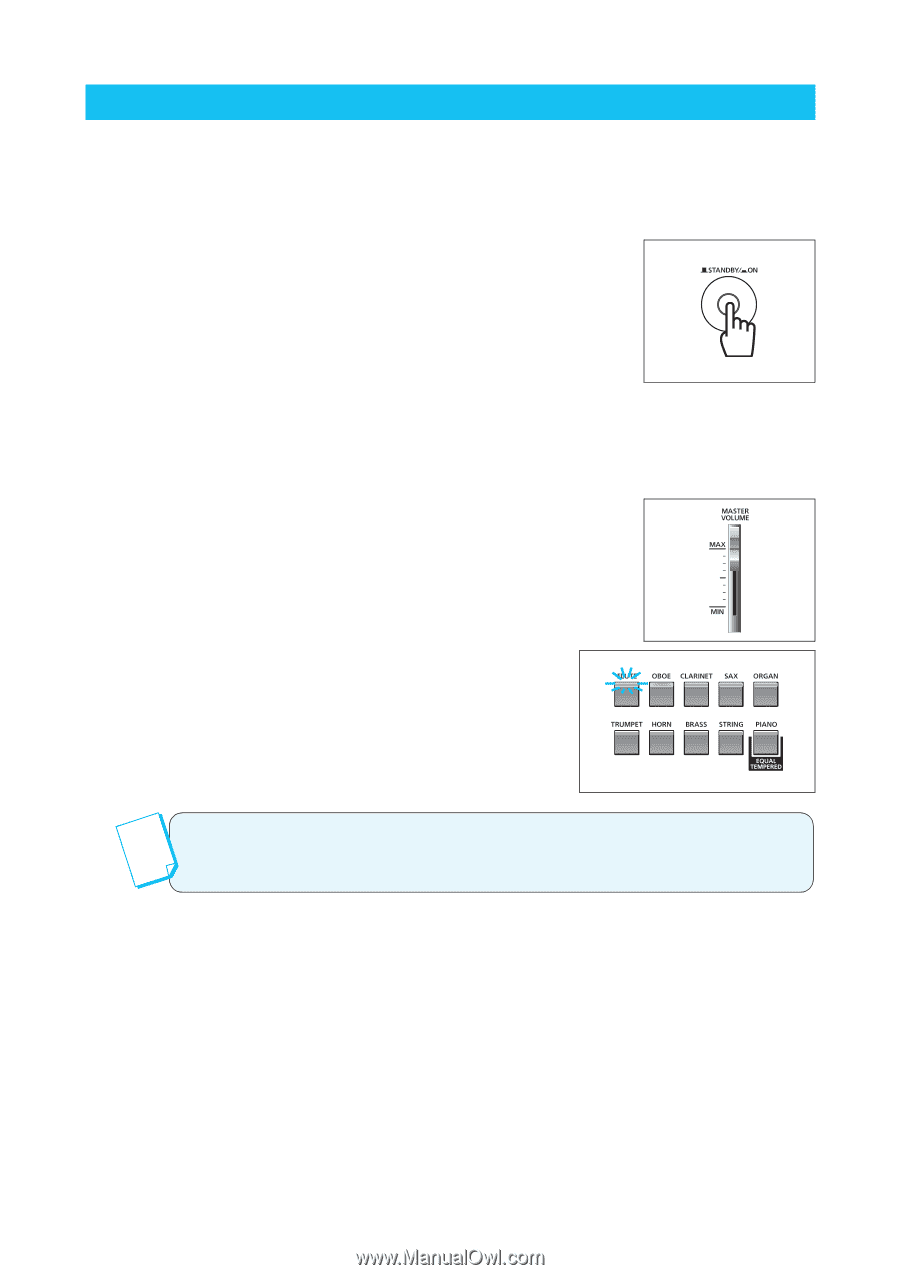
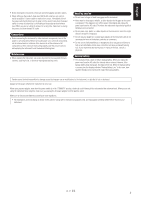
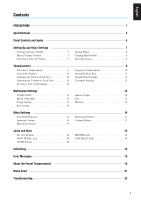
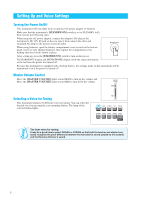
Setting Up and Voice Settings Turning the Power On/Off This instrument will run either from an optional AC power adaptor or batteries. Make sure that the instrument's [STANDBY/ON] switch is set to STANDBY (off), then execute the following steps. When using the AC power adaptor, connect the adaptor's DC plug to the instrument's DC 12V IN jack on the rear panel, then connect the other end (standard AC plug) to the nearest electrical outlet. When using batteries, open the battery compartment cover located on the bottom panel, insert six new alkaline batteries, then replace the compartment cover, making sure that it locks firmly in place. After setting up, press the [STANDBY/ON] switch to turn on the power. The HARMONY display and METRONOME display show the same information as the last time the power was turned off. Because this instrument is equipped with a backup battery, the settings made on this instrument will be maintained even if the power is turned off. Master Volume Control Move the [MASTER VOLUME] slider toward MAX to turn up the volume and Move the [MASTER VOLUME] slider toward MIN to turn down the volume. Selecting a Voice for Tuning This instrument features 10 different voices for tuning. You can select the desired voice by pressing the corresponding button. The lamp of the selected button lights. The best voice for tuning It may be a good idea to select ORGAN or STRING so that both the teacher and student can easily recognize the pitch difference between the instrument's sound (played by the student) and the Harmony Director's sound. 7 Column
-
 1
1 -
2
-
3
-
4
-
5
-
6
-
 7
7 -
 8
8 -
 9
9 -
 10
10 -
 11
11 -
 12
12 -
 13
13 -
 14
14 -
 15
15 -
 16
16 -
 17
17 -
18
-
19
-
20
-
21
-
22
-
23
-
24
-
25
-
26
-
27
-
28
-
29
-
30
-
31
-
32
-
33
-
34
-
35
-
36
-
37
-
38
-
39
-
40
-
41
-
42
-
43
-
44
-
45
-
46
-
47
-
48
-
49
-
50
-
51
-
52
-
53
-
54
-
55
-
56
-
57
-
58
-
59
-
60
-
61
-
62
-
63
-
64
-
65
-
66
-
67
-
68
-
69
-
70
-
71
-
72
-
73
-
74
-
75
-
76
-
77
-
78
-
79
-
80
-
81
-
82
-
83
-
84
-
85
-
86
-
87
-
88
-
89
-
90
-
91
-
92
-
93
-
94
-
95
-
96
-
97
-
98
-
99
-
100
-
101
-
102
-
103
-
104
-
105
-
106
-
107
-
108
-
109
-
110
-
111
-
112
-
113
-
114
-
115
-
116
-
117
-
118
-
119
-
120
-
121
-
122
-
123
-
124
-
125
-
126
-
127
-
128
-
129
-
130
-
131
-
132
-
133
-
134
-
135
-
136
-
137
-
138
-
139
-
140
-
141
-
142
-
143
-
144
-
145
-
146
-
147
-
148
-
149
-
150
-
151
-
152
-
153
-
154
-
155
-
156
-
157
-
158
-
159
-
160
-
161
-
162
-
163
-
164
 |
 |