Yamaha PSS-F30 PSS-F30 Owners Manual - Page 7
Using Batteries, Turning the Power On/Standby, Adjust the Master Volume
 |
View all Yamaha PSS-F30 manuals
Add to My Manuals
Save this manual to your list of manuals |
Page 7 highlights
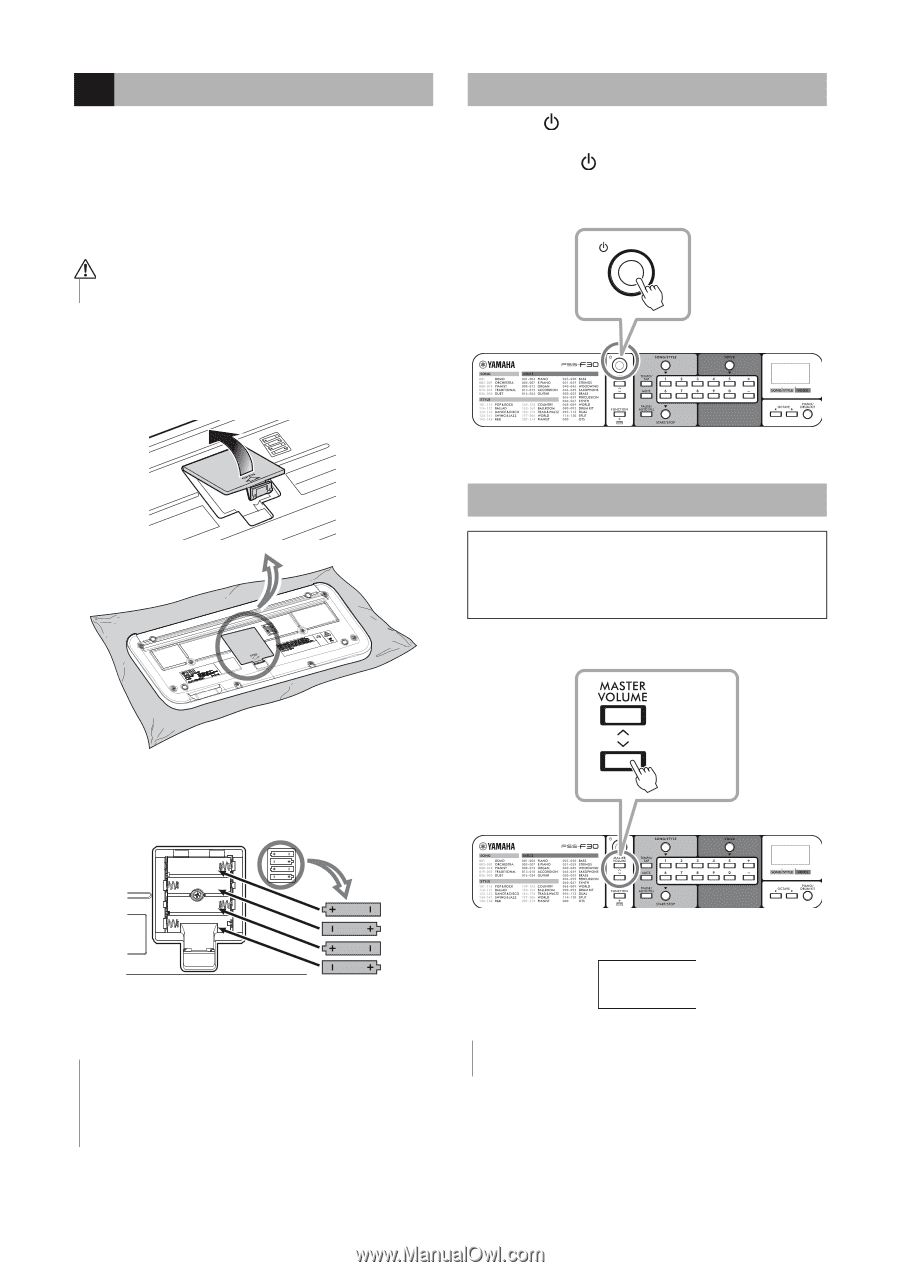
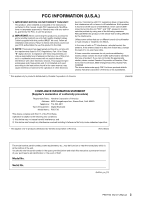
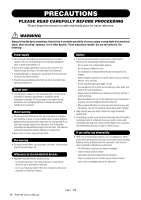
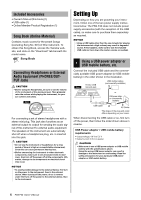
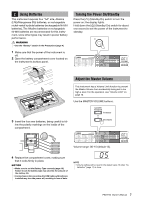
2 Using Batteries This instrument requires four "AA" size, Alkaline (LR6)/Manganese (R6) batteries, or rechargeable nickel-metal hydride batteries (rechargeable Ni-MH batteries). The Alkaline batteries or rechargeable Ni-MH batteries are recommended for this instrument, since other types may result in poorer battery performance. WARNING • See the "Battery" section in the Precautions (page 4). 1 Make sure that the power of the instrument is off. 2 Open the battery compartment cover located on the instrument's bottom panel. Turning the Power On/Standby Press the [ ] (Standby/On) switch to turn the power on; the display lights. Hold down the [ ] (Standby/On) switch for about one second to set the power of the instrument to standby. 0.0.1 Adjust the Master Volume This instrument has a Volume Limit function to prevent the Master Volume from accidentally being set to too high a level. For the operation, see "Volume Limit" on page 10. Use the MASTER VOLUME buttons. 3 Insert the four new batteries, being careful to fol- low the polarity markings on the inside of the compartment. Increases Decreases 0.0.1 4 Replace the compartment cover, making sure that it locks firmly in place. NOTICE • Make sure to set the Battery Type correctly (page 10). Failure to set the battery type may shorten the amount of the battery life. • Connecting or disconnecting the USB cable with batteries installed may turn the power off, resulting in loss of data. Volume range: 00-15 (default 13). 05 NOTE • Volume setting will be reset to the default value 13 when "Initialization" (page 11) is done. PSS-F30 Owner's Manual 7
-
 1
1 -
 2
2 -
 3
3 -
 4
4 -
 5
5 -
 6
6 -
 7
7 -
 8
8 -
 9
9 -
 10
10 -
 11
11 -
 12
12 -
13
-
14
-
15
-
16
-
17
-
18
-
19
-
20
 |
 |