Yamaha RX-V359 Owner's Manual - Page 57
Using SET MENU, SOUND MENU, Speaker settings
 |
View all Yamaha RX-V359 manuals
Add to My Manuals
Save this manual to your list of manuals |
Page 57 highlights
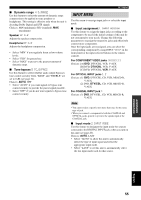
SET MENU Using SET MENU SOUND MENU Use the remote control to access and adjust each parameter. 4 AMP TV ++ VOL CH -- + VOLUME - MUTE INPUT MUTE 2CH STEREO 1 MUSIC ENTERTAIN MOVIE 2 3 4 STANDARD 5 5CH STEREO 6 7 8 A SPEAKERS B 9 0 NIGHT STRAIGHT +10 ENT. LEVEL TITLE BAND - TEST RETURN MEMORY ENTER PRESET/CH SET MENU MENU SRCH MODE + A-E/CAT. DISPLAY 1 2 3 y • You can change the "SET MENU" parameters while this unit is reproducing sound. • You can use NEXT (A/B/C/D/E) and SET MENU +/- (PRESET/TUNING/CH l / h) on the front panel to change these settings, if "TUNER" is not selected as the input source. Press NEXT to select the category or field you wish to change, and SET MENU +/- to change the parameters. 1 Press AMP. 2 Press SET MENU repeatedly to display the desired menu and then press i to enter the menu. y Once you press SET MENU, you can also select the menu by pressing u / d. 3 Press u / d repeatedly to select the item and then press j / i to change the parameter. Depending on the menu item, press u / d to select a sub item, and then press j / i to change the parameter. 4 To exit, press u / d repeatedly until the menu disappears. Use this menu to manually adjust any speaker settings. Notes • If you select "SETUP" (see page 20) and then select "SET" after adjusting the "SOUND MENU" parameters, the "SETUP" parameters override the "SOUND MENU" parameters. Do not enter "SETUP" unless you wish to change the "SOUND MENU" parameters. If you accidentally enter "SETUP", select "CANCEL" to exit from "SETUP". • Some menu item settings have no effect when the unit is reproducing a source with a digital signal sampling frequency greater than 48 kHz. ■ Speaker settings 1 SPEAKER SET Use this feature to manually adjust any speaker setting. y If you are not satisfied with the bass sounds from your speakers, you can change these settings according to your preference. Center speaker 1A CENTER Choices: LRG (large), SML (small), NON (none) • Select "LRG" if you have a large center speaker. The entire range of the center channel signals is directed to the center speaker. • Select "SML" if you have a small center speaker. The low-frequency signals of the center channel are directed to the speakers selected with "1D BASS". • Select "NON" if you do not have a center speaker. The entire range of the center channel signals is directed to the front left and right speakers. Front speakers 1B FRONT Choices: LRG (large), SML (small) • Select "SML" if you have small front speakers. The low-frequency signals of the front channel are directed to the speakers selected with "1D BASS". • Select "LRG" if you have large front speakers. The entire range of the front left and right channel signals is directed to the front left and right speakers. ADVANCED OPERATION English 53
-
 1
1 -
2
-
3
-
4
-
5
-
6
-
7
-
8
-
9
-
10
-
11
-
12
-
13
-
14
-
15
-
16
-
17
-
18
-
19
-
20
-
21
-
22
-
23
-
24
-
25
-
26
-
27
-
28
-
29
-
30
-
31
-
32
-
33
-
34
-
35
-
36
-
37
-
38
-
39
-
40
-
41
-
42
-
43
-
44
-
45
-
46
-
47
-
48
-
49
-
50
-
51
-
 52
52 -
 53
53 -
 54
54 -
 55
55 -
 56
56 -
 57
57 -
 58
58 -
 59
59 -
 60
60 -
 61
61 -
 62
62 -
63
-
64
-
65
-
66
-
67
-
68
-
69
-
70
-
71
-
72
-
73
-
74
 |
 |
