Yamaha YDS-120 YDS-120 Owners Manual - Page 7
Standby/On button, Fn] Function button
 |
View all Yamaha YDS-120 manuals
Add to My Manuals
Save this manual to your list of manuals |
Page 7 highlights
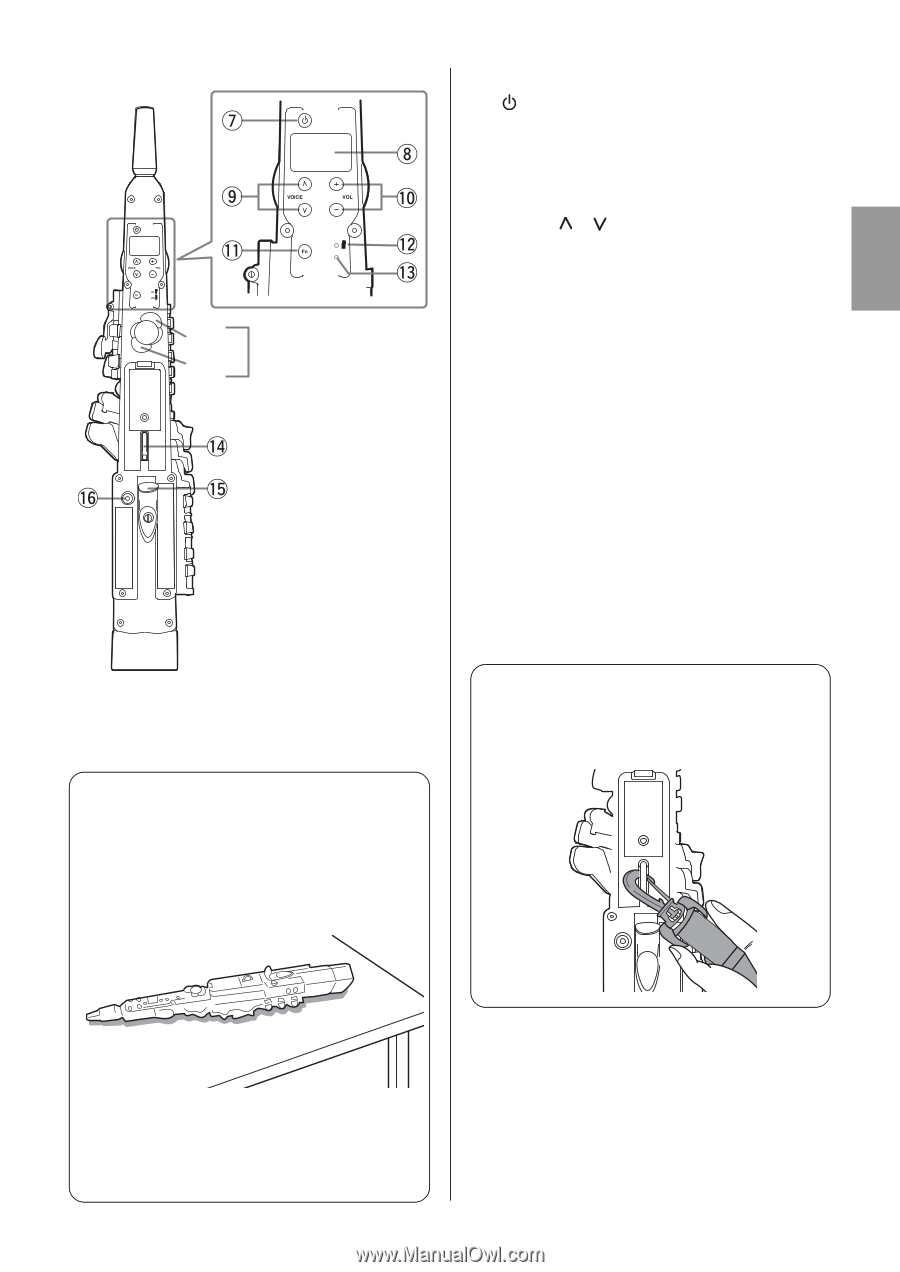
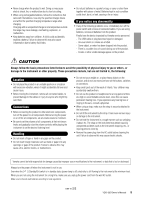
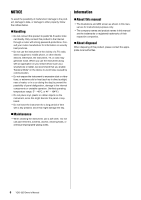
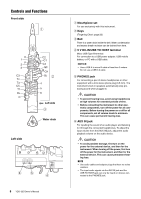
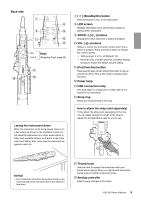
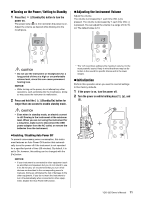
Back side Oct Low A Keys (Fingering Chart: page 20) Laying the instrument down When the instrument is not being played, place it on a flat surface as shown in the illustration below. Do not place the instrument on a chair, music stand, or other such unstable surface, as there is a risk of the instrument falling. Also, never lean the instrument up against a wall, etc. u [ ] (Standby/On) button Press this button to turn on the instrument. i LED screen Displays information such as the Voice number in alphanumeric characters. o VOICE [ ]/[ ] buttons Changes the Voice each time a button is pressed. !0 VOL [-]/[+] buttons Raises or lowers the instrument volume each time a button is pressed. Press and hold a button to change the volume quickly. • Setting range: 0 to 15, od (Default: 13) • Press the VOL [-] button and VOL [+] button simulta- neously to restore the default volume setting. !1 [Fn] (Function) button Press specific keys while holding this button to call up various functions. This is also used to operate some functions. !2 Power lamp !3 USB connection lamp This lamp lights in orange when a USB cable is connected to the instrument. !4 Strap ring Attach the included strap to this ring. How to attach the strap (sold separately) Firmly attach the strap (sold separately) to the ring. You can easily change the length of the strap to adjust it to a length that is easy for you to use. NOTICE • Do not stand the instrument up by itself. Doing so can cause damage to the instrument due to the impact if it falls down. !5 Thumb hook Use this hook to support the instrument with your thumb when playing. Wrap your right thumb around the thumb hook to hold the instrument firmly. !6 Analog controller Used to apply changes to the Voice. YDS-120 Owner's Manual 9
-
 1
1 -
 2
2 -
 3
3 -
 4
4 -
 5
5 -
 6
6 -
 7
7 -
 8
8 -
 9
9 -
 10
10 -
 11
11 -
 12
12 -
13
-
14
-
15
-
16
-
17
-
18
-
19
-
20
-
21
-
22
 |
 |