ZyXEL GS1900 Series User Guide - Page 26
Power Connection
 |
View all ZyXEL GS1900 Series manuals
Add to My Manuals
Save this manual to your list of manuals |
Page 26 highlights
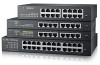
Chapter 3 Hardware Overview Figure 14 Rear Panel: GS1900-24E 3.2.1 Power Connection Make sure you are using the correct power source and that no objects obstruct the airflow of the fans. The Switch uses two power supply modules, one of which is redundant, so if one power module fails the system can operate on the remaining module. Rear Panel Power Connection Connect one end of the supplied power cord or power adaptor to the power receptacle on the back of the Switch and the other end to the appropriate power source. For the GS1900-8HP, GS1900-16 and GS1900-24E, use the POWER ON/OFF switch to have the Switch power on or off. Connecting the Power Use the following procedures to connect the Switch to a power source after you have installed it in a rack. Note: Use the included power cord for the AC power connection. 1 Connect the female end of the power cord to the AC power socket. 2 Connect the other end of the cord to a power outlet. Disconnecting the Power The power input connectors can be disconnected from the power source individually. 1 Disconnect the power cord from the power outlet. 2 Disconnect the power cord from the AC power socket. 26 GS1900 Series User's Guide
-
 1
1 -
2
-
3
-
4
-
5
-
6
-
7
-
8
-
9
-
10
-
11
-
12
-
13
-
14
-
15
-
16
-
17
-
18
-
19
-
20
-
 21
21 -
 22
22 -
 23
23 -
 24
24 -
 25
25 -
 26
26 -
 27
27 -
 28
28 -
 29
29 -
 30
30 -
 31
31 -
32
-
33
-
34
-
35
-
36
-
37
-
38
-
39
-
40
-
41
-
42
-
43
-
44
-
45
-
46
-
47
-
48
-
49
-
50
-
51
-
52
-
53
-
54
-
55
-
56
-
57
-
58
-
59
-
60
-
61
-
62
-
63
-
64
-
65
-
66
-
67
-
68
-
69
-
70
-
71
-
72
-
73
-
74
-
75
-
76
-
77
-
78
-
79
-
80
-
81
-
82
-
83
-
84
-
85
-
86
-
87
-
88
-
89
-
90
-
91
-
92
-
93
-
94
-
95
-
96
-
97
-
98
-
99
-
100
-
101
-
102
-
103
-
104
-
105
-
106
-
107
-
108
-
109
-
110
-
111
-
112
-
113
-
114
-
115
-
116
-
117
-
118
-
119
-
120
-
121
-
122
-
123
-
124
-
125
-
126
-
127
-
128
-
129
-
130
-
131
-
132
-
133
-
134
-
135
-
136
-
137
-
138
-
139
-
140
-
141
-
142
-
143
-
144
-
145
-
146
-
147
-
148
-
149
-
150
-
151
-
152
-
153
-
154
-
155
-
156
-
157
-
158
-
159
-
160
-
161
-
162
-
163
-
164
-
165
-
166
-
167
-
168
-
169
-
170
-
171
-
172
-
173
-
174
-
175
-
176
-
177
-
178
-
179
-
180
-
181
-
182
-
183
-
184
-
185
-
186
-
187
-
188
-
189
-
190
-
191
-
192
-
193
-
194
-
195
-
196
-
197
-
198
-
199
-
200
-
201
-
202
-
203
-
204
-
205
-
206
-
207
-
208
-
209
-
210
-
211
-
212
-
213
-
214
-
215
-
216
-
217
-
218
-
219
-
220
-
221
-
222
-
223
-
224
-
225
-
226
-
227
 |
 |
