eMachines T3958 NG3 Hardware Reference - Page 179
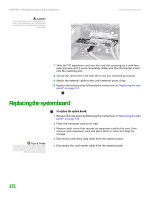
Replacing the system board
 |
View all eMachines T3958 manuals
Add to My Manuals
Save this manual to your list of manuals |
Page 179 highlights
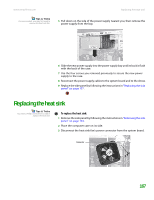
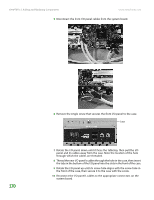
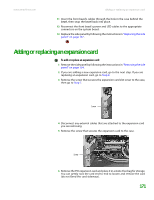
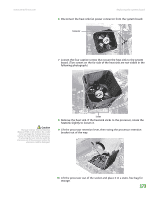
CHAPTER 13: Adding and Replacing Components Caution Do not touch the contacts on the bottom part of the expansion card. Touching the contacts can cause electrostatic damage to the card. www.emachines.com 7 Slide the PCI expansion card into the card slot, pressing on it with firm, even pressure until it seats completely. Make sure that the bracket inserts into the matching slot. 8 Secure the card to the case with the screw you removed previously. 9 Attach the external cable to the card's external ports, if any. 10 Replace the side panel by following the instructions in "Replacing the side panel" on page 157. Replacing the system board Tips & Tricks To make it easier to reconnect the cables to the new system board later, make note of each cable's location as you remove it from the old system board. To replace the system board: 1 Remove the side panel by following the instructions in "Removing the side panel" on page 154. 2 Place the computer case on its side. 3 Remove each screw that secures an expansion card to the case, then remove each expansion card and place them in static-free bags for storage. 4 Disconnect each drive data cable from the system board. 5 Disconnect the card reader cable from the system board. 172
-
 1
1 -
2
-
3
-
4
-
5
-
6
-
7
-
8
-
9
-
10
-
11
-
12
-
13
-
14
-
15
-
16
-
17
-
18
-
19
-
20
-
21
-
22
-
23
-
24
-
25
-
26
-
27
-
28
-
29
-
30
-
31
-
32
-
33
-
34
-
35
-
36
-
37
-
38
-
39
-
40
-
41
-
42
-
43
-
44
-
45
-
46
-
47
-
48
-
49
-
50
-
51
-
52
-
53
-
54
-
55
-
56
-
57
-
58
-
59
-
60
-
61
-
62
-
63
-
64
-
65
-
66
-
67
-
68
-
69
-
70
-
71
-
72
-
73
-
74
-
75
-
76
-
77
-
78
-
79
-
80
-
81
-
82
-
83
-
84
-
85
-
86
-
87
-
88
-
89
-
90
-
91
-
92
-
93
-
94
-
95
-
96
-
97
-
98
-
99
-
100
-
101
-
102
-
103
-
104
-
105
-
106
-
107
-
108
-
109
-
110
-
111
-
112
-
113
-
114
-
115
-
116
-
117
-
118
-
119
-
120
-
121
-
122
-
123
-
124
-
125
-
126
-
127
-
128
-
129
-
130
-
131
-
132
-
133
-
134
-
135
-
136
-
137
-
138
-
139
-
140
-
141
-
142
-
143
-
144
-
145
-
146
-
147
-
148
-
149
-
150
-
151
-
152
-
153
-
154
-
155
-
156
-
157
-
158
-
159
-
160
-
161
-
162
-
163
-
164
-
165
-
166
-
167
-
168
-
169
-
170
-
171
-
172
-
173
-
 174
174 -
 175
175 -
 176
176 -
 177
177 -
 178
178 -
 179
179 -
 180
180 -
 181
181 -
 182
182 -
 183
183 -
 184
184 -
185
-
186
-
187
-
188
-
189
-
190
-
191
-
192
-
193
-
194
-
195
-
196
-
197
-
198
-
199
-
200
-
201
-
202
-
203
-
204
-
205
-
206
-
207
-
208
-
209
-
210
-
211
-
212
-
213
-
214
 |
 |
