1995 Honda Prelude Owner's Manual
1995 Honda Prelude Manual

1995 Honda Prelude manual content summary:
- 1995 Honda Prelude | Owner's Manual - Page 1
of your vehicle's seat belts, and Supplemental Restraint System. Instruments and Controls ...29 Instrument panel indicator and gauge, and how to use dashboard and steering column controls. Comfort and Convenience Features ...71 How to operate the climate control system, the audio system, and other - 1995 Honda Prelude | Owner's Manual - Page 2
selection of a 1995 Honda Prelude was a wise investment. It will give you years of driving pleasure. To enhance the enjoyment of your new car, take time to study this manual. In it, you will learn about your car's many conveniences and useful features. Following the service interval and maintenance - 1995 Honda Prelude | Owner's Manual - Page 3
very important. We have provided many important safety messages in this manual and on the vehicle. Please read these messages carefully. A NOTICE Your Honda or other property can be damaged if you don't follow instructions. The purpose of these messages is to help prevent damage to your car, other - 1995 Honda Prelude | Owner's Manual - Page 4
Women...8 Seat Belt Maintenance...8 Supplemental Restraint System...9 What Happens In a Crash...10 Important Facts About Airbags...11 How the Driver's Airbag Works...12 How the Passenger's Airbag Works...13 How the SRS Indicator Light Works...14 System Service...14 System Service Precautions...15 - 1995 Honda Prelude | Owner's Manual - Page 5
front passenger's airbag. Two indicator lights are also part of your safety system. One reminds you to make sure you and your passengers wear seat belts. The other alerts you to a possible problem with your supplemental restraint system (see page 14). The seats, head restraints, and door locks also - 1995 Honda Prelude | Owner's Manual - Page 6
could increase the chance of serious injuries in a crash. Do not put shoulder belt pads or other accessories on seat belts. They can reduce the effectiveness of the belts and increase the chance of injury. Not wearing a seat belt increases the chance of being killed or seriously hurt in a crash. Be - 1995 Honda Prelude | Owner's Manual - Page 7
and How It Works Seat Belt System Components Your Honda has lap/shoulder seat belts in all four seating positions. Your seat belt system also includes a light on the instrument panel to remind you to fasten your seat belt, and to make sure your passengers fasten theirs. This light comes on when you - 1995 Honda Prelude | Owner's Manual - Page 8
is securely locked. 2. Check that the belt is not twisted. 3. Position the lap portion of the belt as low as possible across your hips, not across your stomach. This lets your strong pelvic bones take the force of a crash. 4. Pull up on the shoulder part of the belt to remove any slack. Make sure - 1995 Honda Prelude | Owner's Manual - Page 9
not in good condition or not working properly should be replaced. To unlatch the seat belt, push the red PRESS button on the buckle. Guide the belt across your body to the door pillar. If the belt doesn't retract easily, pull it out and check for twists or kinks. Protecting the mother is the best - 1995 Honda Prelude | Owner's Manual - Page 10
System Your car is equipped with a Supplemental Restraint System (SRS) to help protect the head and chest of the driver and front seat passenger during a severe frontal collision. This system does not replace your seat belts. It supplements, or adds to, the protection offered by seat belts belts - 1995 Honda Prelude | Owner's Manual - Page 11
activators, and all related wiring when the ignition is ON (II). An indicator light on the instrument panel to alert you to a possible problem with the system. Emergency backup power in case your car's electrical system is disconnected in a crash. What Happens In a Crash If you ever have a severe - 1995 Honda Prelude | Owner's Manual - Page 12
did not inflate, extensive visible damage indicated that the car absorbed much of the crash energy, and the airbags to the undercarriage, may not cause extensive body damage but cause the airbags to inflate. if seat belts are worn properly and the airbags inflate. No safety system can provide - 1995 Honda Prelude | Owner's Manual - Page 13
Supplemental Restraint System How the Driver's Airbag Works To do its job, the airbag frontal collision, your airbag will instantly inflate to help protect your head and chest. After the bag completely inflates, it immediately starts deflating so it won't interfere with your visibility, ability to - 1995 Honda Prelude | Owner's Manual - Page 14
Supplemental Restraint System The driver's airbag is stored in the center of the steering wheel. For your safety, do not attach any items to the steering wheel. They could interfere with the proper operation of the airbag. Or, if the airbag inflates, they could be propelled inside the car and hurt - 1995 Honda Prelude | Owner's Manual - Page 15
replaced. Do not try to remove or discard the airbags by yourself. This must be done by a Honda dealer. If the SRS indicator light alerts you of a problem. Have the supplemental restraint system checked as soon as possible. Otherwise, your airbags might not inflate when you need them. When the car - 1995 Honda Prelude | Owner's Manual - Page 16
procedures and precautions in the official Honda service manual could result in personal injury or damage to the system. Scrapping an entire car that has uninflated airbags can be dangerous. Get assistance from a Honda dealer if your car must be scrapped. If you sell your car, please be sure to tell - 1995 Honda Prelude | Owner's Manual - Page 17
Information The seat belts and airbags are obviously important parts of your occupant protection system. In addition, leave your car doors unlocked. A passenger, especially a child, could open a door and accidentally fall out. Also, there is a greater chance of being thrown out of the car during - 1995 Honda Prelude | Owner's Manual - Page 18
other small animal will be safest in a pet carrier with rigid sides. Choose a style that allows you to secure it to the car's seat by routing a seat belt through the carrier's handle. For further information, contact your veterinarian or local animal protection society. Driver and Passenger Safety - 1995 Honda Prelude | Owner's Manual - Page 19
The child should then wear the lap/ shoulder belt properly for protection. An infant or child who . Be sure any child too small for seat belts is properly secured in a child restraint. Where Should with the lap/shoulder belt. You must use a locking clip with a lap/shoulder belt. Children depend on - 1995 Honda Prelude | Owner's Manual - Page 20
sure the seat fits your child. Check the seat manufacturer's instructions and labels for height and weight limits. Secure the child seat to the car. All approved child seats are designed to be secured to the car seat by the lap belt portion of a lap/shoulder belt. A child whose seat is not properly - 1995 Honda Prelude | Owner's Manual - Page 21
and 40 Ibs). The preferred place to put a toddler seat is in the rear seat. Use the car's lap/shoulder belt to secure the seat to the car. You must use a locking clip with the car's lap/shoulder belt (see page 21). We recommend that, whenever possible, you put the infant seat in the rear - 1995 Honda Prelude | Owner's Manual - Page 22
the rear seat and use a lap/shoulder belt. Whichever style you select, follow the booster seat manufacturer's instructions. Using a Seat Belt Locking Clip Always use a seat belt locking clip when you secure a child seat to your car with a lap/shoulder belt. This helps prevent the seat from shifting - 1995 Honda Prelude | Owner's Manual - Page 23
belt through the restraint according to the seat manufacturer's instructions. 2. Insert the latch plate into the buckle. Pull on the shoulder part of the belt 150 mm (5.9 in) Your Honda has two attachment points for tether-style child seats. Use the dimensions in the above illustration to locate - 1995 Honda Prelude | Owner's Manual - Page 24
them by writing to: American Honda Motor Co., Inc. Consumer Affairs 1919 Torrance Blvd. Torrance, CA 90501-2746 The anchor plate and mounting hardware for a top tether are supplied with the car. When installing, make sure the toothed washer is on the bottom of the bolt. The supplied anchor plate is - 1995 Honda Prelude | Owner's Manual - Page 25
driving. These laws define how much alcohol it takes in your system to be legally "drunk." However, your judgment and reaction time get ride from a friend? Find alternative transportation. Call a taxi. Take a bus. Many communities have transportation services devoted to shuttling people who have - 1995 Honda Prelude | Owner's Manual - Page 26
lid open, open all the windows and set the heating and cooling system as follows. If you must sit in your parked car, even in an unconfined area, with the engine running, adjust the heating and cooling system as follows: 1. Select the Fresh Air mode. 2. Select the mode. 3. Turn the fan on high speed - 1995 Honda Prelude | Owner's Manual - Page 27
Cars) If you believe that your vehicle has a defect which could cause a crash or could cause injury or death, you should immediately inform the National Highway Traffic Safety Administration (NHTSA) in addition to notifying American Honda problems between you, your dealer, or American Honda - 1995 Honda Prelude | Owner's Manual - Page 28
labels are in the locations shown. They warn you of potential hazards that could cause serious injury. Read these labels carefully and don't remove them. If a label comes off or becomes hard to read, contact your Honda dealer for a replacement. RADIATOR CAP BATTERY Driver and Passenger Safety - 1995 Honda Prelude | Owner's Manual - Page 29
58 Power Windows...59 Sunroof...60 Mirrors...61 Adjusting the Power Mirrors...62 Parking Brake...63 Glove Box...64 Digital Clock...64 Vanity Mirror...65 Cigarette Lighter...65 Ashtrays...66 Beverage Holder...67 Console Compartment...68 Interior Lights...68 Ignition Switch Light...69 Instruments and - 1995 Honda Prelude | Owner's Manual - Page 30
Control Locations DOOR LOCK SWITCH (P.51) POWER WINDOW SWITCH (P.59) DIGITAL CLOCK (P.64) HEATING/ COOLING CONTROL (P.72) AUDIO SYSTEM (P.79) FUEL FILL DOOR RELEASE (P. 100) TRUNK RELEASE HANDLE (P.52) HOOD RELEASE HANDLE (P.101) MIRROR CONTROLS (P.62) Instruments and Controls - 1995 Honda Prelude | Owner's Manual - Page 31
car. Lamp Check Many of the indicator lights come on when you turn the ignition switch ON (II), allowing you to see that they are working. The instrument panel should look like the illustration. If an indicator does not light during this test, it cannot alert you if that system develops a problem - 1995 Honda Prelude | Owner's Manual - Page 32
panel is shown. Differences for the Canadian model are noted in the text. CRUISE CONTROL INDICATOR MALFUNCTION INDICATOR LAMP/ CHECK ENGINE LIGHT* BRAKE LAMP INDICATOR LOW FUEL INDICATOR ANTI-LOCK BRAKE SYSTEM INDICATOR* PARKING BRAKE AND BRAKE SYSTEM INDICATOR* SEAT BELT REMINDER LIGHT - 1995 Honda Prelude | Owner's Manual - Page 33
starts. If this light comes on when the engine is running, there is a possibility of serious engine damage. Safely pull to the side of the road and shut off the engine as soon as you can. Turn to page 201 for instructions and precautions on checking the engine. Parking Brake and Brake BRAKE System - 1995 Honda Prelude | Owner's Manual - Page 34
the engine starts, something is wrong with the Supplemental Restraint System. It may also flash on and off to indicate a problem. SRS US Canada ABS Anti-lock Brake System (ABS) Indicator US Malfunction Indicator Lamp Canada Only on cars equipped with ABS (see page 118) Check Engine Light - 1995 Honda Prelude | Owner's Manual - Page 35
it indicates a brake light does not work. Four Wheel Steering System (4WS) Indicator Only on cars equipped with electronic four wheel steering This light normally comes on when you turn the ignition ON (II) and goes off after the engine starts. If it comes on at any other time, there is a problem in - 1995 Honda Prelude | Owner's Manual - Page 36
off if you turn on the headlights or release the parking brake. If it comes on at any other time, it means there is a problem with the DRL. There may also be a problem with the high beam headlights. Cruise Control Indicator This lights when you set the cruise control. See page 46 for information - 1995 Honda Prelude | Owner's Manual - Page 37
switch ON (II). If it flashes while driving (in any shift position), it indicates a possible problem in the transmission. Avoid rapid acceleration and have the transmission checked by an authorized Honda dealer as soon as possible. LEADED LY This indicator shows which shift position the shift - 1995 Honda Prelude | Owner's Manual - Page 38
Gauges (S) ODOMETER TRIP METER TRIP METER RESET BUTTON Speedometer U.S. Models This shows Except S) SPEEDOMETER RESET/CHANGE KNOB Tachometer The tachometer shows the engine speed in revolutions per minute (rpm). To protect the engine from damage, never drive with the tachometer needle in the red - 1995 Honda Prelude | Owner's Manual - Page 39
Gauges Odometer The odometer shows the total distance your car has been driven. It measures miles in U.S. models and kilometers in Canadian models. It is illegal under federal law (in the U.S.) and provincial regulations (in - 1995 Honda Prelude | Owner's Manual - Page 40
instructions and precautions on checking the engine's cooling system. As a test, all the indicator bars in the temperature gauge illuminate when you turn the ignition ON (II). FUEL GAUGE TEMPERATURE GAUGE Fuel Gauge This shows how much fuel you have. The fuel gauge is fully electronic, lighting - 1995 Honda Prelude | Owner's Manual - Page 41
signals, headlights, and high beams. The right lever controls the windshield wipers. The controls on the dashboard to the left of the steering column are for the sunroof, cruise control and instrument panel brightness. The lever on the underside of the steering column allows you to tilt the steering - 1995 Honda Prelude | Owner's Manual - Page 42
set the parking brake. The headlights revert to normal operation when you turn them on with the switch. The rotating switch on the left lever controls the lights. Turning this switch to the first position turns on the parking lights, taillights, instrument panel lights, side-marker lights, and rear - 1995 Honda Prelude | Owner's Manual - Page 43
will return to the center position as soon as you release it. The dial on the dashboard to the left of the instrument panel controls the brightness of the instrument panel lights. Turn the dial to adjust the brightness. To reduce glare at night, the fuel and temperature gauges dim when you turn - 1995 Honda Prelude | Owner's Manual - Page 44
Controls Near the Steering Wheel Windshield Wipers Windshield Washers The right lever controls the windshield wipers and washers. The rotary switch at the end of the lever has three positions: INT - intermittent LO - low speed HI - high speed In intermittent, the wipers operate every few seconds. - 1995 Honda Prelude | Owner's Manual - Page 45
down to the desired position. Position the wheel so you can see all the instrument panel gauges and warning lights. Push the lever up to lock the steering wheel in that position. 4. Make sure you to lose control of the car and be seriously injured in a crash. Adjust the steering wheel only when the - 1995 Honda Prelude | Owner's Manual - Page 46
control, as it operates, moves the accelerator pedal. You can damage your car's accelerator mechanism by resting your foot under the pedal and blocking the movement . The indicator in the switch will light. 2. Accelerate to the desired cruising speed above 25 mph (40 km/h). Instruments and Controls - 1995 Honda Prelude | Owner's Manual - Page 47
the button when you reach the desired speed. Tap the brake or clutch pedal lightly with your foot. The CRUISE CONTROL light on the instrument panel will go out. When the car slows to the desired speed, press the SET/decel button. The car will then maintain the desired speed. Push on the accelerator - 1995 Honda Prelude | Owner's Manual - Page 48
buttons at the same time, the CRUISE CONTROL light on the instrument panel will go out and the car will begin to slow down. You can use the accelerator pedal in the normal way. If you use the brake or clutch pedal to cancel cruise control, the system retains the previously-set cruising speed. To - 1995 Honda Prelude | Owner's Manual - Page 49
in a safe place. When replacing keys, use only Honda-approved key blanks. Press either of the buttons on the steering wheel spokes to sound the horn. Your car comes with two kinds of keys: a master key and a valet key. The master key fits all locks on your car: Ignition Doors Trunk Trunk release - 1995 Honda Prelude | Owner's Manual - Page 50
the audio system and cigarette lighter. ON (II) - This is the normal key position when driving. All features and accessories on the car are usable. Several of the lights on the instrument panel come on as a test when you turn the ignition switch from ACCESSORY to ON (see page 31 ). START (III - 1995 Honda Prelude | Owner's Manual - Page 51
it out to unlock. To lock the passenger's door when getting out of the car, push the lock tab in and close the door. To lock the driver's lock tab in. Release the handle then close the door. Available on U.S. Si, and VTEC models, and Canadian SR, SR 4WS and SR-V models Each door has a master door - 1995 Honda Prelude | Owner's Manual - Page 52
Keys and Locks Both doors lock when you push in the lock tab on the driver's door, or lock the driver's door from the outside with the key. Only the driver's door unlocks when you use the key or lock tab. To unlock the passenger's door, use the master door lock switch or pull out the lock tab on - 1995 Honda Prelude | Owner's Manual - Page 53
Keys and Locks, Seat Adjustments Seat Adjustments Adjust the seat before you start driving. MASTER KEY To protect items in the trunk when you need to give the key to someone else, lock the trunk release handle with - 1995 Honda Prelude | Owner's Manual - Page 54
Seat Adjustments Rear Seat Access Reclining the seat-back can decrease the protection you get from your seat belt in a crash. You can slide under the seat belt and be seriously injured. Adjust the seat-back to an upright position and sit well back in the seat. To change the angle of the - 1995 Honda Prelude | Owner's Manual - Page 55
Adjustments The driver's seat in the Si and VTEC models in the U.S., and the SR, SR 4WS and SR-V models in Canada has additional features. They are: lumbar support adjustment, fine adjustment of seat-back angle, and seat-back angle memory. Lumbar Support Fine Adjustment of Seat-back Angle Vary the - 1995 Honda Prelude | Owner's Manual - Page 56
use the seat heaters when the engine is off or when idling for a long period of time. They can drain the battery, making your car hard to start. After you have adjusted the seatback turn the power on or off. The pilot lamp lights and remains on while the heaters are on. Instruments and Controls - 1995 Honda Prelude | Owner's Manual - Page 57
tied down. Loose items can fly forward and cause injury if you have to brake hard. See Loading Cargo on page 106. Never drive with the seat-back folded seat-back can be released from inside the car or inside the trunk. To fold down the seat-back from inside the car, insert the master key in the lock - 1995 Honda Prelude | Owner's Manual - Page 58
and you have good visibility before starting to drive. The defogger wires on the inside of the rear window can be accidentally damaged. When cleaning the glass, always wipe side to side. Push the red button on the center console to turn on the hazard warning lights (four-way flashers). This causes - 1995 Honda Prelude | Owner's Manual - Page 59
Your car's panel also contains these extra features: AUTO - To open the driver's window fully, push the window switch firmly down and release it. The window automatically open the driver's window only partially, push the window switch down lightly and hold it. The window will stop as soon as you - 1995 Honda Prelude | Owner's Manual - Page 60
you have children in the car so they do not injure themselves by operating the windows unintentionally. The power window system has a keyoff delay function. children are away from the windows before closing them. Use the switch on the dashboard to open and close the sunroof. The ignition m u s t b e - 1995 Honda Prelude | Owner's Manual - Page 61
, or when it is covered with snow or ice, you can damage the sunroof panel or motor. Keep the inside and outside mirrors clean and adjusted for best visibility. Be sure to adjust the mirrors before you start driving. The inside mirror has day and night positions. The night position reduces glare - 1995 Honda Prelude | Owner's Manual - Page 62
Mirrors Adjusting the Power Mirrors SELECTOR SWITCH Adjust the outside mirrors with the adjustment switch on the center console: 1. Turn the ignition switch ON (II). 2. Move the selector switch to L (driver's side) or R (passenger's side). 3. Push the appropriate edge of the adjustment switch to - 1995 Honda Prelude | Owner's Manual - Page 63
it, pull up slightly, push the button, and lower the lever. The parking brake light on the instrument panel should go out when the parking brake is fully released (see page 33). If you try to drive the car without releasing the parking brake, the ABS cannot work properly. Instruments and Controls - 1995 Honda Prelude | Owner's Manual - Page 64
, even if the passenger is wearing the seat belt. Always keep the glove box closed while driving. KNOB GLOVE BOX Open the glove box by turning the knob clockwise. To close, push the lid up and turn the knob counterclockwise to lock. The digital clock displays the time with the ignition switch - 1995 Honda Prelude | Owner's Manual - Page 65
Digital Clock, Vanity Mirror, Cigarette Lighter 3. Turn the knob toward M (clockwise) sun visor and swing down the cover. Vanity Mirror Cigarette Lighter CIGARETTE LIGHTER The ignition switch must be in ACCESSORY (I) or ON (II) for the cigarette lighter to work. To heat up the lighter, push it in - 1995 Honda Prelude | Owner's Manual - Page 66
your car, don't put paper or other things that can burn in the ashtray. ASHTRAY Open the front ashtray by swinging the lid down. To remove it for emptying, open the lid then pull the ashtray straight outward. The rear ashtray is at the rear end of the center console. Open the ashtray by swinging - 1995 Honda Prelude | Owner's Manual - Page 67
the liquid is very hot, it can scald you or your passengers. To open the beverage holder, push on the lid. Use the beverage holder only when the car is parked. If you place cups in the holder while driving, the liquid may spill when you go over bumps or around corners. Instruments and Controls - 1995 Honda Prelude | Owner's Manual - Page 68
S and SR models in Canada The ceiling light has a three-position switch. In the OFF position, the light does not come on. In the center position, the ceiling light comes on when you open either door. In the ON position, the ceiling light stays on continuously. On VTEC model in the U.S., and SR 4WS - 1995 Honda Prelude | Owner's Manual - Page 69
it off. You can use the spotlights at all times. Available on Si and VTEC models in the U.S., and on SR, SR 4WS and SR-V models in Canada This light comes on whenever you open the driver's door. This light stays on for a few seconds after you close the door. Instruments and Controls - 1995 Honda Prelude | Owner's Manual - Page 70
very versatile. To get the most from this system, take the time to learn what the controls do. Some models have an anti-theft audio system that requires a code number to enable it. * Air conditioning is optional on the Canadian S model. Heating and Cooling...72 What Each Control Does...74 How to Use - 1995 Honda Prelude | Owner's Manual - Page 71
. A Genuine Honda air conditioning system is available from your dealer. It meets Honda's high quality standards and is designed to fit your car. Please contact your dealer for more information. CENTER VENT CORNER VENT The direction of air flow from the vents in the center of the dashboard and the - 1995 Honda Prelude | Owner's Manual - Page 72
Heating and Cooling SIDE DEFROSTER VENT Comfort and Convenience Features - 1995 Honda Prelude | Owner's Manual - Page 73
lever to the right increases the temperature of air flowing from the system. Mode Buttons These buttons control the direction of air flow. The indicator light shows which button is controlling air flow. Air Conditioning (A/C) Switch This switch turns the air conditioning ON and OFF. The indicator in - 1995 Honda Prelude | Owner's Manual - Page 74
minutes before you feel warm air circulating. The air conditioning system does not depend on engine temperature. It can produce cold air almost immediately. Controlling Air Flow Direction Air flows into the interior at three levels: Toward the floor through the dash vents and toward the windshield - 1995 Honda Prelude | Owner's Manual - Page 75
To operate the air conditioning system, press the air conditioning switch. Set the fan to the desired speed. You can also use the mode button to direct air out of the dash and heater vents. To cool the interior down rapidly after the car has been sitting in the sun: 1. Start the engine. 2. Turn on - 1995 Honda Prelude | Owner's Manual - Page 76
Heating and Cooling To Heat To warm the interior: MODE BUTTONS 1. Start the engine. 2. Select the Fresh Air mode and 3. Switch the fan to the desired speed. 4. Adjust the warmth of the air with the temperature control lever. To Heat and Dehumidify with Air Conditioning AIR CONDITIONING SWITCH Air - 1995 Honda Prelude | Owner's Manual - Page 77
remove exterior frost or ice from the windshield and side windows after the car has been sitting out in cold weather: 1. Start the engine. 2. Select the Fresh Air should shut the system completely off only for the first few minutes of driving in cold weather, until the engine coolant warms up enough - 1995 Honda Prelude | Owner's Manual - Page 78
Audio System AM/FM/Cassette Stereo Audio System Your Honda audio system is easy to use, and will give clear A M / F M reception. The preset buttons allow you to select six stations on AM and twelve stations on FM. (S) - 1995 Honda Prelude | Owner's Manual - Page 79
Audio System The cassette system uses Dolby B® * noise reduction to give excellent sound reproduction. The system also senses when a metal or chromium-dioxide feature disables the system if it is disconnected from the car's battery. To get the system working again, you must enter a code number. * - 1995 Honda Prelude | Owner's Manual - Page 80
must be in ACCESSORY (I) or ON (II) to operate the audio system. Turn the system on by turning the ON/OFF/VOL knob clockwise. The radio comes on and displays the frequency of the station it was last tuned to. The antenna extends automatically. The system turns off and the antenna retracts when you - 1995 Honda Prelude | Owner's Manual - Page 81
Audio System You can use any of three methods to find radio stations on the selected band: for stations with a strong signal. Depending on which way you push the TUNE/SEEK switch, the system searches up or down from the current frequency. Push the switch until you hear a beep, then release it. The - 1995 Honda Prelude | Owner's Manual - Page 82
Audio System Presetting The preset buttons allow you to store radio frequencies for later twelve on FM. (Except S) (S) TUNE/SEEK SWITCH AM/FM BUTTON PRESET BUTTONS AUTO SELECT LIGHT TUNE/SEEK SWITCH AM/FM BUTTON PRESET BUTTONS AUTO SELECT BUTTON CONTINUED Comfort and Convenience Features - 1995 Honda Prelude | Owner's Manual - Page 83
frequencies you preset will be lost if your car's battery goes dead or is disconnected. Except S model The AUTO SELECT function allows you to find stations easily when you are in an unfamiliar area. Press the AUTO SELECT button. The system automatically scans both bands to find six strong stations - 1995 Honda Prelude | Owner's Manual - Page 84
Audio System Adjusting the Sound Use the Balance and Fader controls to adjust control knob so it pops out, then pull it out slightly further. Check this control if the control panel lights do not come on with the instrument panel lights. Use the Bass and Treble controls to adjust the tone quality to - 1995 Honda Prelude | Owner's Manual - Page 85
Audio System Radio Frequencies Your Honda's radio can tune in all frequencies in both the AM and FM bands. Those bands cover these frequencies: AM band: 530 kilohertz to 1,710 kilohertz - 1995 Honda Prelude | Owner's Manual - Page 86
play. The or will light to show you which side of the cassette is playing. The indicates the side you inserted facing upward is now playing. To play the other side of the tape, press the PROG button. The system also has an Auto-reverse feature. It will automatically reverse direction when it - 1995 Honda Prelude | Owner's Manual - Page 87
Audio System Dolby® noise reduction turns on when you insert a cassette. If the tape was not recorded with Dolby " B " noise reduction, turn it off by pressing the button. To remove the cassette from the drive, press the EJECT button. The system automatically ejects the cassette whenever you turn - 1995 Honda Prelude | Owner's Manual - Page 88
Audio System Cassette Search press the PLAY button. If the system reaches the end of the cassette while in fast forward or rewind, it automatically stops that function, reverses direction, and or cause other problems. See page 94 for information on cassette care and protection. Comfort - 1995 Honda Prelude | Owner's Manual - Page 89
magazine in the changer according to the instructions that came with the unit. Your dealer has Genuine Honda accessory in-dash CD players available that are operated by the radio controls. If you have one of these units, use the directions in this section (except for multi-disc selection) to operate - 1995 Honda Prelude | Owner's Manual - Page 90
Audio System (S) ON/OFF/VOL KNOB RPT INDICATOR TUNE/SEEK SWITCH CD BUTTON REPEAT BUTTON (Except S) ON/OFF/VOL KNOB A. SELECT INDICATOR RPT INDICATOR TUNE/SEEK SWITCH CD BUTTON A. SELECT/ REPEAT BUTTON CONTINUED Comfort and Convenience Features - 1995 Honda Prelude | Owner's Manual - Page 91
A. SELECT in the display. With this active, the system selects and plays the tracks randomly, rather than sequentially, on each disc. When the system has played all the tracks on that disc, it loads the next disc and starts to play randomly. The system continues to select and play tracks randomly on - 1995 Honda Prelude | Owner's Manual - Page 92
Audio System CD Error Indications If you see an error indication on the display, find the cause in the chart to the right. If you cannot clear the error indication, take the car to your Honda dealer. Comfort and Convenience Features - 1995 Honda Prelude | Owner's Manual - Page 93
the Preset 6 button while the system is in the tape operation mode may eventually become impossible to remove the deposits with a normal dashboard or in the player. If a cassette is exposed to extreme heat or cold Convenience Features The cassette player automatically ejects cassettes that do not - 1995 Honda Prelude | Owner's Manual - Page 94
If your car's battery is disconnected or goes dead, the audio system will disable itself. If this happens, you will see "Code" in the frequency display the next time you turn on the system. Use the Preset buttons to enter the five-digit code. If it is entered correctly, the radio will start playing - 1995 Honda Prelude | Owner's Manual - Page 95
fluids. You also need to know how to properly stow luggage or packages. This section will help you. If you plan to add any accessories to your car, please read the information in this section first. Break-in Period...98 Gasoline...98 Oxygenated Fuels...98 Driving in Foreign Countries...99 Service - 1995 Honda Prelude | Owner's Manual - Page 96
that help prevent fuel system and engine deposits. Using gasoline containing lead will damage your car's emission controls. This contributes to air pollution and can void certain parts of your warranty. (S model) (All other models) Use a premium unleaded gasoline with a pump octane number of - 1995 Honda Prelude | Owner's Manual - Page 97
fuel system. Gasoline containing more than 5% methanol by volume may cause starting and/or performance problems. It may also damage metal, rubber and plastic parts of your fuel system car outside the U.S. or Canada, write to Honda at the address shown for information about any modifications your car - 1995 Honda Prelude | Owner's Manual - Page 98
cap back on, tighten it until it clicks more than twice. 6. Push the fuel fill door until it latches. 1. The fuel fill is on the driver's side of the car. Park with that side closest to the service station pumps. 2. Open the fuel fill door by pulling on the handle to the left of the driver - 1995 Honda Prelude | Owner's Manual - Page 99
Service Station Procedures Opening the Hood LATCH HOOD RELEASE HANDLE CLIP SUPPORT ROD 1. Shift to Park or Neutral and set the parking brake. Pull the hood release handle, located under the left lower corner of the dashboard. The hood will pop up slightly. 2. Standing in front of the car, put - 1995 Honda Prelude | Owner's Manual - Page 100
Service Station Procedures Oil Check DIPSTICK Check the engine oil level every time you fill the car with fuel. Wait at least two minutes after turning the engine off before you check the oil. 1. Remove the dipstick (orange handle). 2. Wipe the dipstick with a clean cloth or paper towel. 3. - 1995 Honda Prelude | Owner's Manual - Page 101
Service Station Procedures Engine Coolant Check Refer to Periodic Checks on page 136 for information on checking other items in your Honda. MAX MIN UPPER MARK LOWER MARK RESERVE TANK 4. Remove it again and check the level. It should be between the upper and lower marks. If it is near or below the - 1995 Honda Prelude | Owner's Manual - Page 102
minute, no matter how cold it is outside. The engine will warm up faster, and you get better fuel economy. To cut down on the number of "cold starts," try to combine several short trips into one. The air conditioning puts an extra load on the engine which makes it use more fuel. Turn off the A/C to - 1995 Honda Prelude | Owner's Manual - Page 103
Accessories Your Honda dealer has many accessories available to personalize your car. Some of these are audio systems, alloy wheels, air conditioning, and color-coordinated carpet floor mats. All Genuine Honda Accessories have been approved by our engineers for installation and use on your car, and - 1995 Honda Prelude | Owner's Manual - Page 104
in your Honda is 325 kg (700 Ibs). It includes the total weight of all passengers and their belongings, any accessories, and total weight of cargo you can load in or on the car. With four occupants (driver and three passengers), the maximum brake hard or are involved in a collision. Before Driving - 1995 Honda Prelude | Owner's Manual - Page 105
. It also includes important information on your car's braking system and facts you need if you are planning to tow a trailer. Preparing to Drive...108 Starting the Engine...109 5-speed Manual Transmission...109 Automatic Transmission...109 Starting in Cold Weather at High Altitude...110 5-speed - 1995 Honda Prelude | Owner's Manual - Page 106
. 9. Fasten your seat belt. Check that your passengers have fastened their seat belts (see page 7). 10. Turn the ignition ON (II). Check the indicator lights in the instrument panel. 11. Start the engine (see page 109). 12. Check the gauges and indicator lights in the instrument panel (see page 31 - 1995 Honda Prelude | Owner's Manual - Page 107
Starting the Engine 5-speed Manual Transmission 1. Apply the parking brake. 2. In cold weather, turn off all electrical accessories to reduce the drain on the battery. 3. Push the clutch pedal down all the way. START (III) does not function unless the clutch pedal is depressed. 4. Without touching - 1995 Honda Prelude | Owner's Manual - Page 108
meters/ 8,000 feet) An engine is harder to start in cold weather. The thinner air found at high altitude above 2,400 meters (8,000 feet) adds to the problem. Use the following procedure: 1. Turn off all electrical accessories to reduce the drain on the battery. 2. Push the accelerator pedal halfway - 1995 Honda Prelude | Owner's Manual - Page 109
5-speed Manual Transmission Come to a full stop before you shift into reverse. You can damage the transmission by trying to shift into reverse with the car moving. You can get extra braking from the engine when slowing down by shifting to a lower gear. This extra braking can help you maintain a safe - 1995 Honda Prelude | Owner's Manual - Page 110
speed Manual Transmission Maximum Speeds The speeds in this table are the maximums for the given gears. If you exceed these speeds, the engine speed will enter into the tachometer's red zone. If this occurs, you may feel the engine cut in and out. This is caused by a limiter in the engine's computer - 1995 Honda Prelude | Owner's Manual - Page 111
shift lever. It also indicates a possible problem in the transmission if the "D 4 " indicator light flashes. The shift lever has seven positions. It must be in Park or Neutral to start the engine. When you are stopped in D4, D3, 2, 1, N or R, press firmly on the brake pedal and keep your foot off - 1995 Honda Prelude | Owner's Manual - Page 112
shifting up at higher speeds when the engine is cold. This helps the engine warm up faster. Park (P) - This position mechanically locks the transmission. Use Park whenever you are turning off or starting the engine. To shift out of Park, you must press on the brake pedal and have your foot off the - 1995 Honda Prelude | Owner's Manual - Page 113
power when climbing, and increased engine braking when going down steep hills. Use second gear when starting out on a slippery surface or manual transmission without a clutch pedal. Maximum Speeds The speeds in this table are the maximums for the given position. If you exceed these speeds, the engine - 1995 Honda Prelude | Owner's Manual - Page 114
Park to Neutral. SHIFT LOCK RELEASE SLOT RELEASE BUTTON 5. Remove the key from the Shift Lock Release slot. Depress the brake pedal and restart the engine. If you need to use the Shift Lock Release, it could mean your car is developing a problem. Have the car checked by your Honda dealer. Driving - 1995 Honda Prelude | Owner's Manual - Page 115
The Braking System Your Honda is equipped with disc brakes at all four wheels. The braking system is power-assisted to reduce the effort needed on the brake pedal. Put your foot on the brake pedal only when you intend to brake. Resting your foot on the pedal keeps the brakes applied lightly, causing - 1995 Honda Prelude | Owner's Manual - Page 116
. Under all conditions, the ABS is helping to prevent the wheels from locking so you can retain steering control. You should continue to press on the brake pedal with the same force. You may feel a slight movement of the brake pedal just after you start the engine. This is the ABS working. Driving - 1995 Honda Prelude | Owner's Manual - Page 117
-checking. If anything goes wrong, the ABS indicator on the instrument panel comes on (see page 34). This means the Anti-lock function of the braking system has shut down. The brakes still work like a conventional system, providing normal stopping ability. You should have the dealer inspect your car - 1995 Honda Prelude | Owner's Manual - Page 118
more than two minutes with the engine running. They return to steering mode as soon as you move the steering wheel or start to drive away. The 4WS system is self-checking. If it detects a problem anywhere in the system, it turns on the 4WS indicator on the instrument panel (see page 35) and points - 1995 Honda Prelude | Owner's Manual - Page 119
washer reservoir full of the proper fluid. Have the windshield wiper blades replaced if they start to streak the windshield or leave parts unwiped. Use the defrosters and air conditioning to keep the windows from fogging up on the inside (see page 78). Traction - Check your tires frequently for wear - 1995 Honda Prelude | Owner's Manual - Page 120
Your Honda is the trailer's cargo to change the tongue load. Start by putting approximately 60% of the cargo toward the front and 40 % toward the rear. Never load the trailer so the back is heavier than the front. This takes weight off your car's rear axle - 1995 Honda Prelude | Owner's Manual - Page 121
and check the axle weights again. Trailer Hitches Your Honda dealer, or the Honda Customer Relations Zone Office, can give you advice on the proper hitch for your car. Never use a hitch that mounts only to the rear bumper. The bumper is not designed to handle that type of load. The hitch should bolt - 1995 Honda Prelude | Owner's Manual - Page 122
and air pressure of all tires on the trailer and your car. Low tire pressure can seriously affect the handling. Also check the spare tire. With everything loaded and the trailer connected, check that the rear of the car is not sagging. If so, redistribute the load in the car. Check that all lights - 1995 Honda Prelude | Owner's Manual - Page 123
the temperature gauge closely when climbing hills. If it gets near the hot area, turn off the air conditioning (if it is on). If this does not reduce the heat, it may be necessary to pull to the side of the road and wait for the engine to cool. If the automatic transmission shifts frequently - 1995 Honda Prelude | Owner's Manual - Page 124
Towing a Trailer When parking your car and trailer, especially on a hill, be sure to follow all the normal precautions. Turn your front wheels into the curb, set the parking brake firmly, and put the transmission in 1st or Reverse (manual) or Park (automatic). In addition, place wheel chocks at each - 1995 Honda Prelude | Owner's Manual - Page 125
Changes...141 Cooling System...144 Checking the Engine Coolant Level...144 Adding Engine Coolant...144 Replacing Engine Coolant...146 Windshield Washers...148 Transmission Oil...149 Automatic Transmission...149 5-speed Manual Transmission...150 Brake and Clutch Fluid...151 Brake System...151 Anti - 1995 Honda Prelude | Owner's Manual - Page 126
reward you with more economical, trouble-free driving and help reduce air pollution. This section includes instructions for simple maintenance tasks, such as checking and adding oil. Any service items not detailed in this section should be performed by a Honda technician or other qualified mechanic - 1995 Honda Prelude | Owner's Manual - Page 127
sure there is adequate ventilation whenever you operate the engine. Burns from hot parts. Let the engine and exhaust system cool before touching any parts. Injury from moving parts. Do not run the engine unless instructed to do so. Read the instructions before you begin, and make sure you have the - 1995 Honda Prelude | Owner's Manual - Page 128
or distance intervals shown in the maintenance schedule assume you will use your car as normal transportation. You should: Avoid exceeding your car's load limit. This puts excess stress on the engine, brakes, and many other parts of your car. The load limit is shown on the label on the driver's door - 1995 Honda Prelude | Owner's Manual - Page 129
Honda parts and fluids whenever you have maintenance done. These are manufactured to the same highquality standards as the original components, so you can be confident of their perfomance and durability. U.S. Cars: Maintenance, replacement or repair of emission control devices and systems may - 1995 Honda Prelude | Owner's Manual - Page 130
outlines the minimum required maintenance that you should perform to ensure the troublefree operation of your vehicle. Due to regional and climatic differences, some additional servicing may be required. Please consult your warranty handbook for a more detailed description. Maintenance - 1995 Honda Prelude | Owner's Manual - Page 131
trip. Driving in extremely hot [over 90°F (32°C)] conditions. Extensive idling or long periods of stop-and-go driving. Trailer towing, driving with a car-top carrier, or driving in mountainous conditions. Driving on muddy, dusty, or de-iced roads. NOTE: If you only OCCASIONALLY drive under a "severe - 1995 Honda Prelude | Owner's Manual - Page 132
Required Maintenance Record Have your servicing dealer record all Required Maintenance below. Keep receipts for all work done on your car. Maintenance - 1995 Honda Prelude | Owner's Manual - Page 133
Non-Scheduled Maintenance Record Record additional maintenance for severe driving conditions or non-scheduled maintenance on this page (see page 133). Maintenance - 1995 Honda Prelude | Owner's Manual - Page 134
for fuel. See page 148. Automatic transmission - Check the fluid level monthly. See page 149. Brakes, clutch and power steering - Check the fluid level monthly. See page 151. Tires - Check the tire pressure monthly. Examine the tread for wear and foreign objects. See page 164. Battery - Check its - 1995 Honda Prelude | Owner's Manual - Page 135
Fluid Locations BRAKE FLUID (Gray cap) ANTI-LOCK BRAKE RESERVOIR (Gray cap) (5-M/T only) CLUTCH FLUID (Gray cap) COOLANT RESERVOIR ENGINE OIL FILL CAP POWER STEERING FLUID (Red cap) AUTOMATIC TRANSMISSION FLUID DIPSTICK (Yellow loop) WASHER FLUID (Blue cap) ENGINE OIL DIPSTICK (Orange loop) - 1995 Honda Prelude | Owner's Manual - Page 136
Engine Oil Checking Engine Oil DIPSTICK Adding ENGINE OIL FILL CAP UPPER MARK LOWER MARK Check the engine oil a couple of minutes after shutting off the engine. This will allow the oil to drain down to the bottom of the engine. Make sure the car is parked on level ground. 1. Pull out the dipstick - 1995 Honda Prelude | Owner's Manual - Page 137
label on the oil container. A fuel-efficient oil is recommended for your Honda. This is shown on the API Service label by the words "Energy Conserving I I . " This oil is formulated to help your engine use less fuel. The API Service label also tells you the service classification of the oil. Always - 1995 Honda Prelude | Owner's Manual - Page 138
car according to this chart. (Except US: VTEC, Canada: SR-V) (US: VTEC, Canada: SR-V) Additives Your Honda does not need any oil additives. Purchasing additives for the engine or transmission will not increase your car for improved fuel economy and year-round protection in your Honda. You may - 1995 Honda Prelude | Owner's Manual - Page 139
and filter collect contaminants that can damage your engine if they are not removed regularly. Changing the oil and filter requires special tools and access from underneath the car. The car should be raised on a service station-type hydraulic lift for this service. Unless you have the knowledge and - 1995 Honda Prelude | Owner's Manual - Page 140
qt) 7. Replace the engine oil fill cap. Start the engine. The oil pressure indicator light should go out within five seconds. If it does not, turn off the engine and reinspect your work. 8. Let the engine run for several minutes and check the drain bolt and oil filter for leaks. 3. Remove the oil - 1995 Honda Prelude | Owner's Manual - Page 141
9. Turn off the engine, let it sit for several minutes, then check the oil level. If necessary, add oil to bring the level to the upper of the used oil properly. Put it in a sealed container and take it to a recycling center. Do not discard it in a trash bin or dump it on the ground. Maintenance - 1995 Honda Prelude | Owner's Manual - Page 142
Cooling System Checking the Engine Coolant Level Always use Genuine Honda Antifreeze/Coolant. The cooling system contains many aluminum components which can corrode if an improper antifreeze is used. Some antifreeze, even though labeled as safe for aluminum parts, may not provide adequate protection - 1995 Honda Prelude | Owner's Manual - Page 143
Cooling System RADIATOR CAP 3. Remove the radiator cap by pushing down and turning counterclockwise. 4. The coolant level should be up to the base of the filler neck. Add coolant if it is low. 5. Put the radiator cap back on. Tighten it fully. RESERVE TANK 1. Make sure the engine and radiator are - 1995 Honda Prelude | Owner's Manual - Page 144
Do not add any rust inhibitors or other additives to your car's cooling system. They may not be compatible with the coolant or engine components. Replacing Engine Coolant The cooling system should be completely drained and refilled with new coolant according to the time and distance recommendations - 1995 Honda Prelude | Owner's Manual - Page 145
sealant to the drain bolt threads and reinstall the bolt in the engine block. Tighten it securely. 6. Mix the recommended antifreeze with an equal amount of purified or distilled water in a clean container. The cooling system capacity is: With manual transmission: (US: S, Canada: S) 3.5 l (0.92 - 1995 Honda Prelude | Owner's Manual - Page 146
Cooling System, Windshield Washers Windshield Washers BLEEDER BOLT FLOAT RESERVE TANK 8. Loosen the bleeder bolt on top of the engine. Tighten first stop. Start the engine and let it run until it warms up (the radiator cooling fan comes on at least twice). 10.Turn off the engine. Check the level - 1995 Honda Prelude | Owner's Manual - Page 147
. Use only commercially-available windshield washer fluid. Transmission Oil Automatic Transmission DIPSTICK Check the fluid level with the engine at normal operating temperature. 1. Park the car on level ground. Shut off the engine. 2. Remove the dipstick (yellow loop) from the transmission and - 1995 Honda Prelude | Owner's Manual - Page 148
® II Automatic Transmission Fluid (ATF) only. 6. Insert the dipstick all the way back in the transmission. UPPER MARK LOWER MARK 5-speed Manual Transmission Correct level FILLER BOLT 3. Insert the dipstick all the way into the transmission. 4. Remove the dipstick and check the fluid level. It - 1995 Honda Prelude | Owner's Manual - Page 149
up to three reservoirs, depending on model. They are: Brake fluid reservoir (all models) Clutch fluid reservoir (Manual transmission only) ABS reservoir (Except S model) The brake fluid in the brake and Anti-lock brake systems should be replaced every 2 years or 48,000 km (30,000 miles), whichever - 1995 Honda Prelude | Owner's Manual - Page 150
Brake and Clutch Fluid If you add brake fluid to bring it up to the MAX mark, use Genuine Honda Brake Fluid or an equivalent from a sealed container that is marked DOT3 or DOT4 only. Brake fluid marked DOT5 is not compatible with your car's braking system. Anti-lock Brake System If the fluid level - 1995 Honda Prelude | Owner's Manual - Page 151
a sealed container specified for the brake system. Low fluid level can indicate a leak in the clutch system. Have this system inspected as soon as possible. You should check the fluid level in the power steering reservoir monthly. Check the level when the engine is cold. Look at the side of the - 1995 Honda Prelude | Owner's Manual - Page 152
(such as a gas station), ask your Honda dealer to do this service. Follow the replacement procedure for removal and reinstallation. CLAMPS AIR CLEANER ELEMENT The air cleaner element is inside the box on the passenger's side of the engine compartment. To replace it: 1. Unsnap the four hold-down - 1995 Honda Prelude | Owner's Manual - Page 153
Canada: SR-V) The original spark plugs in your car are a special platinum-tipped design for longer life. They only need to be replaced every 6 years or 96,000 km (60,000 miles), whichever comes first. 1. US: VTEC, Canada: SR-V: Remove the four nuts, then remove the spark plug cover. 2. Clean up any - 1995 Honda Prelude | Owner's Manual - Page 154
spark plug that is too loose can overheat and damage the engine. Overtightening can cause damage to the threads in the cylinder head. 7. Install the spark plug cap. 8. Repeat this procedure for the other three spark plugs. (US: VTEC, Canada: SR-V) Reinstall the plug wire cover and tighten the four - 1995 Honda Prelude | Owner's Manual - Page 155
in) (US: VTEC, Canada: SR-V) Normal driving conditions NGK: PZFR6F-11 Nippondenso: PKJ20CR-L11 Hot climates, or continuous high speed driving NGK: PFR7G-11 Nippondenso: PK22PR-L11 Spark Plug Gap: 1.1 mm (0.04 in) Battery Check the condition of your car's battery monthly. You should check for proper - 1995 Honda Prelude | Owner's Manual - Page 156
a physician or 911. Skin - Remove contaminated clothing. Flush the skin with large quantities of water. Call a physician immediately. Swallowing - Drink water or milk. Call your local Poison Control Center or a physician immediately. TEST INDICATOR WINDOW Check the battery condition by looking at - 1995 Honda Prelude | Owner's Manual - Page 157
have a skilled mechanic do the battery maintenance. If your car's battery is disconnected or goes dead, the audio system will disable itself. The next time you turn on the radio you will see "Code" in the frequency display. Use the Preset buttons to enter the five-digit code (see page 95). NOTICE - 1995 Honda Prelude | Owner's Manual - Page 158
Wipers Check the condition of the windshield wiper blades at least every six months. Look for signs of cracking in the rubber, or areas that are getting hard. Replace the blades if you find these signs, or they leave streaks and unwiped areas when used. WIPER ARMS LOCK TAB To replace: 1. Raise - 1995 Honda Prelude | Owner's Manual - Page 159
the new blade assembly onto the wiper arm. Make sure it locks in place. 7. Lower the wiper arm down against the windshield. REINFORCEMENT BLADE BLADE 3. Remove the blade from its holder by grasping the tabbed end of the blade. Pull firmly until the tabs come out of the - 1995 Honda Prelude | Owner's Manual - Page 160
stuck to the front surface. These block the air flow and reduce cooling efficiency. Use a light spray from a hose or a soft brush to remove them. If the air conditioning does not get as cold as before, have your dealer check the system. Recharge the system with Refrigerant HFC-134a (R-134a). (See - 1995 Honda Prelude | Owner's Manual - Page 161
on how and when to check air pressure, how to inspect your tires for damage, and what to do when your tires need to be replaced. ALTERNATOR BELT Check the condition of the two drive belts. Examine the edges of each belt for cracks or fraying. Check the tension of each belt by pushing on it with - 1995 Honda Prelude | Owner's Manual - Page 162
day and use a gauge to measure the air pressure at least once a month. If you think a tire might be low, check it immediately. Remember to check the spare tire at the same time you check all the other tires. Check the pressure in the tires when they are cold. This means the car has been parked for - 1995 Honda Prelude | Owner's Manual - Page 163
to a tire problem and not due to a variation between gauges. Tubeless tires have some ability to self-seal if they are punctured. However, because leakage is often very slow, you should look closely for punctures if a tire starts losing pressure. Inspection Every time you check inflation, you should - 1995 Honda Prelude | Owner's Manual - Page 164
comfort, and long life. You should replace them with radial tires of the same size, load range, speed rating, and maximum cold tire pressure rating (as shown on the tire's sidewall). Mixing radial and bias-ply tires on your car can reduce its braking ability, traction, and steering accuracy. (For - 1995 Honda Prelude | Owner's Manual - Page 165
came on your car. Replacement wheels are available at your Honda dealer. Wheels and car's handling. The ABS works by comparing the speed of the wheels. When replacing tires, use the same size originally supplied with the car. Tire size and construction can affect wheel speed and may cause the system - 1995 Honda Prelude | Owner's Manual - Page 166
instructions and mount them as Remove the chains as soon as you begin driving on cleared roads. NOTICE Chains of the wrong size or that are improperly installed can damage your car's brake lines, suspension, body, and wheels. Stop driving if you hear the chains hitting any part of the car - 1995 Honda Prelude | Owner's Manual - Page 167
Check the following: Headlights (low and high beam) Parking lights Taillights Brake lights High-mount brake light Turn signals Back-up lights Hazard light function License plate light Side marker lights Daytime running lights (Canadian cars) If you find any bulbs are burned out, replace , remove the - 1995 Honda Prelude | Owner's Manual - Page 168
lock the bulb in place. Do not force the ring. Check the seating of the bulb's tabs if the ring will not Replacing a Parking Light Bulb SCREW 1. Use a Phillips-head screwdriver to remove the screw from the top of the fender. 2. Move the parking light assembly forward until it slides out of the body - 1995 Honda Prelude | Owner's Manual - Page 169
. SCREW FRONT SIDE MARKER ASSEMBLY Replacing a Front Side Marker Light Bulb BULB BULB HOLDER 1. Use a Phillips-head screwdriver to loosen the side marker assembly's mounting screw. 2. Remove the side marker assembly from the bumper. 3. Remove the bulb holder from the side marker assembly by - 1995 Honda Prelude | Owner's Manual - Page 170
mounting screw. BULB SCREW BULB HOLDER Replacing a Front Turn Signal Light Bulb TURN SIGNAL ASSEMBLY 1. Use a Phillips-head screwdriver to loosen the turn signal assembly's mounting screw. 2. Remove the turn signal assembly from the bumper. 3. Remove the bulb holder from the turn signal assembly - 1995 Honda Prelude | Owner's Manual - Page 171
. Make sure the tab on the turn signal assembly fits into the bumper slot. Tighten the mounting screw. Replacing a High-mount Brake Light Bulb (US: S, Si, Canada: S, SR) COVER 1. Remove the cover by pulling it down and sliding it forward. 2. Determine which bulb is burned out. 3. Pull the bulb - 1995 Honda Prelude | Owner's Manual - Page 172
the taillight assembly cover. 2. Use a Phillips-head screwdriver to remove the two screws from the bulb holder. Remove the holder from the taillight assembly. 3. Try the tail/stoplights, rear turn signals and back-up lights to verify which bulb needs replacing. Remove that bulb from the socket by - 1995 Honda Prelude | Owner's Manual - Page 173
Lights Replacing a Rear Side Marker Light Bulb 5. Insert the socket in the assembly. Turn it clockwise to lock it in place. 6. Reinstall the side marker assembly in the fender. Tighten the mounting screw securely. SCREW 1. Use a Phillips-head screwdriver to loosen the side marker assembly mounting - 1995 Honda Prelude | Owner's Manual - Page 174
Rear License Bulb 4. Turn on the parking lights and check that the new bulb is working. 5. Reinstall the cover and the lens. Put the license light assembly in place. Reinstall the two screws and tighten them securely. Replacing a Ceiling Light Bulb 1. Remove the lens by carefully prying on the edge - 1995 Honda Prelude | Owner's Manual - Page 175
S and SR models in Canada On VTEC model in the U.S., and SR 4WS and SR-V models in Canada Replacing a Spotlight Bulb On VTEC model in the U.S., and SR 4WS and SR-V models in Canada The spotlight bulbs are in the ceiling light housing. 1. Remove the ceiling light lens as shown previously. CONTINUED - 1995 Honda Prelude | Owner's Manual - Page 176
Lights Replacing a Trunk Light Bulb SPOTLIGHT BULB 2. Remove the two screws and remove the ceiling light assembly. 3. Turn over the ceiling light assembly. Remove the two screws from the spotlight bulb holder. 4. Pull the bulb straight out of the holder. Push the new bulb straight into the holder - 1995 Honda Prelude | Owner's Manual - Page 177
the carpeting, floor mats, etc. are completely dry. Leave the parking brake off. Put the transmission in Reverse (manual) or Park (automatic). Block the rear wheels. If the car is to be stored for a longer period, it should be supported on jackstands so the tires are off the ground. Leave one window - 1995 Honda Prelude | Owner's Manual - Page 178
Care...182 Washing...182 Power Antenna Cleaning...182 Waxing...183 Aluminum Wheels...183 Paint Touch-up...184 Interior Care...185 Carpeting...185 Fabric...185 Vinyl...185 Leather...185 Seat Belts...185 Windows...186 Air Fresheners...186 Corrosion Protection...186 Body Repairs...187 Appearance Care - 1995 Honda Prelude | Owner's Manual - Page 179
let the exterior cool down before you start. Wash the car, using the water and detergent solution and a softbristle brush, sponge, or soft cloth. Start at the top and work your way down. Rinse frequently. Check the body for road tar, tree sap, etc. Remove these stains with tar remover or turpentine - 1995 Honda Prelude | Owner's Manual - Page 180
original shine after using a wax. Cleaning tar, insects, etc. with removers also takes off the wax. Remember to re-wax those areas, even if the rest of the car does not need waxing. Aluminum Wheels Except S model Clean your Honda's aluminum alloy wheels as you do the rest of the exterior. Wash them - 1995 Honda Prelude | Owner's Manual - Page 181
Exterior Care Paint Touch-up Your dealer has touch-up paint to match your car's color. The color code is printed on a sticker on the driver's doorjamb. Take this code to your dealer so you are sure to get the correct color. Examine the chip or scratch closely before repairing it. If it does not go - 1995 Honda Prelude | Owner's Manual - Page 182
and lukewarm water, letting it air dry. To clean off stubborn spots, use a commercially-available fabric cleaner. Test it on a hidden area of the fabric first, to make sure it does not bleach or stain the fabric. Follow the instructions that come with the cleaner. Vinyl Remove dirt and dust with - 1995 Honda Prelude | Owner's Manual - Page 183
trapped in body cavities. Dirt and road salt that collects in hollows on the underside of the car stays damp, promoting corrosion in that area. 2. Removal of paint and protective coatings from the exterior and underside of the car. Many corrosion-preventive measures are built into your Honda. You - 1995 Honda Prelude | Owner's Manual - Page 184
. If your car needs repairs after a collision, pay close attention to the parts used in the repair and the quality of the work. Make sure the repair facility uses genuine Honda replacement body parts. Some companies make sheetmetal pieces that seem to duplicate the original Honda body parts, but are - 1995 Honda Prelude | Owner's Manual - Page 185
196 The Starter Operates Normally...197 Jump Starting...197 If Your Engine Overheats...199 Low Oil Pressure...201 Charging System Indication...202 Malfunction Indicator Lamp/ Check Engine Light...203 Closing the Sunroof...204 Fuses...205 Checking and Replacing...206 Towing...210 Taking Care of the - 1995 Honda Prelude | Owner's Manual - Page 186
only. Get your regular tire repaired or replaced and put back on your car as soon as you can. Check the inflation pressure of the compact spare tire every time you check the other tires. It should be inflated to: 415 kPa (4.15 kg/cm2 , 60 psi) Follow these precautions whenever you are using - 1995 Honda Prelude | Owner's Manual - Page 187
under the car when it is supported only by the jack. 1. Park the car on firm, level ground away from traffic. Turn on the hazard warning lights and turn the ignition to LOCK (0). SPARE TIRE TOOL KIT 2. Put the transmission in Park (automatic) or Reverse (manual). Set the parking brake. 3. Open - 1995 Honda Prelude | Owner's Manual - Page 188
Tire HANDLE COVER JACK 6. The jack is behind a cover in the right fender. Remove the cover by turning the handle clockwise, then pulling on the cover. 7. Turn the jack's end bracket counterclockwise to loosen it, then remove the jack. 8. Loosen the four wheel nuts 1/2 turn with the wheel wrench - 1995 Honda Prelude | Owner's Manual - Page 189
. It is pointed to by an arrow molded into the underside of the body. Place the jack under the jacking point. Turn the end bracket clockwise until extension and wheel wrench as shown to raise the car until the flat tire is off the ground. 11. Remove the wheel nuts and flat tire. Temporarily place - 1995 Honda Prelude | Owner's Manual - Page 190
on the spare tire. Put the wheel nuts back on finger-tight, then tighten them in a crisscross pattern with the wheel wrench until the wheel is firmly against the hub. Do not try to tighten them fully. 14. Lower the car to the ground and remove the jack. Taking Care of the Unexpected - 1995 Honda Prelude | Owner's Manual - Page 191
crisscross pattern. Have the wheel nut torque checked at the nearest automotive service facility. Tighten the wheel nuts to: 110 N.m (11 kg-m, 80 Ib-ft) 16. Remove the wheel cover or center cap. Place the flat tire face down in the trunk well. 17. Remove the spacer cone from the wing bolt, turn - 1995 Honda Prelude | Owner's Manual - Page 192
the problem. (See Towing on page 210.) If the headlights dim noticeably or go out when you try to start the engine, either the battery is discharged or the connections are corroded. Check the condition of the battery and terminal connections (see page 158). You can then try jump starting the car - 1995 Honda Prelude | Owner's Manual - Page 193
be an electrical problem, such as no power to the fuel pump. Check all the fuses (see page 205). If you find nothing wrong, you will need a qualified technician to find the problem. See Towing on page 210. Jump Starting If your car's battery has run down, you may be able to start the engine by using - 1995 Honda Prelude | Owner's Manual - Page 194
. Do not connect this jumper cable to any other part of the engine. 5. If the booster battery is in another car, have an assistant start that car and run it at a fast idle. 6. Start your car. If the starter motor still operates slowly, check the jumper cable connections to make sure they have good - 1995 Honda Prelude | Owner's Manual - Page 195
and spray from an overheated engine can seriously scald you. Do not open the hood if steam is coming out. 1. Safely pull to the side of the road. Put the transmission in neutral or park and set the parking brake. Turn off the heating and cooling system and all other accessories. Turn on the hazard - 1995 Honda Prelude | Owner's Manual - Page 196
lower, before checking the radiator. 10. Start the engine and set the temperature control lever to maximum. Add coolant to the radiator up to the base of the filler neck. If you do not have the proper coolant mixture available, you can add plain water. Remember to have the cooling system drained and - 1995 Honda Prelude | Owner's Manual - Page 197
the level back to the full mark on the dipstick (see page 138). 4. Start the engine and watch the oil pressure light. If the light does not go out within ten seconds, turn off the engine. There is a mechanical problem that needs to be repaired before you can continue driving. (See Towing on page - 1995 Honda Prelude | Owner's Manual - Page 198
discharged to keep the engine running. Drive to a service station or garage where you can get technical assistance. The charging system indicator should go out after the engine starts. If it comes on brightly with the engine running, the alternator is no longer charging the battery. Taking Care of - 1995 Honda Prelude | Owner's Manual - Page 199
indicator lamp/check engine light on, you can damage your car's emission controls and engine. Those repairs may not be covered by your car's warranties. * U.S. indicator shown If this indicator comes on while driving, there is a problem with your engine or its emission control systems. Even - 1995 Honda Prelude | Owner's Manual - Page 200
close the sunroof manually. 3. Get the tool kit out of the trunk. SOCKET ROUND PLUG 4. Pry off the round plug in the center of the headliner. 5. Insert the sunroof wrench into the socket behind this plug. Turn the wrench until the sunroof is fully closed. 6. Remove the wrench. Replace the round - 1995 Honda Prelude | Owner's Manual - Page 201
in two fuse boxes. UNDERHOOD TAB INTERIOR KNOB The underhood fuse box is located in the engine compartment next to the battery. To open, push the tab as shown. The interior fuse box is underneath the dashboard on the driver's side. To open, turn the knob as shown. Taking Care of the Unexpected - 1995 Honda Prelude | Owner's Manual - Page 202
Checking and Replacing Fuses If something electrical in your car stops working, the first thing you should check for is a blown fuse. Determine from the chart on pages 208 and 209, or the diagram on the fuse box lid, which fuse or fuses control that component. Check those fuses first, but check - 1995 Honda Prelude | Owner's Manual - Page 203
fuses of the same rating or lower. 6. If the replacement fuse of the same rating blows in a short time, there is probably a serious electrical problem in your car. Leave the blown fuse in that circuit and have your car checked by a qualified technician. CONTINUED Taking Care of the Unexpected - 1995 Honda Prelude | Owner's Manual - Page 204
Fuses INTERIOR FUSE BOX * : On Canadian cars Taking Care of the Unexpected - 1995 Honda Prelude | Owner's Manual - Page 205
Fuses UNDERHOOD FUSE BOX Taking Care of the Unexpected - 1995 Honda Prelude | Owner's Manual - Page 206
NOTICE Trying to lift or tow your car by the bumpers will cause serious damage. The bumpers are not designed to support the car's weight. Release the parking brake. Shift the transmission to Neutral. Automatic Transmission Release the parking brake. Start the engine. Shift to D4, then to N. Turn - 1995 Honda Prelude | Owner's Manual - Page 207
The Clean Air Act...Crankcase Emission Control System...Evaporative Emission Control System...Exhaust Emission Controls...PGM-FI System...Ignition Timing Control System...Exhaust Gas Recirculation (EGR) System...Three Way Catalytic Converter...Replacement Parts...Three Way Catalytic Converter...221 - 1995 Honda Prelude | Owner's Manual - Page 208
Identification Number (VIN) is the 17-digit number your Honda dealer uses to register your car for warranty purposes. It is also necessary for licensing and insuring your car. The easiest place to find the VIN is on a plate fastened to the top of the dashboard. You can see it by looking through - 1995 Honda Prelude | Owner's Manual - Page 209
Identification Numbers The Engine Number is stamped into the engine block. The Transmission Number is on a label on top of the transmission. MANUAL TRANSMISSION NUMBER AUTOMATIC TRANSMISSION NUMBER ENGINE NUMBER Technical Information - 1995 Honda Prelude | Owner's Manual - Page 210
page 157 2: *3 * : : *4 *5: * 1 : US: S, Canada: S * 2 : US: Si, Canada: SR, SR 4WS * 3 : US: VTEC, Canada: SR-V Technical Information Including the coolant in the reserve tank and that remaining in the engine. Reserve tank capacity: 0.6 (0.16 US gal , 0.13 Imp gal) US: S, Canada: S US: Si, Canada - 1995 Honda Prelude | Owner's Manual - Page 211
Specifications page 208 page 209 * 1 : Except high-mount brake light installed in rear spoiler. * 2 : US: VTEC, Canada: SR 4WS, SR-V *1:S 2 : Except S Technical Information - 1995 Honda Prelude | Owner's Manual - Page 212
For the system to react quickly, the modulator/solenoid unit must have brake fluid under high pump, and electronics. If the control unit detects any faults, it shuts off power to the pump motor and solenoids. The light on the instrument panel comes on. The brakes then work like a conventional system - 1995 Honda Prelude | Owner's Manual - Page 213
the ignition is ON. If it detects a problem anywhere in the system, it lights the 4WS indicator on the instrument panel and turns the system off. With the system off, the rear wheels remain pointed straight ahead. Your car will then drive like a conventional car without 4WS. Technical Information - 1995 Honda Prelude | Owner's Manual - Page 214
this information when selecting replacement tires for your car. The following explains what - Tire construction code (Radial). 14 - Rim diameter in inches. 87 - Load Index, a numerical code associated with the maximum being used for passenger car tires. The speed rating symbol is part of the tire - 1995 Honda Prelude | Owner's Manual - Page 215
until the tires are cold before adjusting the tire pressure (see page 164). DOT Tire Quality Grading (U.S. Cars) The tires on your car meet all U.S. Federal Safety due to variations in driving habits, service practices and differences in road characteristics and climate. (Except S) - 1995 Honda Prelude | Owner's Manual - Page 216
. Warning: The traction grade assigned to this tire is based on braking (straight ahead) traction tests and does not include cornering (turning) failure. The grade C corresponds to a level of performance which all passenger car tires must meet under the Federal Motor Vehicle Safety Standard No. 109. - 1995 Honda Prelude | Owner's Manual - Page 217
then drawn into the engine and burned. Evaporative Emission Control System As gasoline evaporates in the fuel tank, an evaporative emission control canister filled with charcoal adsorbs the vapor. It is stored in this canister while the engine is off. After the engine is started and warmed up, the - 1995 Honda Prelude | Owner's Manual - Page 218
produced when the fuel is burned. Three Way Catalytic Converter The three way catalytic converter is in the exhaust system. Through chemical reactions, it converts HC, CO, and NOx in the engine's exhaust to carbon dioxide (CO2), dinitrogen (N 2 ) , and water vapor. Replacement Parts The emission - 1995 Honda Prelude | Owner's Manual - Page 219
HC, CO, and NOx. A replacement unit must be an original Honda part or its equivalent. The three way catalytic converter must operate at a high temperature for the chemical reactions to take place. It can set on fire any combustible materials that come near it. Park your car away from high grass, dry - 1995 Honda Prelude | Owner's Manual - Page 220
Warranty and Customer Relations Warranty Coverages...Customer Relations Information...U.S. Zone Office Map...Canada Zone Office Map...Authorized Manuals...226 227 228 229 231 Warranty and Customer Relations - 1995 Honda Prelude | Owner's Manual - Page 221
booklet. Canada Cars Please refer to the 1995 Warranty and Maintenance Guide that came with your car. - all exterior body panels are covered for rust-through from the inside for the specified time period with no mileage limit. Accessory Limited Warranty - Genuine Honda Accessories are covered - 1995 Honda Prelude | Owner's Manual - Page 222
, please discuss it with the dealership's management. The Service Manager or General Manager can help. Almost all problems are solved in this way. If you are dissatisfied with the decision made by the dealership's management, contact your Honda Customer Relations Zone Office. Refer to the U.S. and - 1995 Honda Prelude | Owner's Manual - Page 223
, PR 00919-0816 (787) 250-4318 The above addresses and telephone numbers are subject to change. If you cannot reach your Zone office, ask your Honda dealer for the current information. Customer Relations - 1995 Honda Prelude | Owner's Manual - Page 224
Richmond, B.C. V6V 2B8 (604) 278-7121 Central Zone Honda Canada Inc. 126 Milner Avenue Scarborough, Ontario MIS 3R2 (416) 299-3400 Quebec Zone Honda Canada Inc. 1750 rue Eiffel Boucherville, Quebec J4B 7W1 (514) 655-6161 Atlantic Zone Honda Canada Inc. 800 Windmill Road Dartmouth, N.S. B3B 1L1 - 1995 Honda Prelude | Owner's Manual - Page 225
servicing of your vehicle can be obtained from Helm Incorporated, either by filling out the attached form or, for credit card holders, calling the toll-free phone number on the form. For manuals Honda dealer. By completing this form you can order the materials desired. You can pay by check - 1995 Honda Prelude | Owner's Manual - Page 226
. Electrical Troubleshooting Manual: This manual complements the Service Manual by providing in-depth troubleshooting information for each electrical circuit in your car. Body Repair Manual: This manual describes the procedures involved in the replacement of damaged body parts. These Publications - 1995 Honda Prelude | Owner's Manual - Page 227
, Engine Oil...140 Adjustments Mirrors...61 Seats...53 Steering Wheel...45 Battery Charging System Light...33 Jump Starting...197 Maintenance...157 Specifications...215 Before Driving...97 Belts, Seat...5 Body Repair...187 Brakes Anti-lock System (ABS)...118 Break-in, New Linings...98 Fluid...151 - 1995 Honda Prelude | Owner's Manual - Page 228
Changing Engine Coolant...146 Charging System Indicator...33, 202 Check Engine Light...34, 203 Checking Automatic Transmission Fluid...149 Battery Condition...157 Brake Fluid...151 Clutch Fluid...153 Drive Belts...163 Engine Coolant...144 Engine Oil...138 Fuses...205 Manual Transmission Fluid...150 - 1995 Honda Prelude | Owner's Manual - Page 229
Your Car If...210 Disc Brake Wear Indicators...117 Economy, Fuel...104 Emergencies on the Road...189 Battery, Jump Starting...197 Changing a Flat Tire...191 Charging System Indicator...202 Check Engine Light...203 Checking the Fuses...206 Low Oil Pressure Indicator...201 Malfunction Indicator Lamp - 1995 Honda Prelude | Owner's Manual - Page 230
the Fuel Tank...100 Filters Fuel...155 Oil...141 First Gear, Shifting...111 5-speed Manual Transmission, Checking Fluid Level...150 Shifting the...111 Flashers, Hazard Warning...58 Flat Tire, Changing a...191 Fluids Automatic Transmission...149 Brake...151 Clutch...153 Manual Transmission...150 - 1995 Honda Prelude | Owner's Manual - Page 231
Chart...214 Luggage...106 Jacking up the Car...193 Jack, Tire...191 Jump Starting...197 Identification Number, Vehicle...212 If Your Car Has to be Towed...210 Ignition Keys...49 Switch...50 Timing Control System...222 Indicator Lights, Instrument Panel...31 Infant Restraint...19 Inflation, Proper - 1995 Honda Prelude | Owner's Manual - Page 232
Recommended Shift Speeds ...111 Reminder Lights...31 Replacement Information Air Cleaner...154 Coolant...146 Engine Oil and Filter...141 Fuel Filter...155 Fuses...205 Light Bulbs...169 Schedule...130 Spark Plugs...155 Tires...166 Wiper Blades...160 Replacing Seat Belts After a Crash...8 Reserve Tank - 1995 Honda Prelude | Owner's Manual - Page 233
)...50 Starting the Engine...109 In Cold Weather at High Altitude...110 With a Dead Battery...197 Steam Coming from Engine...199 Steering Wheel Adjustment...45 Anti-theft Column Lock...50 Stereo Sound System...79 Storing Your Car...179 Sunroof...60 Closing Manually...204 Operation...60 Supplemental - 1995 Honda Prelude | Owner's Manual - Page 234
164 Inspection...165 Replacing...166 Rotating...166 Snow...168 Specifications...215 Tools, Tire Changing...191 Torn Seat Belts...8 Towing A Trailer...122 Emergency Wrecker...210 Transmission Checking Fluid Level, Automatic...149 Checking Fluid Level, Manual...150 Fluid Selection...150 Identification - 1995 Honda Prelude | Owner's Manual - Page 235
Index Windows Cleaning...186 Operating the Power...59 Rear, Defogger...58 Windshield Cleaning...44 Defroster...78 Wipers, Windshield Changing Blades...160 Operation...44 Worn Tires...165 Wrecker, Emergency Towing...210 - 1995 Honda Prelude | Owner's Manual - Page 236
Pump octane of 91 or higher Fuel Tank Capacity. 60 l (15.9 US gal, 13.2 Imp gal) 5-speed Manual Transmission Oil: SAE 10W-30 or 10W-40 viscosity API SF or SG grade recommended Capacity: 1.9 l (2.0 US qt,1.7 Imp qt) Automatic Transmission Fluid: Honda Premium Formula Automatic Transmission Fluid
-
 1
1 -
 2
2 -
 3
3 -
 4
4 -
 5
5 -
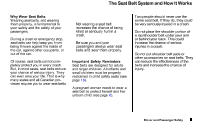 6
6 -
 7
7 -
8
-
9
-
10
-
11
-
12
-
13
-
14
-
15
-
16
-
17
-
18
-
19
-
20
-
21
-
22
-
23
-
24
-
25
-
26
-
27
-
28
-
29
-
30
-
31
-
32
-
33
-
34
-
35
-
36
-
37
-
38
-
39
-
40
-
41
-
42
-
43
-
44
-
45
-
46
-
47
-
48
-
49
-
50
-
51
-
52
-
53
-
54
-
55
-
56
-
57
-
58
-
59
-
60
-
61
-
62
-
63
-
64
-
65
-
66
-
67
-
68
-
69
-
70
-
71
-
72
-
73
-
74
-
75
-
76
-
77
-
78
-
79
-
80
-
81
-
82
-
83
-
84
-
85
-
86
-
87
-
88
-
89
-
90
-
91
-
92
-
93
-
94
-
95
-
96
-
97
-
98
-
99
-
100
-
101
-
102
-
103
-
104
-
105
-
106
-
107
-
108
-
109
-
110
-
111
-
112
-
113
-
114
-
115
-
116
-
117
-
118
-
119
-
120
-
121
-
122
-
123
-
124
-
125
-
126
-
127
-
128
-
129
-
130
-
131
-
132
-
133
-
134
-
135
-
136
-
137
-
138
-
139
-
140
-
141
-
142
-
143
-
144
-
145
-
146
-
147
-
148
-
149
-
150
-
151
-
152
-
153
-
154
-
155
-
156
-
157
-
158
-
159
-
160
-
161
-
162
-
163
-
164
-
165
-
166
-
167
-
168
-
169
-
170
-
171
-
172
-
173
-
174
-
175
-
176
-
177
-
178
-
179
-
180
-
181
-
182
-
183
-
184
-
185
-
186
-
187
-
188
-
189
-
190
-
191
-
192
-
193
-
194
-
195
-
196
-
197
-
198
-
199
-
200
-
201
-
202
-
203
-
204
-
205
-
206
-
207
-
208
-
209
-
210
-
211
-
212
-
213
-
214
-
215
-
216
-
217
-
218
-
219
-
220
-
221
-
222
-
223
-
224
-
225
-
226
-
227
-
228
-
229
-
230
-
231
-
232
-
233
-
234
-
235
-
236
 |
 |

1995 Prelude Online Reference Owner's Manual
Use these links (and links throughout this manual) to navigate through this reference.
For a printed owner's manual, click on authorized manuals or go to www.helminc.com.
Contents
Owner's Identification Form
Introduction
.........................................................................................................................................
i
A Few Words About Safety
.................................................................................................................
ii
Driver and Passenger Safety
..............................................................................................................
3
Proper use and care of your vehicle's seat belts, and Supplemental Restraint System.
Instruments and Controls
.................................................................................................................
29
Instrument panel indicator and gauge, and how to use dashboard and steering column controls.
Comfort and Convenience Features
................................................................................................
71
How to operate the climate control system, the audio system, and other convenience features.
Before Driving
....................................................................................................................................
97
What gasoline to use, how to break-in your new vehicle, and how to load luggage and other cargo.
Driving
..............................................................................................................................................
107
The proper way to start the engine, shift the transmission, and park, plus towing a trailer.
Maintenance
.....................................................................................................................................
127
The Maintenance Schedule shows you when you need to take your vehicle to the dealer.
Appearance Care
..............................................................................................................................
181
Tips on cleaning and protecting your vehicle. Things to look for if your vehicle ever needs body repairs.
Taking Care of the Unexpected
......................................................................................................
189
This section covers several problems motorists sometimes experience, and how to handle them.
Technical Information
.....................................................................................................................
211
ID numbers, dimensions, capacities, and technical information.
Warranty and Customer Relations (U.S. and Canada)
................................................................
225
A summary of the warranties covering your new Acura, and how to contact us.
Authorized Manuals (U.S. only)
......................................................................................................
231
How to order manuals and other technical literature.
Index
......................................................................................................................................................
I
Gas Station Information
A summary of information you need when you pull up to the fuel pump.