1997 Mercury Tracer Owner's Manual - Page 42
1997 Mercury Tracer Manual
Page 42 highlights
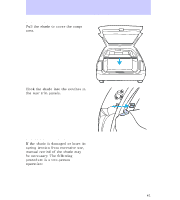
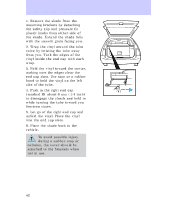
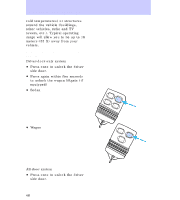
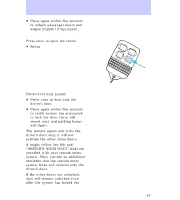
Controls and features 1. Remove the shade from the mounting brackets by detaching the safety clip and pressure fit plastic knobs from either side of the shade. Extend the shade fully with the smooth grain facing you. 2. Wrap the vinyl around the tube twice by twisting the tube away from you. Tuck the edges of the vinyl inside the end cap with each wrap. 3. Fold the vinyl toward the center, making sure the edges clear the end cap slots. Use tape or a rubber band to hold the vinyl on the left side of the tube. 4. Push in the right end cap (marked R) about 6 mm (1/4 inch) to disengage the clutch and hold in while turning the tube toward you fourteen times. 5. Let go of the right end cap and unfold the vinyl. Place the vinyl into the end cap slots. 6. Place the shade back in the vehicle. To avoid possible injury during a sudden stop or collision, the cover should be attached to the brackets when not in use. 42
-
 1
1 -
2
-
3
-
4
-
5
-
6
-
7
-
8
-
9
-
10
-
11
-
12
-
13
-
14
-
15
-
16
-
17
-
18
-
19
-
20
-
21
-
22
-
23
-
24
-
25
-
26
-
27
-
28
-
29
-
30
-
31
-
32
-
33
-
34
-
35
-
36
-
 37
37 -
 38
38 -
 39
39 -
 40
40 -
 41
41 -
 42
42 -
 43
43 -
 44
44 -
 45
45 -
 46
46 -
 47
47 -
48
-
49
-
50
-
51
-
52
-
53
-
54
-
55
-
56
-
57
-
58
-
59
-
60
-
61
-
62
-
63
-
64
-
65
-
66
-
67
-
68
-
69
-
70
-
71
-
72
-
73
-
74
-
75
-
76
-
77
-
78
-
79
-
80
-
81
-
82
-
83
-
84
-
85
-
86
-
87
-
88
-
89
-
90
-
91
-
92
-
93
-
94
-
95
-
96
-
97
-
98
-
99
-
100
-
101
-
102
-
103
-
104
-
105
-
106
-
107
-
108
-
109
-
110
-
111
-
112
-
113
-
114
-
115
-
116
-
117
-
118
-
119
-
120
-
121
-
122
-
123
-
124
-
125
-
126
-
127
-
128
-
129
-
130
-
131
-
132
-
133
-
134
-
135
-
136
-
137
-
138
-
139
-
140
-
141
-
142
-
143
-
144
-
145
-
146
-
147
-
148
-
149
-
150
-
151
-
152
-
153
-
154
-
155
-
156
-
157
-
158
-
159
-
160
-
161
-
162
-
163
-
164
-
165
-
166
-
167
-
168
-
169
-
170
-
171
-
172
-
173
-
174
-
175
-
176
-
177
-
178
-
179
-
180
-
181
-
182
-
183
-
184
-
185
-
186
-
187
-
188
-
189
-
190
-
191
-
192
 |
 |
