3Com 3C16791B-US User Guide - Page 14
Connecting Workstations and Other, Equipment to Your Switch
 |
UPC - 662705518671
View all 3Com 3C16791B-US manuals
Add to My Manuals
Save this manual to your list of manuals |
Page 14 highlights
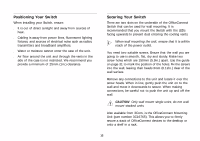
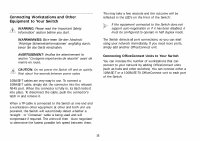
Connecting Workstations and Other Equipment to Your Switch WARNING: Please read the 'Important Safety Information' section before you start. WARNHINWEIS: Bitte lesen Sie den Abschnitt 'Wichtige Sicherheitsinformationen' sorgfältig durch, bevor Sie das Gerät einschalten. AVERTISSEMENT: Veuillez lire attentivement la section "Consignes importantes de sécurité" avant de mettre en route. CAUTION: Do not power the Switch off and on quickly. Wait about five seconds between power cycles. 10BASE-T cables are very easy to use. To connect a 10BASE-T cable, simply slot the connector into the relevant RJ-45 port. When the connector is fully in, its latch locks it into place. To disconnect the cable, push the connector's latch in and remove it. When a TP cable is connected to the Switch at one end and a workstation other equipment at other and both unit are powered, the Switch will automtically detect whether a 'straight ' or 'Crossover' cable is being used and will compensate if required. The units will then 'Auto negotiate' to determine the fastest possible link speed between them. This may take a few seconds and the outcome will be reflected in the LED's on the front of the Switch'. If the equipment connected to the Switch does not support auto-negotiation or if it has been disabled, it must be configured to operate in half duplex mode. The Switch detects all port connections, so you can start using your network immediately. If you need more ports, simply add another OfficeConnect unit. Connecting OfficeConnect Units to Your Switch You can increase the number of workstations that can connect to your network by adding OfficeConnect units (such as hubs and other switches). You can connect either a 10BASE-T or a 100BASE-TX OfficeConnect unit to each port of the Switch. 13
-
 1
1 -
2
-
3
-
4
-
5
-
6
-
7
-
8
-
 9
9 -
 10
10 -
 11
11 -
 12
12 -
 13
13 -
 14
14 -
 15
15 -
 16
16 -
 17
17 -
 18
18 -
 19
19 -
20
-
21
-
22
-
23
-
24
-
25
-
26
-
27
-
28
-
29
-
30
-
31
-
32
 |
 |
