AIWA CX-NV20U Operating Instructions - Page 14
CLOCK SEllllUG
 |
View all AIWA CX-NV20U manuals
Add to My Manuals
Save this manual to your list of manuals |
Page 14 highlights
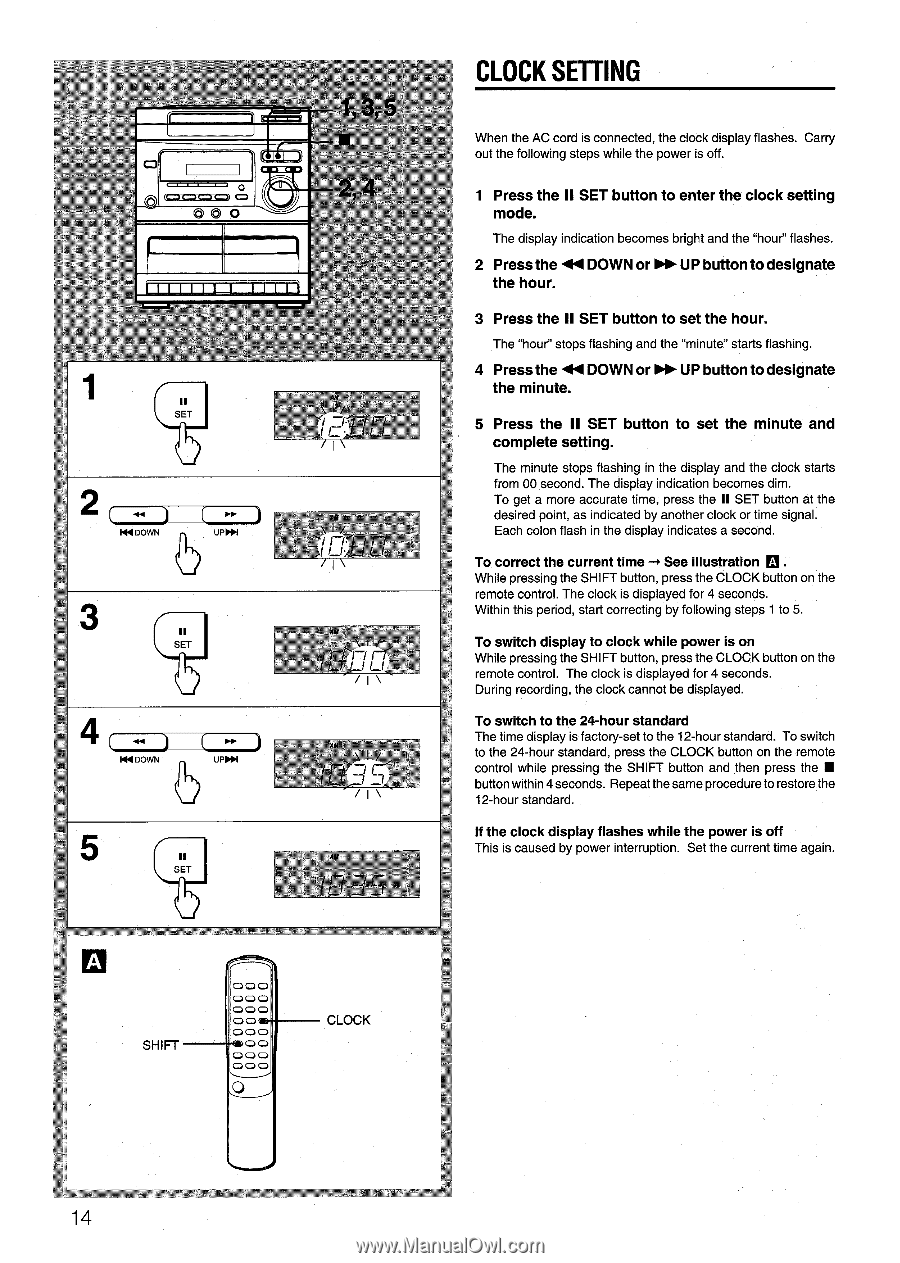
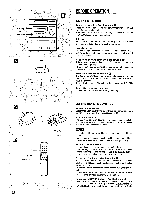
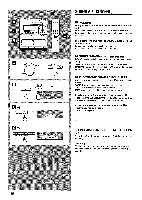
$-J I II SET u 2[+W, ( M1 DOWN UPPPI b 3 9II SET Y= !3 II SET "/l\ .. CLOCK SEllllUG When the AC cord is connected, the clock display flashes. Carry out the following steps while the power is off. 1 Press the II SET button to enter the clock setting mode. The display indication becomes bright and the "hour" flashes. 2 Press the + DOWN or* the hour. UP button to designate 3 Press the II SET button to set the hour. The "hour stops flashing and the "minute" starts flashing. 4 Press the < DOWN or* the minute. UP button to designate 5 Press the II SET button to set the minute and complete setting. The minute stops flashing in the display and the clock starts from 00 second. The display indication becomes dim. To get a more accurate time, press the II SET button at the desired point, as indicated by another clock or time signal. Each colon flash in the display indicates a second. To correct the current time+ See illustration u . While pressing the SHIFT button, press the CLOCK button on the remote control. The clock is displayed for 4 seconds. Within this period, start correcting by following steps 1 to 5. To switch display to clock while power is on While pressing the SHIFT button, press the CLOCK button on the remote control. The clock is displayed for 4 seconds. During recording, the clock cannot be displayed. To switch to the 24-hour standard The time display is factoiy-set to the 12-hour standard. To switch to the 24-hour standard, press the CLOCK button on the remote control while pressing the SHIFT button and then press the s button within 4 seconds. Repeat the same procedure to restore the 12-hour standard. If the clock display flashes while the power is off This is caused by power interruption. Set the current time again. SHIFT i 000 000 000 Ooai - aQa 00 000 000 0 L CLOCK
-
 1
1 -
2
-
3
-
4
-
5
-
6
-
7
-
8
-
 9
9 -
 10
10 -
 11
11 -
 12
12 -
 13
13 -
 14
14 -
 15
15 -
 16
16 -
 17
17 -
 18
18 -
 19
19 -
20
-
21
-
22
-
23
-
24
-
25
-
26
-
27
-
28
-
29
-
30
-
31
-
32
-
33
-
34
-
35
-
36
-
37
-
38
-
39
-
40
-
41
-
42
-
43
-
44
-
45
-
46
-
47
-
48
-
49
-
50
-
51
-
52
-
53
-
54
-
55
-
56
-
57
-
58
-
59
-
60
-
61
-
62
 |
 |