ASRock 775XFire-RAID Quick Installation Guide - Page 24
English, Serial A, Serial ATA SA, A SATA Hard Disks Installation, A Hard Disks Installation
 |
View all ASRock 775XFire-RAID manuals
Add to My Manuals
Save this manual to your list of manuals |
Page 24 highlights
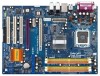
SLI/XFIRE Power Connector (4-pin SLI/XFIRE_POWER1) (see p.2 No. 31) SLI/XFIRE_POWER1 It is not necessary to use this connector, but please connect it with a hard disk power connecor when two graphics cards are plugged to this motherboard at the same time. Game Port Header (15-pin GAME1) (see p.2 No. 23) Connect a Game cable to this header if the Game port bracket is installed. 2.10 Serial ATA (SATA) Hard Disks Installation This motherboard adopts Intel ICH6R south bridge chipset that supports Serial ATA (SATA) hard disks and RAID (RAID 0, RAID 1, and Intel Matrix Storage) functions. You may install SATA hard disks on this motherboard for internal storage devices. This section will guide you to install the SATA hard disks. STEP 1: Install the SATA hard disks into the drive bays of your chassis. STEP 2: Connect the SATA power cable to the SATA hard disk. STEP 3: Connect one end of the SATA data cable to the motherboard's SATA connector. STEP 4: Connect the other end of the SATA data cable to the SATA hard disk. It is not recommended to switch the "Configure SATA as" setting between AHCI, RAID, and IDE mode after OS installation. English 24 ASRock 775XFire-RAID Motherboard
-
 1
1 -
2
-
3
-
4
-
5
-
6
-
7
-
8
-
9
-
10
-
11
-
12
-
13
-
14
-
15
-
16
-
17
-
18
-
 19
19 -
 20
20 -
 21
21 -
 22
22 -
 23
23 -
 24
24 -
 25
25 -
 26
26 -
 27
27 -
 28
28 -
 29
29 -
30
-
31
-
32
-
33
-
34
-
35
-
36
-
37
-
38
-
39
-
40
-
41
-
42
-
43
-
44
-
45
-
46
-
47
-
48
-
49
-
50
-
51
-
52
-
53
-
54
-
55
-
56
-
57
-
58
-
59
-
60
-
61
-
62
-
63
-
64
-
65
-
66
-
67
-
68
-
69
-
70
-
71
-
72
-
73
-
74
-
75
-
76
-
77
-
78
-
79
-
80
-
81
-
82
-
83
-
84
-
85
-
86
-
87
-
88
-
89
-
90
-
91
-
92
-
93
-
94
-
95
-
96
-
97
-
98
-
99
-
100
-
101
-
102
-
103
-
104
-
105
-
106
-
107
-
108
-
109
-
110
-
111
-
112
-
113
-
114
-
115
-
116
-
117
-
118
-
119
-
120
-
121
-
122
-
123
-
124
-
125
-
126
-
127
-
128
-
129
-
130
-
131
-
132
-
133
-
134
-
135
-
136
-
137
-
138
-
139
-
140
-
141
-
142
-
143
-
144
-
145
-
146
-
147
-
148
-
149
-
150
-
151
-
152
-
153
-
154
-
155
-
156
-
157
-
158
-
159
-
160
-
161
-
162
-
163
 |
 |
