ASRock 960GM-GS3 FX RAID Installation Guide - Page 9
Press <Y> to restart the computer. - channel
 |
View all ASRock 960GM-GS3 FX manuals
Add to My Manuals
Save this manual to your list of manuals |
Page 9 highlights
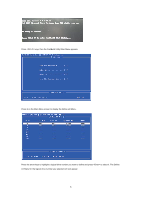
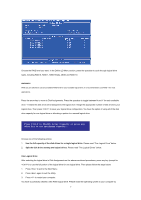
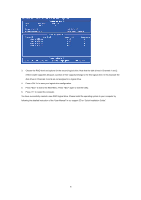
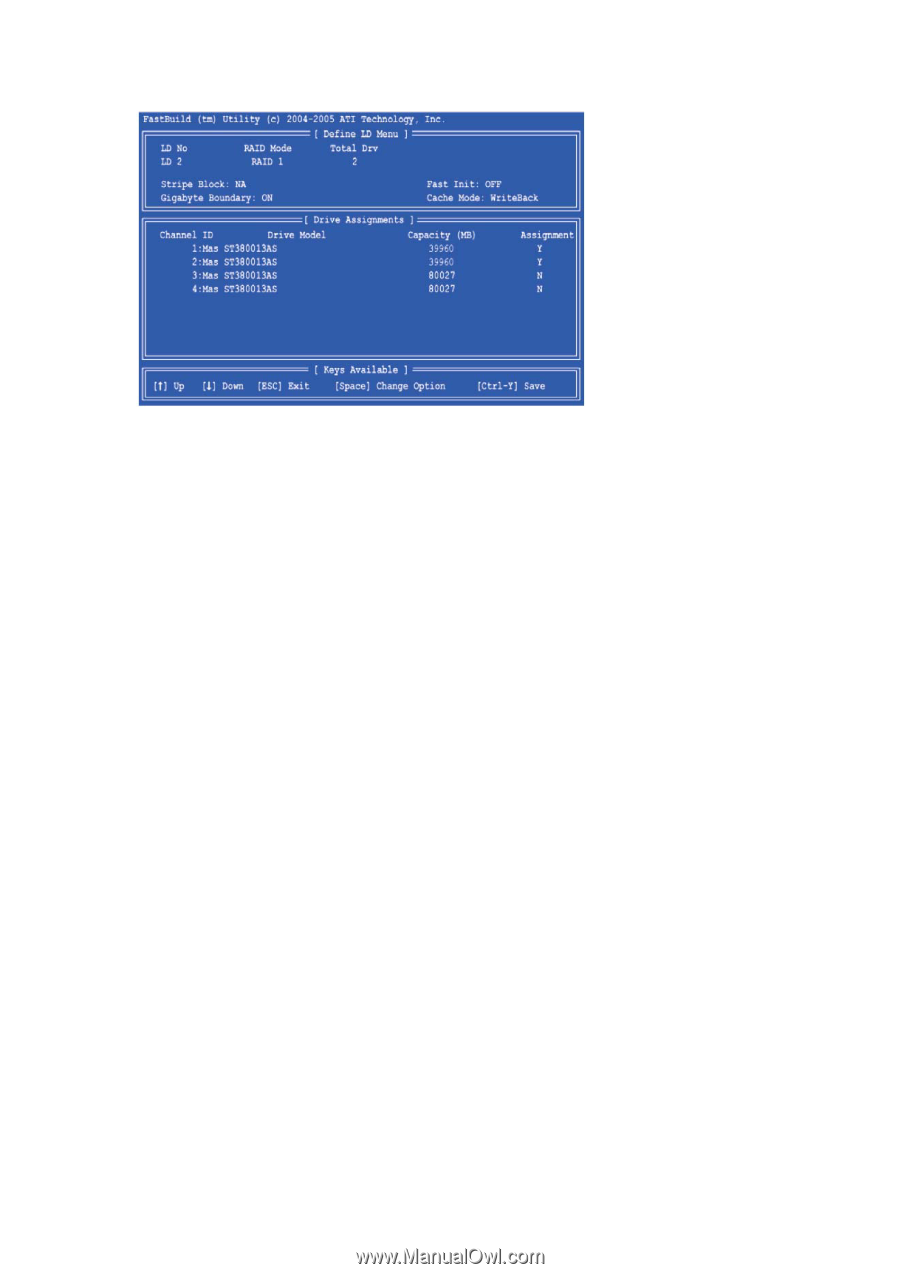
3. Choose the RAID level and options for the second logical drive. Note that the disk drives in Channels 1 and 2 reflect smaller capacities because a portion of their capacity belongs to the first logical drive. In this example the disk drives in Channels 3 and 4 are not assigned to a logical drive. 4. Press to save your logical drive configuration. 5. Press to exit to the Main Menu. Press again to exit the Utility. 6. Press to restart the computer. You have successfully created a new RAID logical drive. Please install the operating system to your computer by following the detailed instruction of the "User Manual" in our support CD or "Quick Installation Guide". 9
-
 1
1 -
2
-
3
-
 4
4 -
 5
5 -
 6
6 -
 7
7 -
 8
8 -
 9
9 -
 10
10 -
 11
11 -
 12
12 -
 13
13 -
 14
14 -
15
-
16
-
17
 |
 |
9
3.
Choose the RAID level and options for the second logical drive. Note that the disk drives in Channels 1 and 2
reflect smaller capacities because a portion of their capacity belongs to the first logical drive. In this example the
disk drives in Channels 3 and 4 are not assigned to a logical drive.
4.
Press <Ctrl-Y> to save your logical drive configuration.
5.
Press <Esc> to exit to the Main Menu. Press <Esc> again to exit the Utility.
6.
Press <Y> to restart the computer.
You have successfully created a new RAID logical drive. Please install the operating system to your computer by
following the detailed instruction of the “User Manual” in our support CD or “Quick Installation Guide”.