Acer AB2x280 F1 Acer AB7000 Enclosure with AB2x280 F1 and AB460 F1 Blade Serve - Page 43
Removing a hard drive carrier, Installing a Hard Drive, AB2x280 F1 HDD LED Indicators
 |
View all Acer AB2x280 F1 manuals
Add to My Manuals
Save this manual to your list of manuals |
Page 43 highlights
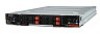
AB2x280 F1 HDD LED Indicators Status Power On HDD Access HDD Rebuild (Blue) ON OFF Blink OFF Blink OFF (Red) Removing a hard drive carrier 1. Locate the colored "Open" button at the bottom of the drive carrier and press it with your thumb (1). This action releases the drive carrier from the drive bay. 2. Pull the release handle out about 45-degrees (2), then use it to pull the drive carrier out (3). Installing a Hard Drive 1. Remove a blank drive carrier from the blade (see removal procedure above). 2. Insert a drive into the carrier with the PCB side facing down and the connector end toward the rear of the carrier. 3. Align the drive in the carrier so that the screw holes of both line up. Note that there are holes in the carrier marked "SAS/SATA" to aid in correct installation. Hardware removal and installation 35