Acer AW2000ht-AW170ht F1 Acer AW2000ht w AW170htx F1 Server Service Guide - Page 52
Air shroud removal and installation, Removing the air shroud
 |
View all Acer AW2000ht-AW170ht F1 manuals
Add to My Manuals
Save this manual to your list of manuals |
Page 52 highlights
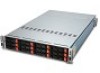
Air shroud removal and installation Removing the air shroud You need to remove the air shroud to perform the following procedures: CAUTION: Always operate your server with the air shroud installed to ensure reliable and continued operation. Follow these steps: 1. Remove the cover plate (see "Removing the cover plate" on page 45). . 2. Remove the two screws ( ) from the mainboard. 3. Lift the air shroud ( ) from the server node. Installing the air shroud Follow these steps: 1. Position the air shroud so that its tabs align with the screw holes ( 2. Secure the air shroud to the mainboard with two screws ( ). ) on the server node. CAUTION: Do not pinch or unplug cables that may be near or under the air duct. 46 Chapter 7