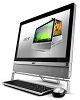
Acer Aspire Z3801 Acer Aspire Z3801 Desktop Service Guide
Acer Aspire Z3801 Manual
 |
View all Acer Aspire Z3801 manuals
Add to My Manuals
Save this manual to your list of manuals |
Acer Aspire Z3801 manual content summary:
- Acer Aspire Z3801 | Acer Aspire Z3801 Desktop Service Guide - Page 1
Aspire Z3801 SERVICE GUIDE i - Acer Aspire Z3801 | Acer Aspire Z3801 Desktop Service Guide - Page 2
, manual or otherwise, without the prior written permission of Acer Incorporated. Disclaimer The information in this guide is subject to change without notice. There are no representations or warranties, either expressed or implied, with respect to the contents hereof and specifically disclaims - Acer Aspire Z3801 | Acer Aspire Z3801 Desktop Service Guide - Page 3
conventions are used in this manual: ! WARNING: Indicates a and circuit board disposal. Batteries and Circuit Boards >10 cm² have been highlighted with a yellow rectangle. process names are shown in italics. Example: the DRS5 User's Guide /usr/local/bin/fd the /TPH15spool_M program Computer - Acer Aspire Z3801 | Acer Aspire Z3801 Desktop Service Guide - Page 4
extra memory capabilities). These localized features are not covered in this generic service guide. service guide. Acer-authorized Service Providers: Your Acer office may have a different part number code than those given in the FRU list in this service guide. The list provided by your regional Acer - Acer Aspire Z3801 | Acer Aspire Z3801 Desktop Service Guide - Page 5
System Board Major Chips (Intel® H61 Express Chipset) . . . 1-19 Processor 1-20 Processor Specifications 1-20 CPU Fan True Value Table (Tj 1-20 System Memory 1-21 Memory Combinations 1-21 Video Interface 1-22 BIOS 1-22 LAN Interface 1-22 Keyboard 1-22 Hard Disk Drive (AVL components 1-23 - Acer Aspire Z3801 | Acer Aspire Z3801 Desktop Service Guide - Page 6
Supported Resolution (GPU 1-28 Camera 1-29 Mini Card 1-29 Audio Codec and Amplifier 1-30 Audio Interface 1-31 Wireless Module - 802.11 b/g/n (optional 1-31 USB Port 1-32 AC Adapter 1-32 System Power Management 1-33 Card Reader 1-33 System LED Indicator 1-34 CHAPTER 2 System Utilities BIOS - Acer Aspire Z3801 | Acer Aspire Z3801 Desktop Service Guide - Page 7
Recommended Equipment 3-5 Screw Table 3-6 Maintenance Flowchart 3-7 Getting Started 3-8 Dummy Card Removal 3-9 Dummy Card Installation 3-9 Rear Door Removal 3-10 Rear Door Installation 3-11 DIMM Removal 3-12 DIMM Installation 3-13 Rear Stand Removal 3-14 Rear Stand Installation 3-14 ODD - Acer Aspire Z3801 | Acer Aspire Z3801 Desktop Service Guide - Page 8
Installation 3-49 CHAPTER 4 Troubleshooting Introduction 4-3 General Information 4-3 Common Problems 4-4 LCD Failure 4-5 Wireless Function Failure 4-8 Component Failure 4-9 Other Functions Failure 4-11 Intermittent Problems 4-16 Undetermined Problems 4-16 BIOS Post Codes 4-17 CHAPTER - Acer Aspire Z3801 | Acer Aspire Z3801 Desktop Service Guide - Page 9
CHAPTER 6 FRU (Field Replaceable Unit) List Exploded Diagram 6-4 Main Assembly 6-4 FRU List 6-6 Screw List 6-22 CHAPTER 7 Online Support Information Support Service 7-3 ix - Acer Aspire Z3801 | Acer Aspire Z3801 Desktop Service Guide - Page 10
x - Acer Aspire Z3801 | Acer Aspire Z3801 Desktop Service Guide - Page 11
CHAPTER 1 Hardware Specifications - Acer Aspire Z3801 | Acer Aspire Z3801 Desktop Service Guide - Page 12
System Board Major Chips (Intel® H61 Express Chipset) . . . 1-19 Processor 1-20 Processor Specifications 1-20 CPU Fan True Value Table (Tj 1-20 System Memory 1-21 Memory Combinations 1-21 Video Interface 1-22 BIOS 1-22 LAN Interface 1-22 Keyboard 1-22 Hard Disk Drive (AVL components 1-23 - Acer Aspire Z3801 | Acer Aspire Z3801 Desktop Service Guide - Page 13
Audio Codec and Amplifier 1-30 Audio Interface 1-31 Wireless Module - 802.11 b/g/n (optional 1-31 USB Port 1-32 AC Adapter 1-32 System Power Management 1-33 Card Reader 1-33 System LED Indicator 1-34 1-3 - Acer Aspire Z3801 | Acer Aspire Z3801 Desktop Service Guide - Page 14
1-4 - Acer Aspire Z3801 | Acer Aspire Z3801 Desktop Service Guide - Page 15
solution Storage Subsystem 0 Hard disk drive Serial ATA hard disk up to 2 TB Multi-in-1 card reader, supporting: MultiMediaCard™ (MMC) Secure Digital™ (SD) Card SDHC™ Card Memory Stick™ Memory Stick PRO Duo™ Memory Stick PRO-HG Duo™ Hardware Specifications and Configurations 1-5 - Acer Aspire Z3801 | Acer Aspire Z3801 Desktop Service Guide - Page 16
0 Intel® HD Graphics technology Microsoft® DirectX® 10.1 Audio Subsystem 0 Dolby®-optimized surround sound system with Weight 0 Dimensions 473 (H) x 532 (W) x 55 (D) mm Weight Touch Screen 0 8.3 kg (18.3 lbs) Non-Touch Screen 0 8.2 kg (18.08 lbs) 1-6 Hardware Specifications - Acer Aspire Z3801 | Acer Aspire Z3801 Desktop Service Guide - Page 17
0 Temperature: Operating: +5°C to +35°C Non-operating: -20°C to +60°C (Unpacked: -10°C to +60°C) Humidity (non-condensing): Operating: 15% to 80% RH, non-condensing Non-operating: 10% to 90% RH, non-condensing at 40°C (104°F) Warranty (N/A) 0 Hardware Specifications and Configurations 1-7 - Acer Aspire Z3801 | Acer Aspire Z3801 Desktop Service Guide - Page 18
Software 0 Acer clear.fi Acer eRecovery Management Acer Game Zone Acer TouchPortal Adobe® Flash® Player Adobe® Reader® Bing™ Bar 2010 MyWinLocker® Nero® 10 Essentials Netflix newsXpresso™ Skype™ Windows Live™ Essentials 1-8 Hardware Specifications and Configurations - Acer Aspire Z3801 | Acer Aspire Z3801 Desktop Service Guide - Page 19
Description Web camera for video communication Also called Liquid-Crystal Display (LCD), displays computer output (configure may vary by model) Illuminates ambient LED light Hardware Specifications and Configurations 1-9 - Acer Aspire Z3801 | Acer Aspire Z3801 Desktop Service Guide - Page 20
Microphone Jack Accepts inputs from external microphones 3 4 5 1-10 Headphones/Speaker Connects to audio devices (e.g., speakers, Jack headphones) Memory Stick PRO (MS PRO), xD-Picture Card (xD) NOTE: Push to remove/install the card. Only one card can operate at any time Hardware Specifications - Acer Aspire Z3801 | Acer Aspire Z3801 Desktop Service Guide - Page 21
handle of a locked drawer. Insert the lock into the notch and turn the key to secure the lock. Some keyless models are also available. Hardware Specifications and Configurations 1-11 - Acer Aspire Z3801 | Acer Aspire Z3801 Desktop Service Guide - Page 22
Description Connects to a set-top box Connects to a TV cable Connects to external audio source 4 Ethernet (RJ-45) Port Connects to an Ethernet 10/100/1000-based network. 5 USB 2.0 Ports Connect to USB 2.0 devices (e.g., USB mouse, USB camera, USB keyboard). 6 DC-IN Jack Connects to an AC - Acer Aspire Z3801 | Acer Aspire Z3801 Desktop Service Guide - Page 23
mode when doing a lot of numeric data entry. Scroll Lock When Scroll Lock is on, the screen moves one line up or down when the up or down arrow keys are pressed respectively. Scroll Lock does not work Home, PgUp, PgDn, End, Ins, Del and arrow keys. Hardware Specifications and Configurations 1-13 - Acer Aspire Z3801 | Acer Aspire Z3801 Desktop Service Guide - Page 24
Functions supported by Windows XP, Windows Vista, and Windows 7: : Open or close the Start menu + R: Open the Run dialog box + M: Minimizes all windows Shift + + M: Undo minimize all windows + F1: Show the help window + E: Open Windows Explorer + F: Search for a file or folder + D: Show the desktop - Acer Aspire Z3801 | Acer Aspire Z3801 Desktop Service Guide - Page 25
the email client Play/Pause Plays or pauses media files Stop Stops media file Previous Plays the previous media file in the play sequence Hardware Specifications and Configurations 1-15 - Acer Aspire Z3801 | Acer Aspire Z3801 Desktop Service Guide - Page 26
Table 1-8. Multimedia Keys (Continued) Key Function Next Description Plays the next media file in the play sequence VOLVOL+ Volume decrease Volume increase Speaker toggle Decreases the volume Increases the volume Turns the speakers on and off 1-16 Hardware Specifications and Configurations - Acer Aspire Z3801 | Acer Aspire Z3801 Desktop Service Guide - Page 27
System Block Diagram 0 Figure 1-7. System Block Diagram Hardware Specifications and Configurations 1-17 - Acer Aspire Z3801 | Acer Aspire Z3801 Desktop Service Guide - Page 28
specifications Item Metric Imperial Dimensions Width 532 mm 20.94 in Depth 65 mm (with LED cover) 2.56 in (with LED cover) 55 mm (without LED cover) 2.17 in (without LED cover) Height 514.7 mm 20.26 in Weight RMS 0.071 oz RMS random, 10 andom, 10 minutes per axis in minutes - Acer Aspire Z3801 | Acer Aspire Z3801 Desktop Service Guide - Page 29
controller Bluetooth Wireless TV PCMCIA Audio codec Card reader Specification Cougar Point PCH package H61(Desktop Supports Mini PCIE, PCI_E wireless LAN Supports Mini PCIE, PCI_E TV N/A ALC272 RTS5138 One-LUN USB 2.0 Card Reader Controller SD, SDHC, MMC, MS, MS pros lot Hardware Specifications - Acer Aspire Z3801 | Acer Aspire Z3801 Desktop Service Guide - Page 30
L2) for each core 8 MB shared instruction/data Last-Level Cache (L3), shared among all cores Cougar Point PCH package H61(Desktop Only) Processor Specifications Item CPU Speed (GHz) Cores/ Threads Bus Speed (FSB/ DMI/QBI) Lithogr aphy (nm) Cache Size Package i5-2500S 2.7 GHz 4 Cores 5 GT - Acer Aspire Z3801 | Acer Aspire Z3801 Desktop Service Guide - Page 31
System Memory Item Memory controller Memory size DIMM socket number Supports memory size per socket Supports maximum memory size Supports DIMM type Supports DIMM Speed Support DIMM voltage Supports DIMM package Specification Built in CPU: Conditional self-refresh (Intel® Rapid Memory Power - Acer Aspire Z3801 | Acer Aspire Z3801 Desktop Service Guide - Page 32
connector type LAN connector location Features Specification RTL8111E-VC-CG RJ45 Base Integrated Gigabit LAN Controller Supports PCI Express1.1 Supports IEEE 802.3 10/100/1000 Mbps Ethernet Support Keyboard Item Type Total number of keypads Windows logo key Internal & external keyboard work - Acer Aspire Z3801 | Acer Aspire Z3801 Desktop Service Guide - Page 33
& Model Name HGST HDS721032CL A362 Capacity (GB) 320 Bytes per sector Data heads 2 Drive Format Disks 1 Spindle speed (RPM) Performance Specifications Buffer size 16MB Interface Fast data transfer rate (Gbits / sec, max) Media data transfer rate (Mbytes/sec max) 1484 DC Power - Acer Aspire Z3801 | Acer Aspire Z3801 Desktop Service Guide - Page 34
transfer 6.0 rate (Gbits / sec, max) Media data transfer rate (Mbytes/sec max) 1695 128 126 DC Power Requirements Voltage tolerance 5V ± 5% Item Specification Vendor & Model Name WD WD10EADX-22 TDHB0 WD WD10EARS-22 Y5B1 WD WD15EARS-22 MVWB0 Capacity (GB) 1000 1000 1500 Bytes per - Acer Aspire Z3801 | Acer Aspire Z3801 Desktop Service Guide - Page 35
rate (KB/sec) Buffer Memory Interface Applicable disc format Loading mechanism Power Requirement Input Voltage Specification HLDS Super-Multi Drive GT32N/GT34N PLDS Super-Multi DRIVE DS-8A5SH with CD Diskette with DVD Diskette Sustained Max 3.6Mbytes/sec Sustained Max 10.08Mbytes/sec 2 MB - Acer Aspire Z3801 | Acer Aspire Z3801 Desktop Service Guide - Page 36
) Buffer Memory Interface Applicable disc format Loading mechanism Power Requirement Input Voltage Specifications PLDS BD Combo Drive DS-6E2SH HDLS BD Combo Drive CT30N with CD Diskette with DVD Diskette with BD Diskette Sustained Max 3.6Mbytes/sec Sustained Sustained Max 10.8Mbytes/sec - Acer Aspire Z3801 | Acer Aspire Z3801 Desktop Service Guide - Page 37
Contrast Ratio Response Time (Optical Rise Time/Fall Time) msec Typical Power Consumption (watt) Weight (without inverter) Physical Size (mm) Electrical Interface Viewing Angle (degree) CR > 10 (Left) Specification AUO M215HW01 VB 21.5 inches (546.1 mm) 476.6 x 268.1 1920x1080 0.248 mm 250 cd - Acer Aspire Z3801 | Acer Aspire Z3801 Desktop Service Guide - Page 38
1360x768/60Hz 16:9 V 1366x768/60Hz 16:9 V Legend: V = Supported; X = Not supported 32 bits V V V V V V V 36 bits X X X X X X X 48 bits X X X X X X X Graphics Controller VGA Chip Supports Item Specification Yes Memory Interface Avivo™ Display System Motion Video Acceleration Features - Acer Aspire Z3801 | Acer Aspire Z3801 Desktop Service Guide - Page 39
Protocol Interface Connector type Supported protocol Bluetooth Module (N/A) Controller Features Item Camera Item Vendor and Model Type Mini Card Item Number supported Features 3G Card (N/A) Features Item Specifications Specifications Specification Foxlink FO20FF-232H-2 Chicony - Acer Aspire Z3801 | Acer Aspire Z3801 Desktop Service Guide - Page 40
Features Specification Realtek ALC272X-GR Two stereo DAC support 16/20/24-bit PCM for two independent playback (multiple streaming) Two stereo ADC supports 16/ required Speaker amplifier power supplies from 3.3V to 5V 10A Shut Down current 1-30 Hardware Specifications and Configurations - Acer Aspire Z3801 | Acer Aspire Z3801 Desktop Service Guide - Page 41
speaker/quantity Specification ALC272 supports Azalia function Specification Battery (N/A) Item Vendor & Model name Battery Type Pack capacity Number of battery cell Package configuration Specification VRAM (N/A) Item Chipset Memory size Interface Specification Hardware Specifications - Acer Aspire Z3801 | Acer Aspire Z3801 Desktop Service Guide - Page 42
port(s) Location AC Adapter Item Input rating Maximum input AC current Inrush current Efficiency Specification 2.0 The PCH contains seven USB full/low-speed host controllers that support the standard Universal Host Controller Interface (UHCI), Revision 1.1. Each UHCI Host Controller (UHC) includes - Acer Aspire Z3801 | Acer Aspire Z3801 Desktop Service Guide - Page 43
size Features Specification Realtek RTS5138 QFP 24P SD: 2T MMC: 32G miniSD: 2T MS/MS-PRO: 32G Multi in 1 card reader, supporting: MultiMediaCard™ (MMC) Secure Digital™ (SD) Card SDHC™ Card Memory Stick™ Memory Stick PRO Duo™ Memory Stick PRO-HG Duo™ Hardware Specifications and - Acer Aspire Z3801 | Acer Aspire Z3801 Desktop Service Guide - Page 44
System LED Indicator Item Lock System state HDD access state Wireless state Power button backlight Battery state Specification N/A White color solid on: System on Amber color blinking: S3 state Reflects the activities of the HDD or Card reader access N/A White - Power on Amber - - Acer Aspire Z3801 | Acer Aspire Z3801 Desktop Service Guide - Page 45
CHAPTER 2 System Utilities - Acer Aspire Z3801 | Acer Aspire Z3801 Desktop Service Guide - Page 46
Setup Utility 2-3 Navigating the BIOS Utility 2-3 BIOS 2-4 Main 2-4 Advanced 2-6 Power 2-7 Security 2-8 Boot Options 2-13 Exit 2-14 BIOS Flash Utilities 2-15 DOS Flash Utility 2-16 WinFBB Utility 2-18 Clearing BIOS Passwords 2-21 Using DMI Tools 2-23 Using the LAN MAC EEPROM Utility - Acer Aspire Z3801 | Acer Aspire Z3801 Desktop Service Guide - Page 47
program built into a computer's BIOS (Basic Input/Output System). The utility is pre-configured and optimized so most users do not need to run it. If configuration problems occur, the setup utility may need to be run. Refer to Chapter 4, Troubleshooting when a problem arises. To activate the utility - Acer Aspire Z3801 | Acer Aspire Z3801 Desktop Service Guide - Page 48
] Select Screen Select Item Enter: |Select +/-: 11||Change Opt. F7: Load User-defined Defaults F8: Save as User-defined F9: Optimized Defaults (When Access Level is Administrator) F10: Save & Exit Version 2.10.1208. Copyright (C) 2002-2011, Acer Inc. Figure 2-1. BIOS Main 2-4 System Utilities - Acer Aspire Z3801 | Acer Aspire Z3801 Desktop Service Guide - Page 49
Speed of system Count Amount of cores Memory Size Memory size available Product Name Product name of the system System Serial Number Serial number of unit Asset Tag Number Asset tag number of system System Date BIOS system date System Time BIOS system time in 24-hour format System - Acer Aspire Z3801 | Acer Aspire Z3801 Desktop Service Guide - Page 50
Item Enter: |Select +/-: 11||Change Opt. F7: Load User-defined Defaults F8: Save as User-defined F9: Optimized Defaults (When Access Level is Administrator) F10: Save & Exit Version 2.10.1208. Copyright (C) 2002-2011, Acer Inc. Figure 2-2. BIOS Advanced Table 2-2 describes the parameters shown in - Acer Aspire Z3801 | Acer Aspire Z3801 Desktop Service Guide - Page 51
Enter: |Select +/-: 11||Change Opt. F7: Load User-defined Defaults F8: Save as User-defined F9: Optimized Defaults (When Access Level is Administrator) F10: Save & Exit Version 2.10.1208. Copyright (C) 2002-2011, Acer Inc. Figure 2-3. BIOS Power Table 2-3 describes the parameters shown in Figure - Acer Aspire Z3801 | Acer Aspire Z3801 Desktop Service Guide - Page 52
support and 5 special keys Select Screen Select Item Enter: |Select +/-: 11||Change Opt. F7: Load User-defined Defaults F8: Save as User-defined F9: Optimized Defaults (When Access Level is Administrator) F10: Save & Exit Version 2.10.1208. Copyright (C) 2002-2011, Acer Inc. Figure 2-4. BIOS - Acer Aspire Z3801 | Acer Aspire Z3801 Desktop Service Guide - Page 53
enter password, three attempts are allowed before system halts. Resetting BIOS password may require computer be returned to dealer. Password on than 12 characters. Setting a Password 0 Perform the following to set a new user or supervisor password: 1. Use the and keys to highlight the Set - Acer Aspire Z3801 | Acer Aspire Z3801 Desktop Service Guide - Page 54
2-7. Setting a Password: Passwords Do Not Match a. Press Enter to return to the BIOS Setup Utility Security menu. b. The Supervisor Password parameter is shown as Clear. c. New Password [ ] Confirm New Password [ ] 2-10 Figure 2-8. Removing a Password: Set Supervisor Password System Utilities - Acer Aspire Z3801 | Acer Aspire Z3801 Desktop Service Guide - Page 55
strings match, The Setup Notice dialog is shown (Figure 2-10). If it is not shown, go to step 6. Setup Notice Changes have been saved. [Continue] Figure 2-10. Changing a Password: Setup Notice a. Press Enter to return to the BIOS Setup Utility Security menu. b. The Supervisor Password parameter is - Acer Aspire Z3801 | Acer Aspire Z3801 Desktop Service Guide - Page 56
a. Press Enter to return to the BIOS Setup Utility Security menu. b. The Supervisor Password parameter is shown Figure 2-12. Changing a Password: Passwords Do Not Match a. Press Enter to return to the BIOS Setup Utility Security menu. b. The Supervisor Password parameter is shown as Clear. c. To try - Acer Aspire Z3801 | Acer Aspire Z3801 Desktop Service Guide - Page 57
Screen Select Item Enter: |Select +/-: 11||Change Opt. F7: Load User-defined Defaults F8: Save as User-defined F9: Optimized Defaults (When Access Level is Administrator) F10: Save & Exit Version 2.10.1208. Copyright (C) 2002-2011, Acer Inc. Figure 2-13. BIOS Boot Options System Utilities 2-13 - Acer Aspire Z3801 | Acer Aspire Z3801 Desktop Service Guide - Page 58
Enter: |Select +/-: 11||Change Opt. F7: Load User-defined Defaults F8: Save as User-defined F9: Optimized Defaults (When Access Level is Administrator) F10: Save & Exit Version 2.10.1208. Copyright (C) 2002-2011, Acer Inc. Figure 2-14. BIOS Exit Table 2-5 describes the parameters in Figure 2-14 - Acer Aspire Z3801 | Acer Aspire Z3801 Desktop Service Guide - Page 59
Use the Flash utility to update the system BIOS Flash ROM. NOTE: NOTE: If a Crisis Recovery Disc is not available, create one before BIOS Flash utility is used. Refer to BIOS Recovery by Crisis Disk. Do not install memory related drivers (XMS, EMS, DPMI) when BIOS Flash is used. Use AC adaptor power - Acer Aspire Z3801 | Acer Aspire Z3801 Desktop Service Guide - Page 60
+/-: 11||Change Opt. F7: Load User-defined Defaults F8: Save as User-defined F9: Optimized Defaults (When Access Level is Administrator) F10: Save & Exit Version 2.10.1208. Copyright (C) 2002-2011, Acer Inc. Figure 2-15. Change BIOS Boot priority Order 4. Copy the BIOS file to USB HDD. 5. Insert - Acer Aspire Z3801 | Acer Aspire Z3801 Desktop Service Guide - Page 61
Firmware 8. When flash is complete, system will restart automatically when finished. 9. Press DEL to enter setup when the splash screen displays. Check to see if BIOS is correct. 10. Press F9 to load default settings. 11. Press F10 to save the default settings and exit - Acer Aspire Z3801 | Acer Aspire Z3801 Desktop Service Guide - Page 62
NOTE: NOTE: Two DOS batch files are included to flash system BIOS: WinFBB.BAT only updates system BIOS WinFBBME.BAT updates system BIOS and Intel ME firmware. To use the WinFBB Utility, perform the following: 1. Click on the Windows Start icon. 2. Click on All Programs in the Start Menu. (Figure - Acer Aspire Z3801 | Acer Aspire Z3801 Desktop Service Guide - Page 63
4. Right-click Command Prompt and select Run as administrator. (Figure 2-20) 5. When Command Prompt opens, enter the name of the BIOS file. (Figure 2-21) Figure 2-21. Command Prompt 6. Type Win to access the file. (Figure 2-22) Figure 2-22. Command Prompt 7. Type 64 to access the file. - Acer Aspire Z3801 | Acer Aspire Z3801 Desktop Service Guide - Page 64
8. Execute WinFBB to flash BIOS. (Figure 2-23) Figure 2-23. Flashing BIOS 9. Restart system after flash has completed. 10. Press DEL to enter setup when the splash screen displays. 11. Check to see if BIOS is correct. 12. Press F9 to load default settings. 13. Press F10 to save the default settings - Acer Aspire Z3801 | Acer Aspire Z3801 Desktop Service Guide - Page 65
password (Supervisor Password and/or User Password) is set, the BIOS will prompt for the password at system POST or upon entering the BIOS setup menu. There are two methods for clearing the BIOS password. A hardware method and a software method. Hardware Method 0 1. Remove AC adapter. 2. Locate - Acer Aspire Z3801 | Acer Aspire Z3801 Desktop Service Guide - Page 66
Software Method 0 If wrong supervisor password is entered three times, the System will halt! dialog is shown. (Figure 2-25) Figure 2-25. Supervisor Password Error 1. At a DOS prompt, enter ClearSuPw.exe. (Figure 2-26) Figure 2-26. Clear Supervisor Password Utility 2. When message Clear the SU Pws - Acer Aspire Z3801 | Acer Aspire Z3801 Desktop Service Guide - Page 67
0 The DMI (Desktop Management Interface) Tool is for multi-BIOS functionality. This tool is for switching the BIOS branding on multi-brand BIOS Setup Utility. 8. After system boots to DOS, type cd P01_A1 to enter the BIOS flash folder. (Figure 2-27) Figure 2-27. DMIBatch In DOS 9. Enter DMIBatch. 10. - Acer Aspire Z3801 | Acer Aspire Z3801 Desktop Service Guide - Page 68
Flash Completed 11. Restart system after flash has completed. 12. Press DEL to enter setup when the splash screen displays. 13. Check to see if BIOS is correct. 14. Press F9 to load default settings. 15. Press F10 to save the default settings and exit - Acer Aspire Z3801 | Acer Aspire Z3801 Desktop Service Guide - Page 69
BD E DS6E2SH USB HDD Enter Setup and to move selection ENTER to select boot device ESC to boot using defaults Figure 2-31. Boot Device Window 6. After the USB HDD has booted, type cd macid. (Figure 2-32) A:\>cd macid A:\MACID>writeid.bat Figure 2-32. MACID.BAT 7. Type A:\MACID\WRITEID.BAT - Acer Aspire Z3801 | Acer Aspire Z3801 Desktop Service Guide - Page 70
. NOTE: NOTE: There should be 128 bytes for remaining space. If the MAC ID is flashed too many times, the MAC ID cannot be rewritten. 10. After the process is complete, the screen indicates the process is successful, as shown in Figure 2-34. PG EFuse is Successful!!! NodeID = 60 EB 69 - Acer Aspire Z3801 | Acer Aspire Z3801 Desktop Service Guide - Page 71
CHAPTER 3 Machine Maintenance Procedures - Acer Aspire Z3801 | Acer Aspire Z3801 Desktop Service Guide - Page 72
Recommended Equipment 3-5 Screw Table 3-6 Maintenance Flowchart 3-7 Getting Started 3-8 Dummy Card Removal 3-9 Dummy Card Installation 3-9 Rear Door Removal 3-10 Rear Door Installation 3-11 DIMM Removal 3-12 DIMM Installation 3-13 Rear Stand Removal 3-14 Rear Stand Installation 3-14 ODD - Acer Aspire Z3801 | Acer Aspire Z3801 Desktop Service Guide - Page 73
CPU Removal 3-38 CPU Installation 3-39 Speaker Module Removal 3-40 Speaker Module Installation 3-40 Light Bar Cover Removal 3-41 Light Bar Cover Installation 3-41 Light Bar Module Removal 3-42 Light Bar Module Installation 3-42 Mainboard Removal 3-43 Mainboard Installation 3-45 LCD Panel - Acer Aspire Z3801 | Acer Aspire Z3801 Desktop Service Guide - Page 74
3-4 - Acer Aspire Z3801 | Acer Aspire Z3801 Desktop Service Guide - Page 75
Machine Maintenance Procedures Introduction 0 This chapter contains general information about the computer, a list of tools needed to perform the required maintenance and step by step procedures on how to remove and install components from the computer. General Information 0 The product previews - Acer Aspire Z3801 | Acer Aspire Z3801 Desktop Service Guide - Page 76
3-1. Main Screw List Screw M2.0x3.0 M3.0x4.0 M3.0x0.5P x L 5.4+0.1/-0.1 L1 3.5 +0.2/-0.2 M3.0x6.0 M2.0x6.0 M3.0x10.0 M4.0x7.0 M3.5x8.9 Quantity 4 31 4 13 2 4 6 4 Acer Part Number 86.SG407.004 86.SG407.002 86.SG407.007 86.SG407.003 86.SG407.006 86.SG407.005 86.SG407.001 86.SG407 - Acer Aspire Z3801 | Acer Aspire Z3801 Desktop Service Guide - Page 77
in Figure 3-1 provides a graphic representation of the module removal and installation sequences. It provides information on what components need to be removed and installed during servicing. Figure 3-1. Maintenance Flowchart Machine Maintenance Procedures 3-7 - Acer Aspire Z3801 | Acer Aspire Z3801 Desktop Service Guide - Page 78
Getting Started 0 The flowchart in Figure 3-1 identifies sections illustrating the entire removal and install sequence. Observe the order of the sequence to avoid damage to any of the hardware components. Perform the following prior to performing any maintenance procedures: 1. Remove power (A) from - Acer Aspire Z3801 | Acer Aspire Z3801 Desktop Service Guide - Page 79
Dummy Card Removal 0 1. Open door (A) on side panel. (Figure 3-3) A Figure 3-3. Door on Side Panel 2. Push in dummy card (B) to release. (Figure 3-4) B Figure 3-4. Dummy Card 3. Remove dummy card (B). Dummy Card Installation 1. Insert dummy card (B). 2. Push in to lock. Machine Maintenance - Acer Aspire Z3801 | Acer Aspire Z3801 Desktop Service Guide - Page 80
Rear Door Removal 0 1. Locate rear door (A). (Figure 3-5) A B Figure 3-5. Rear Door Slot 2. Lift rear door from slot (B) to unlock and separate from rear cover. 3. Lift rear door in an angle, as shown in Figure 3-6. Figure 3-6. Rear Door 4. Remove rear door. 3-10 Machine Maintenance Procedures - Acer Aspire Z3801 | Acer Aspire Z3801 Desktop Service Guide - Page 81
Rear Door Installation 0 1. Locate flanges (C) on rear door. (Figure 3-7) C Figure 3-7. Rear Door Flanges 2. Install rear door flanges into slots (D) on rear cover. (Figure 3-8) D Figure 3-8. Rear Cover Slots 3. Install rear door to rear cover. (Figure 3-6) 4. Press along edges until rear door is - Acer Aspire Z3801 | Acer Aspire Z3801 Desktop Service Guide - Page 82
DIMM Removal 0 Prerequisite: Rear Door Removal 1. Locate DIMM (Dual In-Line Memory Module) door (A) on mainboard cover (B). (Figure 3-9) A C B Figure 3-9. DIMM Door 2. Remove screw (C) from DIMM door. 3. Remove DIMM door from mainboard cover. 3-12 Machine Maintenance Procedures - Acer Aspire Z3801 | Acer Aspire Z3801 Desktop Service Guide - Page 83
DIMM (E) from mainboard connector (D). 6. Repeat steps 4 and 5 for remaining DIMM (G). DIMM Installation 0 1. Connect DIMM (G) into mainboard connector (D). (Figure 3-10) 2. Press on DIMM until clips (F) lock in place. 3. Repeat steps 4 and 5 for DIMM (E). 4. Install DIMM door (A) to mainboard cover - Acer Aspire Z3801 | Acer Aspire Z3801 Desktop Service Guide - Page 84
Rear Stand Removal 0 Prerequisite: Rear Door Removal 1. Remove screws (A) from rear stand (B). (Figure 3-11) B A B B Figure 3-11. Rear Stand 2. Remove rear stand from front cover. Rear Stand Installation 0 1. Install rear stand (A) to front cover. (Figure 3-11) 2. Install and secure screws (B) to - Acer Aspire Z3801 | Acer Aspire Z3801 Desktop Service Guide - Page 85
ODD Module Removal 0 Prerequisite: Rear Door Removal 1. Locate ODD module (A). (Figure 3-12) A C B Figure 3-12. ODD Module 2. Remove screw (B) from front cover. 3. Slide and remove ODD module through ODD slot (C) on rear cover. 4. Press ODD tray release button (D) on bezel to eject ODD tray. (Figure - Acer Aspire Z3801 | Acer Aspire Z3801 Desktop Service Guide - Page 86
5. Slide ODD tray (F) from ODD module. (Figure 3-14) H G F Figure 3-14. ODD Latch and Bezel 6. Unlock latch (G) to separate ODD bezel (H) from tray. 7. Remove ODD bezel. 8. Remove screws (J) from ODD bracket (K) and ODD module. (Figure 3-15) J K Figure 3-15. ODD Module Bracket 9. Remove ODD - Acer Aspire Z3801 | Acer Aspire Z3801 Desktop Service Guide - Page 87
ODD Module Installation 0 1. Install ODD bracket (K) to ODD module. (Figure 3-15) 2. Install and secure screws (J) from ODD bracket to ODD module. 3. Install ODD bezel (H) to ODD tray (F). (Figure 3-14) 4. Install and secure latch (G) to tray. 5. Install ODD tray (F) into ODD module. 6. Install ODD - Acer Aspire Z3801 | Acer Aspire Z3801 Desktop Service Guide - Page 88
Rear Cover Removal 0 Prerequisite: Rear Stand Removal ODD Module Removal 1. Remove screws (A) from rear cover (B). (Figure 3-11) A A B Figure 3-16. Rear Cover 2. Separate rear cover from bottom side (C). (Figure 3-17) C 3-18 Figure 3-17. Rear Cover Machine Maintenance Procedures - Acer Aspire Z3801 | Acer Aspire Z3801 Desktop Service Guide - Page 89
3. Move along edges until rear cover is completely separated from front cover. 4. Remove rear cover. Rear Cover Installation 0 1. Align and install rear cover (B) with front cover. (Figure 3-11) 2. Press along edges until rear cover is secure to front cover. 3. Install and secure screws (A) to rear - Acer Aspire Z3801 | Acer Aspire Z3801 Desktop Service Guide - Page 90
Camera Module Removal 0 Prerequisite: Rear Cover Removal 1. Remove screws (A) from brackets (B) and (C). (Figure 3-18) A C B Figure 3-18. Camera Module Brackets 2. Remove brackets (B) and (C). ! CAUTION: Camera cable is connected to mainboard. Use caution when lifting or removing camera. 3. - Acer Aspire Z3801 | Acer Aspire Z3801 Desktop Service Guide - Page 91
4. Turn camera module over. (Figure 3-20) E F Figure 3-20. Camera Module Cable 5. Disconnect camera module cable (E) from module connector (F). Camera Module Installation 0 1. Connect camera module cable (E) to module connector (F). (Figure 3-20) 2. Turn camera module over. 3. Install camera module - Acer Aspire Z3801 | Acer Aspire Z3801 Desktop Service Guide - Page 92
cable (A) from power board connector (B). 3. Remove screw (D) from front cover. 4. Remove power board from guide pin (E) on front cover. Power Board Installation 0 1. Align and install power board (C) with guide pin (E) on front cover. (Figure 3-21) 2. Install and secure screw (D) to front cover - Acer Aspire Z3801 | Acer Aspire Z3801 Desktop Service Guide - Page 93
Converter Board Removal 0 Prerequisite: Rear Cover Removal 1. Locate converter board (A) on front cover. (Figure 3-22) A D B F C E D Figure 3-22. Inverter Board 2. Disconnect the following cables: Converter to mainboard cable (B) from converter board connector (C) Converter to panel cable (F) - Acer Aspire Z3801 | Acer Aspire Z3801 Desktop Service Guide - Page 94
cover. (Figure 3-23) B A C D E Figure 3-23. LED Switch Board 2. Disconnect LED switch board cable (B) from connector (C). 3. Remove screw (E) from board. 4. Remove LED switch board from guide pin (D) on front cover. LED Switch Board Installation 0 1. Align and install LED switch board (A) with - Acer Aspire Z3801 | Acer Aspire Z3801 Desktop Service Guide - Page 95
. Infrared Board 2. Disconnect infrared board cable (C) from board connector (D). 3. Remove screw (B) from infrared board. 4. Remove infrared board from guide pin (E) on front cover. Infrared Board Installation 0 1. Align and install infrared board (A) with guidepin (E) on front cover. (Figure 3-24 - Acer Aspire Z3801 | Acer Aspire Z3801 Desktop Service Guide - Page 96
Disconnect the following cables: HDD cable (D) from mainboard connector (E) HDD cable (G) from mainboard connector (F) 3. Remove HDD cables (D) and (G) from guide (H). 4. Remove screw (B) from ground cable (C) on HDD module. 5. Slide and remove HDD module. 3-26 Machine Maintenance Procedures - Acer Aspire Z3801 | Acer Aspire Z3801 Desktop Service Guide - Page 97
on HDD module. (Figure 3-25) 3. Install and secure screw (B) to ground cable and HDD module. 4. Secure HDD cables (D) and (G) to guides (H) on front cover. 5. Connect the following cables: HDD cable (D) to mainboard connector (E) HDD cable (G) to mainboard connector (F) 6. Install rear cover - Acer Aspire Z3801 | Acer Aspire Z3801 Desktop Service Guide - Page 98
HDD Carrier Removal 0 Prerequisite: HDD Module Removal 1. Disconnect HDD cable (C) from HDD module connector (D). (Figure 3-27) A B C A D Figure 3-27. HDD Module 2. Remove screws (A) from HDD carrier. 3. Remove HDD carrier (B) from HDD module. HDD Carrier Installation 0 1. Install HDD carrier (B) - Acer Aspire Z3801 | Acer Aspire Z3801 Desktop Service Guide - Page 99
LCD Stand Removal 0 Prerequisite: Rear Cover Removal 1. Locate LCD stand (A) on front cover. (Figure 3-28) B B A Figure 3-28. LCD Stand 2. Remove screws (B) from LCD stand. 3. Remove LCD stand from front cover. LCD Stand Installation 0 1. Install LCD stand (A) to slots (C) on front cover. ( - Acer Aspire Z3801 | Acer Aspire Z3801 Desktop Service Guide - Page 100
Mainboard Cover Removal 0 Prerequisite: Rear Cover Removal 1. Locate mainboard cover (A) on front cover. (Figure 3-30) A B E F B D C Figure 3-30. Mainboard Cover 2. Disconnect the following cables: HDD cable (D) from mainboard connector (C) HDD cable (E) from mainboard connector (F) 3. - Acer Aspire Z3801 | Acer Aspire Z3801 Desktop Service Guide - Page 101
WLAN Module Removal 0 Prerequisite: Mainboard Cover Removal 1. Locate WLAN module (A) on mainboard. (Figure 3-31) E D A C B Figure 3-31. WLAN Module 2. Disconnect WLAN main (C) and auxiliary (D) antenna cables from WLAN module. 3. Remove screw (E) from module. 4. Disconnect WLAN module (A) from - Acer Aspire Z3801 | Acer Aspire Z3801 Desktop Service Guide - Page 102
RTC Battery Removal 0 Prerequisite: Mainboard Cover Removal 1. Locate RTC battery mylar (A). (Figure 3-32) E A Figure 3-32. RTC Mylar 2. Remove mylar. 3. Lift battery (B) from opening (C) on mainboard connector (D). (Figure 3-33) D B C Figure 3-33. RTC Battery 4. Remove battery from mainboard - Acer Aspire Z3801 | Acer Aspire Z3801 Desktop Service Guide - Page 103
RTC Battery Installation 0 1. Install battery (B) into mainboard connector (D). (Figure 3-33) 2. Press down to secure. 3. Install mylar (A) on RTC battery. (Figure 3-32) 4. Install mainboard cover. Machine Maintenance Procedures 3-33 - Acer Aspire Z3801 | Acer Aspire Z3801 Desktop Service Guide - Page 104
0 1. Install fan module (A) to front cover. (Figure 3-34) 2. Install and secure screws (E) to front cover. 3. Secure fan cable (B) to guide (D) on front cover. 4. Connect fan cable to mainboard connector (C). 5. Install mainboard cover. ID Size E M3.0x6.0 Quantity 3 Screw Type 3-34 Machine - Acer Aspire Z3801 | Acer Aspire Z3801 Desktop Service Guide - Page 105
front cover. (Figure 3-35) 2. Install and secure screws (B) to front cover. 3. Secure ODD cable (G) to guides on front cover. 4. Secure WLAN main (E) and auxiliary (F) cables to guide. 5. Connect ODD cable (G) to mainboard connector (H). 6. Install WLAN mylar (D) to front cover. 7. Install ODD mylar - Acer Aspire Z3801 | Acer Aspire Z3801 Desktop Service Guide - Page 106
Thermal Module Removal 0 Prerequisite: Mainboard Cover Removal 1. Locate thermal module (A) on mainboard. (Figure 3-36) B/2 C B/4 A B/1 B/3 Figure 3-36. Thermal Module 2. Loosen the following captive screws from mainboard: Screws (B/1 - B/4) Screw (C) 3. Remove thermal module (A) from mainboard. - Acer Aspire Z3801 | Acer Aspire Z3801 Desktop Service Guide - Page 107
. CPU Grease 3. Align and install thermal module (A) to mainboard screw holes. (Figure 3-36) 4. Secure the following captive screws to mainboard: Screws (B/1 - B/4) in numerical order from one (1) to four (4) Screw (C) 5. Install mainboard cover. Machine Maintenance Procedures 3-37 - Acer Aspire Z3801 | Acer Aspire Z3801 Desktop Service Guide - Page 108
CPU module (A) on mainboard. (Figure 3-38) A C B Figure 3-38. CPU in Socket 2. Release lever (B) from latch (C). 3. Move lever until CPU holder (D) clears guide (E) and lifts open. (Figure 3-39) G F Figure 3-39. CPU Holder 4. Remove CPU from socket. 3-38 D E Machine Maintenance Procedures - Acer Aspire Z3801 | Acer Aspire Z3801 Desktop Service Guide - Page 109
(F) with socket marker (G) and install CPU to socket. (Figure 3-39) 2. Install CPU holder (D) until covering CPU. 3. Move lever (B) until CPU holder is inserted to guide (E). 4. Install and secure lever to latch (C). (Figure 3-38) 5. Install thermal module. Machine Maintenance Procedures 3-39 - Acer Aspire Z3801 | Acer Aspire Z3801 Desktop Service Guide - Page 110
3-40. Speaker Modules 2. Disconnect speaker cable (C) from mainboard connector (D). 3. Remove speaker cable from guides. 4. Remove screws (E) from speakers. 5. Remove speakers (A) and (B) from guide pins (F). Speaker Module Installation 0 1. Align and install right (A) and left (B) speakers with - Acer Aspire Z3801 | Acer Aspire Z3801 Desktop Service Guide - Page 111
Light Bar Cover Removal 0 Prerequisite: Mainboard Cover Removal 1. Remove screws (A) from front cover. (Figure 3-41) A Figure 3-41. Front Cover Screws 2. Turn front cover over. 3. Remove light bar cover (B). (Figure 3-42) B Figure 3-42. Light Bar Cover Light Bar Cover Installation 0 1. Install - Acer Aspire Z3801 | Acer Aspire Z3801 Desktop Service Guide - Page 112
(Figure 3-43) C B A D Figure 3-43. Left Light Bar Module 2. Move and hold latch (C) on light bar cover. 3. Remove left light bar module from guides. 4. Repeat steps 2 and 3 to remove right light bar module (D). Light Bar Module Installation 0 1. Align and install left light bar module (A) with - Acer Aspire Z3801 | Acer Aspire Z3801 Desktop Service Guide - Page 113
Mainboard Removal 0 Prerequisite: DIMM Removal WLAN Module Removal RTC Battery Removal CPU Removal 1. Disconnect the following cables: (Figure 3-44) Left light bar cable (A) from mainboard connector (a) Speaker cable (B) from mainboard connector (b) Infrared board cable (C) from mainboard - Acer Aspire Z3801 | Acer Aspire Z3801 Desktop Service Guide - Page 114
Camera cable (M) from mainboard connector (m) M m k K j J Hh G g Figure 3-45. Mainboard Connectors 3. Remove screws (N) from mainboard (P). (Figure 3-46) Q N P N N Q Figure 3-46. Mainboard Screws 4. Remove mainboard from guide pins (Q) on front cover. 3-44 Machine Maintenance Procedures - Acer Aspire Z3801 | Acer Aspire Z3801 Desktop Service Guide - Page 115
Mainboard Installation 0 NOTE: NOTE: Make sure all cables are clear when installing mainboard. 1. Align and install mainboard (P) with guide pins (Q) on front cover. (Figure 3-46) 2. Install and secure screws (N) to mainboard. 3. Connect the following cables: (Figure 3-45) Touch board cable (G) - Acer Aspire Z3801 | Acer Aspire Z3801 Desktop Service Guide - Page 116
Figure 3-47. Mainboard Recycling + IMPORTANT: Follow local regulations for circuit board disposal. 3-46 Machine Maintenance Procedures - Acer Aspire Z3801 | Acer Aspire Z3801 Desktop Service Guide - Page 117
LCD Panel Removal 0 Prerequisite: Camera Module Removal Mainboard Removal Converter Board Removal Speaker Module Removal 1. Disconnect converter to panel cable (A) from LCD panel connector (B). (Figure 3-48) C B A Figure 3-48. Screws on Front Cover 2. Remove eleven (11) screws (C) from front cover. - Acer Aspire Z3801 | Acer Aspire Z3801 Desktop Service Guide - Page 118
3. Remove front cover to reveal LCD panel. (Figure 3-49) Figure 3-49. LCD Panel LCD Panel Installation 0 1. Align and install front cover with LCD panel. (Figure 3-48) 2. Install and secure eleven (11) screws (C) to front cover. 3. Connect converter to panel cable (A) to LCD panel connector (B). 4. - Acer Aspire Z3801 | Acer Aspire Z3801 Desktop Service Guide - Page 119
LVDS Cable Removal 0 Prerequisite: LCD Panel Removal 1. Locate LVDS cable (A) on LCD panel. (Figure 3-50) A Figure 3-50. LVDS Cable ! CAUTION: LVDS cable is connected to LCD panel. Use caution when removing cable. 2. Remove LVDS cable from adhesive on LCD panel. 3. Peel tape (B) covering LVDS cable - Acer Aspire Z3801 | Acer Aspire Z3801 Desktop Service Guide - Page 120
3-50 Machine Maintenance Procedures - Acer Aspire Z3801 | Acer Aspire Z3801 Desktop Service Guide - Page 121
CHAPTER 4 Troubleshooting - Acer Aspire Z3801 | Acer Aspire Z3801 Desktop Service Guide - Page 122
Introduction 4-3 General Information 4-3 Common Problems 4-4 LCD Failure 4-5 Wireless Function Failure 4-8 Component Failure 4-9 Other Functions Failure 4-11 Intermittent Problems 4-16 Undetermined Problems 4-16 BIOS Post Codes 4-17 4-2 - Acer Aspire Z3801 | Acer Aspire Z3801 Desktop Service Guide - Page 123
. General Information 0 The following procedures are a guide for troubleshooting computer problems. The step by step procedures are designed to be performed as described. NOTE: NOTE: The diagnostic tests are intended for Acer products only. Non-Acer products, prototype cards, or modified options can - Acer Aspire Z3801 | Acer Aspire Z3801 Desktop Service Guide - Page 124
Use the following procedure as a guide for computer problems. 1. Obtain the failing symptoms in as much detail as possible. 2. Verify the symptoms by attempting to re-create the failure by running the diagnostic test or by repeating the same operation. 3. Use the troubleshooting sections to try and - Acer Aspire Z3801 | Acer Aspire Z3801 Desktop Service Guide - Page 125
not appear, perform the following: 1. Make sure that internal display is selected. Switching between internal and external by pressing Fn+F5. Reference Product pages for specific model procedures. Troubleshooting 4-5 - Acer Aspire Z3801 | Acer Aspire Z3801 Desktop Service Guide - Page 126
one by one until the failure point is discovered. 9. Reseat the memory modules. 10. Remove the drives (Refer to Maintenance Flowchart). 11. If the Issue is still not resolved, refer to Online Support to its highest level. Refer to the User Manual for instructions on adjusting the settings. If the - Acer Aspire Z3801 | Acer Aspire Z3801 Desktop Service Guide - Page 127
There are no device conflicts No hardware is listed under Other Devices 7. If the Issue is still not resolved, refer to Online Support Information. 8. Run the Windows Memory Diagnostic from the operating system DVD and follow the on-screen prompts. 9. If the Issue is still not resolved, refer to - Acer Aspire Z3801 | Acer Aspire Z3801 Desktop Service Guide - Page 128
WLAN module OK Reconnect NG cable correctly OK NG Replace NG WLAN module OK NG Replace Mainboard OK Close Close Close Figure 4-3. Wireless Function Failure 4-8 Troubleshooting - Acer Aspire Z3801 | Acer Aspire Z3801 Desktop Service Guide - Page 129
connected properly? No Close Figure 4-4. Component Failure Sound Problems 0 Perform the following: 1. Boot the computer. If updated recently, roll back the audio driver to the previous version. 4. Remove and reinstall the audio driver. 5. Make sure that all volume mark). Troubleshooting 4-9 - Acer Aspire Z3801 | Acer Aspire Z3801 Desktop Service Guide - Page 130
the Operating System. 12. If the Issue is still not resolved, refer to Online Support Information. Microphone Failure 0 If internal or external Microphones fail, perform the following: 1. Check If the Issue is still not resolved, refer to Online Support Information. 4-10 Troubleshooting - Acer Aspire Z3801 | Acer Aspire Z3801 Desktop Service Guide - Page 131
is discovered, follow the on-screen information to resolve the problem. 1. Run the Windows Memory Diagnostic Tool. For more information see Windows Help and Support. 2. Restart the computer and press F2 to enter the BIOS Utility. Check the BIOS settings are correct and that CD/DVD drive is set as - Acer Aspire Z3801 | Acer Aspire Z3801 Desktop Service Guide - Page 132
Windows Disk Defragmenter. For more information see Windows Help and Support. 6. Run Windows Check Disk by entering chkdsk /r from a command prompt. For more information see Windows Help and Support or the BIOS setup LED Perform the following, one at a time: the driver. 8. reinstall the driver. 9. - Acer Aspire Z3801 | Acer Aspire Z3801 Desktop Service Guide - Page 133
changed even when Windows is reinstalled or the Desktop disc recording panel, select the writable ODD from the drop down list. Click OK. 7. Confirm that the software used for burning discs is the factory default. If using different software, refer to the software's user manual. Troubleshooting - Acer Aspire Z3801 | Acer Aspire Z3801 Desktop Service Guide - Page 134
the computer and press F2 to enter the BIOS Utility. 2. Verify that the drive is detected in the ATAPI Model Name field on the Information page. NOTE: NOTE: Verify that the entry is identical to one of the ODDs specified in Hardware Specifications and Configurations. Remove power and remove the - Acer Aspire Z3801 | Acer Aspire Z3801 Desktop Service Guide - Page 135
BIOS Settings 0 If the computer is experiencing intermittent loss of BIOS information, perform the following: 1. If the computer is more than one 10. Run the Event Viewer to check the events log for errors. For more information refer to Windows Help and Support. 11. Roll back the mouse driver - Acer Aspire Z3801 | Acer Aspire Z3801 Desktop Service Guide - Page 136
are supported by Acer devices Printer, mouse, and other external devices Battery pack Hard disk drive DIMM CD-ROM/Diskette drive Module PC Cards 4. Apply power to the computer. 5. Determine if the problem has changed. 6. If the problem does not recur, connect the removed devices one - Acer Aspire Z3801 | Acer Aspire Z3801 Desktop Service Guide - Page 137
as RAM SEC_SETUP_CAR_OK SEC 7 Cache as RAM test SEC_GO_TO_SECSTARTUP SEC 9 Setup BIOS ROM cache SEC_GO_TO_PEICORE SEC 0A Enter Boot Firmware Volume Table 4-4. PEI Phase PEI 70 Super I/O Initialization PEI_CPU_REG_INIT PEI 71 CPU Early Initialization Troubleshooting 4-17 - Acer Aspire Z3801 | Acer Aspire Z3801 Desktop Service Guide - Page 138
PEI 87 Load Recovery Image completed PEI_RECOVERY_START_FLASH PEI 88 Start Flash BIOS with Recovery image PEI_ENTER_DXEIPL PEI 89 Loading BIOS image to RAM PEI_FINDING_DXE_CORE PEI 8A Loading DXE core PEI_GO_TO_DXE_CORE PEI 8B Enter DXE core 4-18 Troubleshooting - Acer Aspire Z3801 | Acer Aspire Z3801 Desktop Service Guide - Page 139
Hotkey service BDS_PCI_ENUMERATION_START BDS 13 PCI enumeration BDS_BEFORE_PCIIO_INSTALL BDS 14 PCI resource assign complete BDS_PCI_ENUMERATION_END BDS 15 PCI enumeration complete BDS_CONNECT_CONSOLE_IN BDS 16 Keyboard Controller, keyboard and mouse initialization Troubleshooting 4-19 - Acer Aspire Z3801 | Acer Aspire Z3801 Desktop Service Guide - Page 140
BDS 20 SIO controller initialization BDS_START_ISA_BUS BDS 21 ISA BUS driver initialization BDS_START_ISA_FDD BDS 22 Floppy device initialization BDS_START_ISA_SEIRAL BDS 23 30 Start to boot UEFI OS BDS_LEGACY16_PREPARE_TO_BOOT BDS 31 Prepare to Boot to Legacy OS 4-20 Troubleshooting - Acer Aspire Z3801 | Acer Aspire Z3801 Desktop Service Guide - Page 141
BDS_ENTER_LEGACY_16_BOOT BDS 34 Ready to Boot Legacy OS. BDS_RECOVERY_START_FLASH BDS 35 Fast Recovery Start Flash. Table 4-7. PostBDS POST Code Table Functionality Name (Include\ ASL_WAKEUP_S3 ASL E3 System wakeup from S3 ASL_WAKEUP_S4 ASL E4 System wakeup from S4 Troubleshooting 4-21 - Acer Aspire Z3801 | Acer Aspire Z3801 Desktop Service Guide - Page 142
10. SMM Functions POST Code Table Functionality Name (Include\PostCode.h) Phase Post Code Description SMM_IDENTIFY_FLASH_DEVICE SMM 0xA0 Identify Flash device in SMM SMM_SMM_PLATFORM_INIT SMM 0xA2 SMM service debugger 0xD7 DDT Cable Transmission Error (Set address fail) 4-22 Troubleshooting - Acer Aspire Z3801 | Acer Aspire Z3801 Desktop Service Guide - Page 143
CHAPTER 5 Jumper and Connector Locations - Acer Aspire Z3801 | Acer Aspire Z3801 Desktop Service Guide - Page 144
Mainboard 5-3 Clearing Password and BIOS Recovery 5-5 Clearing Password 5-5 BIOS Recovery by Crisis Disk 5-6 5-2 - Acer Aspire Z3801 | Acer Aspire Z3801 Desktop Service Guide - Page 145
Jumper and Connector Locations Mainboard 0 1 16 15 14 13 12 11 10 9 8 7 6 Figure 5-1. Mainboard Top Table 5-1. Mainboard Top Item Description Connector Jumper and Connector Locations 2 54 3 Item 2 4 6 8 10 Description TV Mini PCIE Speaker Connector Light Bar Left HDD Power Connector - Acer Aspire Z3801 | Acer Aspire Z3801 Desktop Service Guide - Page 146
Table 5-1. Mainboard Top (Continued) Item Description 11 Touch Panel Connector 13 LED Switch Connector 15 SATA ODD Connector Item 12 14 16 Description WLAN Mini PCIE Fan Connector LVDS Connector 5-4 Jumper and Connector Locations - Acer Aspire Z3801 | Acer Aspire Z3801 Desktop Service Guide - Page 147
and BIOS Recovery 0 This section provides users with the SOP (standard operating procedure) for clearing the BIOS password and recovering the BIOS for the Aspire Z3801. Clearing Password 0 NOTE: NOTE: The following procedure is only for clearing BIOS Password (Supervisor Password and User Password - Acer Aspire Z3801 | Acer Aspire Z3801 Desktop Service Guide - Page 148
BIOS Recovery Boot Block 0 BIOS Recovery Boot Block is a special block of BIOS. It is used to boot up the system with minimum BIOS initialization. Users can enable this feature to restore the BIOS firmware if a previous BIOS flashing process has failed. BIOS Recovery Hotkey 0 To enable the BIOS - Acer Aspire Z3801 | Acer Aspire Z3801 Desktop Service Guide - Page 149
update. 8. Press Enter button to initiate BIOS Recovery mode. Flash will begin. (Figure 5-5) Figure 5-5. Flash Update Progress 9. When BIOS Recovery is complete, press F10 to save and exit. 10. Press Del to return to BIOS setup menu. Update the latest BIOS version for this machine by the regular - Acer Aspire Z3801 | Acer Aspire Z3801 Desktop Service Guide - Page 150
5-8 Jumper and Connector Locations - Acer Aspire Z3801 | Acer Aspire Z3801 Desktop Service Guide - Page 151
CHAPTER 6 FRU (Field Replaceable Unit) List - Acer Aspire Z3801 | Acer Aspire Z3801 Desktop Service Guide - Page 152
Exploded Diagram 6-4 Main Assembly 6-4 FRU List 6-6 Screw List 6-7 6-2 - Acer Aspire Z3801 | Acer Aspire Z3801 Desktop Service Guide - Page 153
chapter provides users with a FRU (Field Replaceable Unit) listing in global configurations for the Aspire Z3801. Refer to Service Guide. For Acer Authorized Service Providers, the Acer office may have a different part number code from those given in the FRU list of this printed Service Guide. Users - Acer Aspire Z3801 | Acer Aspire Z3801 Desktop Service Guide - Page 154
Exploded Diagram 0 Main Assembly 0 24 23 1 2 22 21 3 4 20 5 19 6 18 17 16 7 15 8 14 13 9 12 10 11 Figure 6-1. Main Assembly Exploded Diagram Table 6-1. Main Assembly Exploded Diagram No. 1 Touch Board 2 LCD Panel Description P/N 55.SG407.006 6M.SG407.001 6-4 FRU (Field - Acer Aspire Z3801 | Acer Aspire Z3801 Desktop Service Guide - Page 155
Main Assembly Exploded Diagram (Continued) No. Description 3 Front Cover 4 Left Camera Bracket 5 Camera Module 6 Mainboard 7 Fan Module 8 ODD Bezel 9 DIMM Door 10 Rear Cover 11 Rear Door 12 Mainboard Cover 13 ODD Module 14 Infrared Board 15 ODD Bracket 16 HDD Bracket 17 HDD Module - Acer Aspire Z3801 | Acer Aspire Z3801 Desktop Service Guide - Page 156
FRU List Table 6-2. FRU List Category Description ADAPTER Adapter LITE-ON 135W 19V 2.5x5.5x12.5 Orange PA-1131-07AC, LV5 LED LF Adapter DELTA 135W-DE 19V 2.5x5.5x11 Orange ADP-135FB BFA, LV5+OBL LED LF MAINBOARD Mainboard Intel Cougar Point H61 Intel H61 LF 0 P/N AP.13503.010 AP.13501.015 - Acer Aspire Z3801 | Acer Aspire Z3801 Desktop Service Guide - Page 157
Table 6-2. FRU List (Continued) Category Description P/N Lite-On WN6605LH-AA WLAN Lite-On WN6605LH-AA, NI.10200.034 Realtek RTL8191SE 802.11b/g/n 1Tx1R WLAN(mini-card) Half Size Intel Centrino Wireless-N WLAN Intel Centrino Wireless-N 1000 (Condor Peak) 802.11b/g/n 1Tx2R WLAN(mini-card) Half - Acer Aspire Z3801 | Acer Aspire Z3801 Desktop Service Guide - Page 158
Table 6-2. FRU List (Continued) Category Description CABLE - TOUCH CONTROL/B TO MB HDD CABLE LVDS CABLE LED Cable - L CABLE - B-CAS/B TO MB CAMERA CABLE P/N 50.SG407.005 50.SG407.006 50.SG407.007 50.SG407.008 50.SG407.009 50.SG407.010 IR CABLE 50.SG407.011 CASE/COVER/BRACKET ASSEMBLY FRONT - Acer Aspire Z3801 | Acer Aspire Z3801 Desktop Service Guide - Page 159
Remote Controller Philips Remote Controller ECO KB remote RT.11300.031 + internal IR module SMK Remote Controller JA RRS9003-3409EC SMK Quatro Pulse code, support I-O data mAgicTV application; with Battery pack IR BLASTER FRU (Field Replaceable Unit) List RT.11300.032 RT.11300.033 50.SCY07.022 6-9 - Acer Aspire Z3801 | Acer Aspire Z3801 Desktop Service Guide - Page 160
.013 Keyboard LITE-ON SK-9660 RF2.4 105KS Silver French KB.RF40B.014 Keyboard LITE-ON SK-9660 RF2.4 105KS Silver Swedish KB.RF40B.015 6-10 FRU (Field Replaceable Unit) List - Acer Aspire Z3801 | Acer Aspire Z3801 Desktop Service Guide - Page 161
Table 6-2. FRU List (Continued) Category Description P/N Keyboard LITE-ON SK-9660 RF2.4 105KS Silver UK KB.RF40B.016 Keyboard LITE-ON SK-9660 RF2.4 105KS Silver Dutch KB.RF40B.017 Keyboard LITE-ON SK-9660 RF2.4 105KS Silver Swiss/G KB.RF40B.018 Keyboard LITE-ON SK-9660 RF2.4 105KS Silver - Acer Aspire Z3801 | Acer Aspire Z3801 Desktop Service Guide - Page 162
Table 6-2. FRU List (Continued) Category Description P/N Keyboard LITE-ON SK-9660 RF2.4 105KS Silver Nordic KB.RF40B.037 Keyboard LITE-ON SK-9660 RF2.4 105KS Silver English/Canadian French KB.RF40B.038 Keyboard LITE-ON SK-9660 RF2.4 105KS Silver Czech/Slovak KB.RF40B.039 Keyboard LITE-ON - Acer Aspire Z3801 | Acer Aspire Z3801 Desktop Service Guide - Page 163
Table 6-2. FRU List (Continued) Category Description Keyboard PRIMAX KBRF36211 RF2.4 105KS Silver French Keyboard PRIMAX KBRF36211 RF2.4 105KS Silver Swedish Keyboard PRIMAX KBRF36211 RF2.4 105KS Silver UK Keyboard PRIMAX KBRF36211 RF2.4 105KS Silver Dutch Keyboard PRIMAX KBRF36211 RF2.4 - Acer Aspire Z3801 | Acer Aspire Z3801 Desktop Service Guide - Page 164
Table 6-2. FRU List (Continued) Category Description Keyboard PRIMAX KBRF36211 RF2.4 105KS Silver Arabic/French Keyboard PRIMAX KBRF36211 RF2.4 104KS Silver Kazakh Keyboard PRIMAX KBRF36211 RF2.4 104KS Silver Turkmen Keyboard PRIMAX KBRF36211 RF2.4 105KS Silver Nordic Keyboard PRIMAX - Acer Aspire Z3801 | Acer Aspire Z3801 Desktop Service Guide - Page 165
Table 6-2. FRU List (Continued) Category Description Keyboard PRIMAX KBRF33711 RF2.4 Standard Silver US International with touch pad Keyboard PRIMAX KBRF33711 RF2.4 Standard Silver Japanese with touch pad P/N KB.RF40P.096 KB.RF40P.097 Keyboard Keyboard LITE-ON SK-9621 USB 104KS Silver US KB. - Acer Aspire Z3801 | Acer Aspire Z3801 Desktop Service Guide - Page 166
Table 6-2. FRU List (Continued) Category Description P/N Keyboard LITE-ON SK-9621 USB 105KS Silver Belgium KB.USB0B.307 Keyboard LITE-ON SK-9621 USB 105KS Silver Icelandic KB.USB0B.308 Keyboard LITE-ON SK-9621 USB 105KS Silver Norwegian KB.USB0B.309 Keyboard LITE-ON SK-9621 USB 104KS - Acer Aspire Z3801 | Acer Aspire Z3801 Desktop Service Guide - Page 167
Table 6-2. FRU List (Continued) Category Description P/N Keyboard LITE-ON SK-9621 USB 105KS Silver Spanish Latin KB.USB0B.376 Keyboard PRIMAX KB36211 USB 104KS Silver US KB.USB0P.042 Keyboard PRIMAX KB36211 USB 104KS Silver Traditional Chinese KB.USB0P.043 Keyboard PRIMAX KB36211 USB 104KS - Acer Aspire Z3801 | Acer Aspire Z3801 Desktop Service Guide - Page 168
Table 6-2. FRU List (Continued) Category Description P/N Keyboard PRIMAX KB36211 USB 104KS Silver Hebrew KB.USB0P.063 Keyboard PRIMAX KB36211 USB 105KS Silver Polish KB.USB0P.064 Keyboard PRIMAX KB36211 USB 105KS Silver Slovenian KB.USB0P.065 Keyboard PRIMAX KB36211 USB 105KS Silver Slovak - Acer Aspire Z3801 | Acer Aspire Z3801 Desktop Service Guide - Page 169
DDR3 1333) , D2 , 65W Core i3-2100 (3.10G 3M DDR3 1333) , D2 , 65W Core i5 2405s LGA 2.5G 6M 1333 1155 65W Quad Core Core i3 2105 LGA 3.1G 3M 1155 65W Dual 6M.SG407.002 KC.25001.SI5 KC.24001.SI5 KC.21201.CI3 KC.21001.CI3 KC.40501.SI5 KC.10501.CI3 KC.85001.DEG KC.84001.DEG KC.62001.DEG KH.32007. - Acer Aspire Z3801 | Acer Aspire Z3801 Desktop Service Guide - Page 170
1000GB WD10EADX-22TDHB0 ( GP500 ) SATA III 32MB LF F/W:77.04D77 MEMORY Memory NANYA SO-DIMM DDRIII 1333 1GB NT1GC64BH4B0PS-CG LF 128*16 0.055um Memory KINGSTON SO-DIMM DDRIII 1333 1GB ACR128X64D3S1333C9 LF 128*8 0.065um Memory UNIFOSA SO-DIMM DDRIII 1333 1GB GU672203EP0200 LF 128*8 0.065um - Acer Aspire Z3801 | Acer Aspire Z3801 Desktop Service Guide - Page 171
-Multi DRIVE 12.7mm Tray DL 8X GT34N LF W/O bezel SATA Zero Power Supported, PCC LD (HF + Windows 7) ODD PLDS Super-Multi DRIVE 12.7mm Tray DL 8X DS-8A5SH LF+HF W/O bezel SATA With TI + Rohm Solution (HF + Windows 7) ODD HLDS BD COMBO 12.7mm Tray DL 4X CT30N LF W/O bezel 1.00 - Acer Aspire Z3801 | Acer Aspire Z3801 Desktop Service Guide - Page 172
Description SCREW SCREW M4.0*7-I (BNI,NYLOK) IRON SCREW M3.0*4.0-I(BNI)(NYLOK)IRON SCREW M3*6-I(BNI)(NYLOK)IRON SCREW M2.0*3.0-I (BNI) (NYLOK) SCREW M3.0*10-I(NI)(NYLOK)IRON SCREW M2.0*6-I(BNI)(NYLOK) D4.0 T0.7 SCREW M2.5*4.0-I(BNI,NYLOK) IRON SCREW M3.5*8.9-I(NI)IRON 0 P/N 86.SG407.001 86 - Acer Aspire Z3801 | Acer Aspire Z3801 Desktop Service Guide - Page 173
CHAPTER 7 Online Support Information - Acer Aspire Z3801 | Acer Aspire Z3801 Desktop Service Guide - Page 174
Support Service 7-3 7-2 - Acer Aspire Z3801 | Acer Aspire Z3801 Desktop Service Guide - Page 175
be obtained directly from Acer CSD Taiwan. Acer's Website offers convenient and valuable support resources. In the Technical Information section users can download information on all of Acer's Notebook, Desktop and Server models including: Service guides for all models BIOS updates Software - Acer Aspire Z3801 | Acer Aspire Z3801 Desktop Service Guide - Page 176
7-4 Online Support Information