Airlink AMPS240W Quick Installation Guide - Page 2
Installing the PS Software - print server
 |
View all Airlink AMPS240W manuals
Add to My Manuals
Save this manual to your list of manuals |
Page 2 highlights
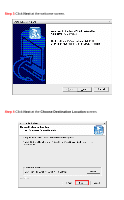
Step 1 Power down the printer and the printer server. Step 2 Connect one end of a networking cable to your router, then connect the other end to the Ethernet port on the back of the print server. Step 3 Connect the USB cable coming from your printer into the USB port on the printer server. Step 4 Turn on the printer. Once the printer is powered on, connect the print server's power adapter to an electrical outlet. Section 2 Installing the PS Software Note: The PS Software must be installed on all computers you plan to use with the print server. Step 1 Insert the Utility CD into your CD-ROM drive. When the autorun screen appears, select Install PS Software from the menu.
-
 1
1 -
 2
2 -
 3
3 -
 4
4 -
 5
5 -
 6
6 -
 7
7 -
 8
8 -
9
-
10
-
11
-
12
-
13
-
14
-
15
-
16
 |
 |

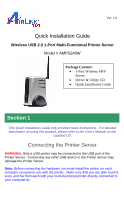
Step 1
Power down the printer and the printer server.
Step 2
Connect one end of a networking cable to your router, then connect the
other end to the Ethernet port on the back of the print server.
Step 3
Connect the USB cable coming from your printer into the USB port on
the printer server.
Step 4
Turn on the printer.
Once the printer is powered on, connect the print
server’s power adapter to an electrical outlet.
Installing the PS Software
Note:
The PS Software must be installed on
all computers
you plan to use
with the print server.
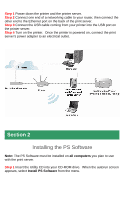
Step 1
Insert the Utility CD into your CD-ROM drive.
When the autorun screen
appears, select
Install PS Software
from the menu.
Section 2