Alpine 7893 Owners Manual - Page 20
Radio Operation - stereo
 |
View all Alpine 7893 manuals
Add to My Manuals
Save this manual to your list of manuals |
Page 20 highlights
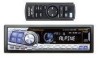
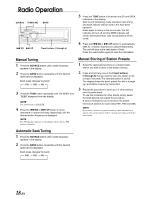
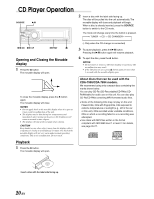
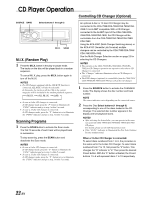
Radio Operation SOURCE TUNE/A.ME BAND g DN f UP Preset buttons (1 through 6) 3 Press the TUNE button to illuminate the DX and SEEK indicators in the display. With the DX (Distance) mode activated, both strong and weak stations will be tuned in the Auto-Seek operation. Press again to return to the local mode. The DX indicator will turn off and the SEEK indicator will remain illuminated. Now, only strong stations will be tuned. 4 Press the g DN or f UP button to automatically seek for a station downward or upward respectively. The unit will stop at the next station it finds. Press the same button again to seek the next station. Manual Tuning 1 Press the SOURCE button until a radio frequency appears in the display. 2 Press the BAND button repeatedly until the desired radio band is displayed. Each press changes the band: → FM1 → FM2 → AM 3 Press the TUNE button repeatedly until "DX SEEK" and "SEEK" disappear from the display. NOTE The initial mode is DX SEEK. 4 Press the g DN or f UP button to move downward or upward one step respectively until the desired station frequency is displayed. NOTE The ST indicator appears on the display when a Stereo FM station is tuned in. Manual Storing of Station Presets 1 Select the radio band and tune in a desired radio station you wish to store in the preset memory. 2 Press and hold any one of the Preset buttons (1 through 6) that you want to store the station on for at least 2 seconds. The selected station is stored. The display shows the band, preset No. with a triangle (9) and station frequency memorized. 3 Repeat the procedure to store up to 5 other stations onto the same band. To use this procedure for other bands, simply select the band desired and repeat the procedure. A total of 18 stations can be stored in the preset memory (6 stations for each band; FM1, FM2 and AM). NOTE If you store a station in a preset memory which already has a station, the current station will be cleared and replaced with the new station. Automatic Seek Tuning 1 Press the SOURCE button until a radio frequency appears in the display. 2 Press the BAND button repeatedly until the desired radio band is displayed. Each press changes the band: → FM1 → FM2 → AM 18-EN
-
 1
1 -
2
-
3
-
4
-
5
-
6
-
7
-
8
-
9
-
10
-
11
-
12
-
13
-
14
-
 15
15 -
 16
16 -
 17
17 -
 18
18 -
 19
19 -
 20
20 -
 21
21 -
 22
22 -
 23
23 -
 24
24 -
 25
25 -
26
-
27
-
28
-
29
-
30
-
31
-
32
-
33
-
34
-
35
-
36
-
37
-
38
-
39
-
40
-
41
-
42
-
43
-
44
-
45
-
46
-
47
 |
 |
