Asko T702 User manual Use & Care Guide Asko T702 EN
Asko T702 Manual
 |
View all Asko T702 manuals
Add to My Manuals
Save this manual to your list of manuals |
Asko T702 manual content summary:
- Asko T702 | User manual Use & Care Guide Asko T702 EN - Page 1
Operating Instructions Tumble dryer Save these instructions for future reference Dear ASKO Customer, Thank you for choosing this that you read the operating instructions before using the machine. The operating instructions also contain information on how to avoid damaging the environment. ASKO T702 - Asko T702 | User manual Use & Care Guide Asko T702 EN - Page 2
instructions Installation Grounding instructions Troubleshooting Service and guarantee 17 General 6 Warranty 18 Description of the tumble dryer 7 How to contact the ASKO Front panel 8 Appliances Inc. 18 Options button 8 Installation instructions guide 32 Operating instructions - Asko T702 | User manual Use & Care Guide Asko T702 EN - Page 3
Do you need this Use&Care Guide in spanish? Log onto www not suitable for tumble drying. Always check and follow the instructions on each item's laundry label. You can find more before you tumble dry" chapter. Note! When starting the tumble dryer for the first time or after a long period without use, - Asko T702 | User manual Use & Care Guide Asko T702 EN - Page 4
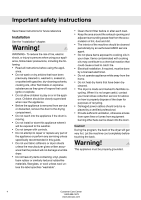
, including the following: • Read all instructions before using the appli- ance. • part of the appliance or perform any servicing unless specifically recommended in this guide. • Do not use fabric softeners or dryer ASKO service agent. • Do not place items exposed to cooking oils in your dryer - Asko T702 | User manual Use & Care Guide Asko T702 EN - Page 5
Check with a qualified electrician or service representative or personnel if you are in in a building. B) Grounding instructions for a permanently connected appliance: the appliance. Note This manual does not cover every the door and press the Start/Stop button. Packing material Please sort - Asko T702 | User manual Use & Care Guide Asko T702 EN - Page 6
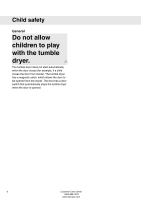
closes (for example, if a child closes the door from inside). The tumble dryer has a magnetic catch, which allows the door to be opened from the inside. The door has a door switch that automatically stops the tumble dryer when the door is opened. 6 Customer Care Center 1-800-898-1879 www.askousa - Asko T702 | User manual Use & Care Guide Asko T702 EN - Page 7
Description of the tumble dryer 1 2 3 4 5 1. Panel 2. Serial number tag and rating plate 3. Lint filter holder 4. Outer door 5. Fan (behind the front plate) 6. Lint filter 96 Customer Care Center 7 1-800-898-1879 www.askousa.com - Asko T702 | User manual Use & Care Guide Asko T702 EN - Page 8
Front panel 1 2 3 4 1 Main power switch 2 Options button 3 Program selector 4 Start/Stop Options button 2 2. Button for selecting Low Temperature 8 Customer Care Center 1-800-898-1879 www.askousa.com - Asko T702 | User manual Use & Care Guide Asko T702 EN - Page 9
to be tumble dried should be spun at 1000 rpm or faster. Higher spin speeds save both energy and drying time. Materials that can be tumble dried and lighter when tumbled than when hung out to dry. Note! The tumble dryer does not cause any significant wear to fabrics. The lint trapped in the lint - Asko T702 | User manual Use & Care Guide Asko T702 EN - Page 10
appliance. Below are step-by-step instructions to help you achieve the best possible tumble drying results. 1Sort your fabrics You will achieve the most uniform drying results if the items are made of the same type of material. Close zippers and fasten buttons or belts; sort the items and adjust - Asko T702 | User manual Use & Care Guide Asko T702 EN - Page 11
Operating instructions Program chart Here we present a few examples of the energy and time consumption of a few different program settings. Consumption can vary due to room temperature, - Asko T702 | User manual Use & Care Guide Asko T702 EN - Page 12
Operating instructions 5Selecting Options By selecting options, you can tailor drying programs , the red field next to the button lights up. 6Press the Start button Stopping or changing a program Press and hold the Start/Stop button for three seconds. The red field next to the button will go out - Asko T702 | User manual Use & Care Guide Asko T702 EN - Page 13
Operating instructions 7Drying program finished Important! • Clean the lint filter after each load. Caution! If the lint filter becomes clogged, the machine's automatic overheating cut-off may - Asko T702 | User manual Use & Care Guide Asko T702 EN - Page 14
Care and maintenance instructions Cleaning the lint filter The lint filter must be cleaned with water. Note! Do not allow dust to accumulate around the machine. Keep the area around the tumble dryer clean and cool; dust, heat, and moisture prolong drying times. 3. Open the filter and remove the - Asko T702 | User manual Use & Care Guide Asko T702 EN - Page 15
below). Overheating cut-off The overheating cut-off shuts off the tumble dryer if the temperature is too high, caused by lint clogging the lint the Start/Stop button are flashing, the maximum permitted program time has been reached. Read "Drying takes too long" in the "Troubleshooting" chapter - Asko T702 | User manual Use & Care Guide Asko T702 EN - Page 16
Technical information Technical data Height: Width: Depth: Weight: Cylinder volume: Max. drying capacity: Speed: Rated power: Drum material: Outer casing material: Setup Drain: 33 1/2'' (850mm) 23 7/16'' (595mm) 23,0" (585mm) 104lb (47kg) 29,3gal (111l) 13lb (6kg) 52 rpm See serial number tag and - Asko T702 | User manual Use & Care Guide Asko T702 EN - Page 17
of warranty Two-Year Full From date of purchase. ASKO replacement parts and/or repair labor to correct defect in materials or workmanship. Service must be provided by an authorized ASKO service agent. Third Year Full ASKO replacement parts and/or repair labor to cor- Complete your product - Asko T702 | User manual Use & Care Guide Asko T702 EN - Page 18
, misuse or abuse. 3. Instruct how to use the appliance. 4. Replace house fuses or correct house wiring. 5. Correct house plumbing, including drainage problems related to improper installation. 6. Clean or service air device in drain line. • Repair and/or replacement parts for failure of product if - Asko T702 | User manual Use & Care Guide Asko T702 EN - Page 19
the risk of of severe injury or death, follow all installation instructions. Save these instructions for future reference. Positioning the tumble dryer The tumble dryer can be freestanding or stacked. Remember that the tumble dryer produces heat and should therefore not be located in a room that - Asko T702 | User manual Use & Care Guide Asko T702 EN - Page 20
Installation instructions C. Built-in ASKO dryers can be installed beneath a cabinet or worktop with a minimum (622 mm). The condensing models work best when they have good air circulation. Install the dryer so the condensed water will continuously flow into a drain or sink, you will need a drain - Asko T702 | User manual Use & Care Guide Asko T702 EN - Page 21
Installation instructions How to assemble the stacking kit: 1. Undo the anti-tip device. indicated on the back of the washing machine. 6. Push out the knock-out hole on the back of the dryer (you don't have to completely remove the knockout, just fold it up far enough for the stacking bracket to - Asko T702 | User manual Use & Care Guide Asko T702 EN - Page 22
instructions Adjusting the feet Screw the feet in or out so that the tumble dryer is steady and balanced on the floor or on the washing machine. Then tighten the lock nuts. Lock nut Air exhaust Connecting the exhaust duct to the dryer or left exhaust outlet. Asko dryers have a "T-stile" exhaust - Asko T702 | User manual Use & Care Guide Asko T702 EN - Page 23
Installation instructions Connecting the exhaust duct to the Left or Right Side the duct attached, insert the stub pipe into the hole. It should snap into place. 6. After you push the dryer into place, check for kinks in the duct. 7. Use the exhaust outlet cover you removed from the to cover the - Asko T702 | User manual Use & Care Guide Asko T702 EN - Page 24
use the ready-fitted plug supplied with the washing machine or an equivalent. ASKO washers rated 208-240 V have two internal fuses of 15 A each. must be properly grounded. Refer to the "Important Safety Instructions" for grounding instructions. The power supply cord must be grounded. If the - Asko T702 | User manual Use & Care Guide Asko T702 EN - Page 25
can be made with an approved power supply cord or by direct wiring. Each connection instruction identifies the appropriate Power Supply Cord and covers requirements for direct wiring. Note In Canada, the dryer is delivered ready-fitted with a four-prong plug intended for connection to a single-phase - Asko T702 | User manual Use & Care Guide Asko T702 EN - Page 26
Installation instructions 5. Connect ground (center) wire of power supply cord to the center, silver-colored terminal screw. Tighten screw. 6. Connect the other wires to outer screws. 7. Tighten the strain relief screws. 8. Replace terminal box cover on back of dryer. 9. Plug dryer into wall - Asko T702 | User manual Use & Care Guide Asko T702 EN - Page 27
Reversing the door Reversing the door The tumble dryer comes with the door hinged on the left. However, it is possible to change the door to be hinged on the right. Follow these instructions: 1. Remove the lower front plate and undo the three screws holding the hinge attachment. 5. Next you must - Asko T702 | User manual Use & Care Guide Asko T702 EN - Page 28
plate. 3 10. Insert the screws so that the door magnet and cover washer are held in place. 11. Remove the screw indicated. If using a condenser dryer, you must also open the condenser panel. 12. Then fit the door securely on the right side of the machine. 13. Secure the hinge attachment - Asko T702 | User manual Use & Care Guide Asko T702 EN - Page 29
Notes Customer Care Center 29 1-800-898-1879 www.askousa.com - Asko T702 | User manual Use & Care Guide Asko T702 EN - Page 30
Notes 30 Customer Care Center 1-800-898-1879 www.askousa.com - Asko T702 | User manual Use & Care Guide Asko T702 EN - Page 31
Notes Customer Care Center 31 1-800-898-1879 www.askousa.com - Asko T702 | User manual Use & Care Guide Asko T702 EN - Page 32
Quick guide 1Fabrics • Dry fabrics of the same type together to ensure they • Turn the program selector to the desired program. • Select any options and settings. 5Press the Start/Stop button 6Drying program finished • If the Anti Wrinkle option has been selected, the drum will rotate for 3
-
 1
1 -
 2
2 -
 3
3 -
 4
4 -
 5
5 -
 6
6 -
 7
7 -
8
-
9
-
10
-
11
-
12
-
13
-
14
-
15
-
16
-
17
-
18
-
19
-
20
-
21
-
22
-
23
-
24
-
25
-
26
-
27
-
28
-
29
-
30
-
31
-
32
 |
 |

Dear ASKO Customer,
Thank you for choosing this quality product from Scandinavia,
which was made in Sweden.
We want you to feel assured that the inside of your new ma-
chine is just as good as the outside and that the ethics and
standards that went into the production of this machine are
just as high as the quality and performance that you will re-
ceive from it. We hope that this product will give you many
years of pleasure.
To ensure that you get the most out of your new machine, we
recommend that you read the operating instructions before
using the machine. The operating instructions also contain
information on how to avoid damaging the environment.
Operating Instructions
Tumble dryer
Save these instructions for future reference
ASKO T702