Asus A7S266-VM U2 A7S266-VM/U2 User Manual - Page 19
Central Processing Unit CPU
 |
View all Asus A7S266-VM U2 manuals
Add to My Manuals
Save this manual to your list of manuals |
Page 19 highlights
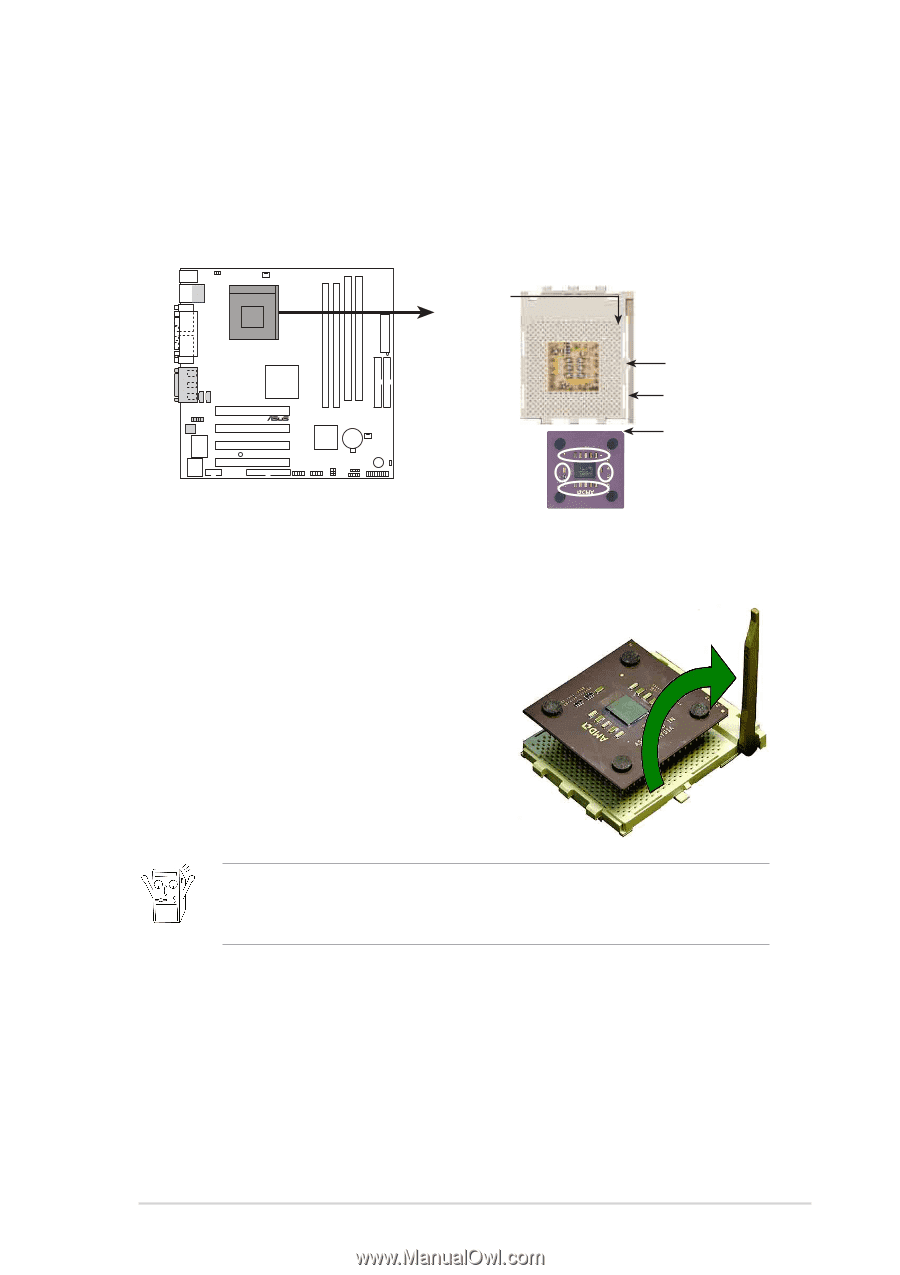
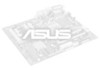
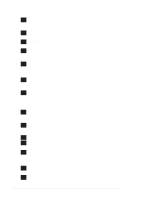
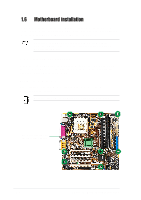
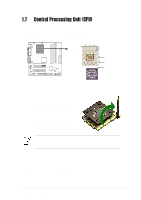
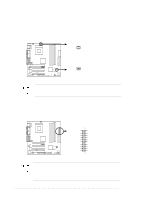
1.7 Central Processing Unit (CPU) The motherboard provides a Socket A (462) for CPU installation. AMD processors offer gigahertz speeds to support all the latest computing platforms and applications. The A7S266-VM/U2 supports AthlonTM XP/AthlonTM and DuronTM processors. CPU NOTCH TO INNER CORNER ® A7S266-VM/U2 A7S266-VM/U2 Socket 462 AMD™ CPU LOCK LEVER CPU NOTCH 1.7.1 Installing the CPU Follow these steps to install a CPU: 1. Locate the Socket 462 and open it by pulling the lever gently sideways away from the socket. Then lift the lever upwards. The socket lever must be fully opened (90 to 100 degrees). 2. Insert the CPU with the correct orientation. The notched or golden corner of the CPU must be oriented toward the inner corner of the socket base nearest to the lever hinge. The CPU should drop easily into place. Do not force the CPU into the socket to avoid bending the pins. If the CPU does not fit, check its alignment and look for bent pins. 4. Once completely inserted, press the CPU firmly and close the socket lever until it snaps shut. 5. Place the CPU fan and heatsink on the CPU. The heatsink should entirely cover the CPU. Carefully attach the heatsink locking brace to the plastic clips on the socket base. With the added weight of the CPU fan and heatsink locking brace, no extra force is required to keep the CPU in place ASUS A7S266-VM/U2 Motherboard 1-9
-
 1
1 -
2
-
3
-
4
-
5
-
6
-
7
-
8
-
9
-
10
-
11
-
12
-
13
-
 14
14 -
 15
15 -
 16
16 -
 17
17 -
 18
18 -
 19
19 -
 20
20 -
 21
21 -
 22
22 -
 23
23 -
 24
24 -
25
-
26
-
27
-
28
-
29
-
30
-
31
-
32
-
33
-
34
-
35
-
36
-
37
-
38
-
39
-
40
-
41
-
42
-
43
-
44
-
45
-
46
-
47
-
48
-
49
-
50
-
51
-
52
-
53
-
54
-
55
-
56
-
57
-
58
-
59
-
60
 |
 |